- This article describes Yuki Mori as depicted in Space Battleship Yamato 2199 and its sequels. For her counterpart in the original Space Battleship Yamato, see Yuki Mori (OS). For her counterpart in the Space Battleship Yamato live action film, see Yuki Mori (live action film).
- "There was no need for Earth or Garmillas to fight! They could have cared for one another... They could have loved one another!"
- —Yuki Mori[12]
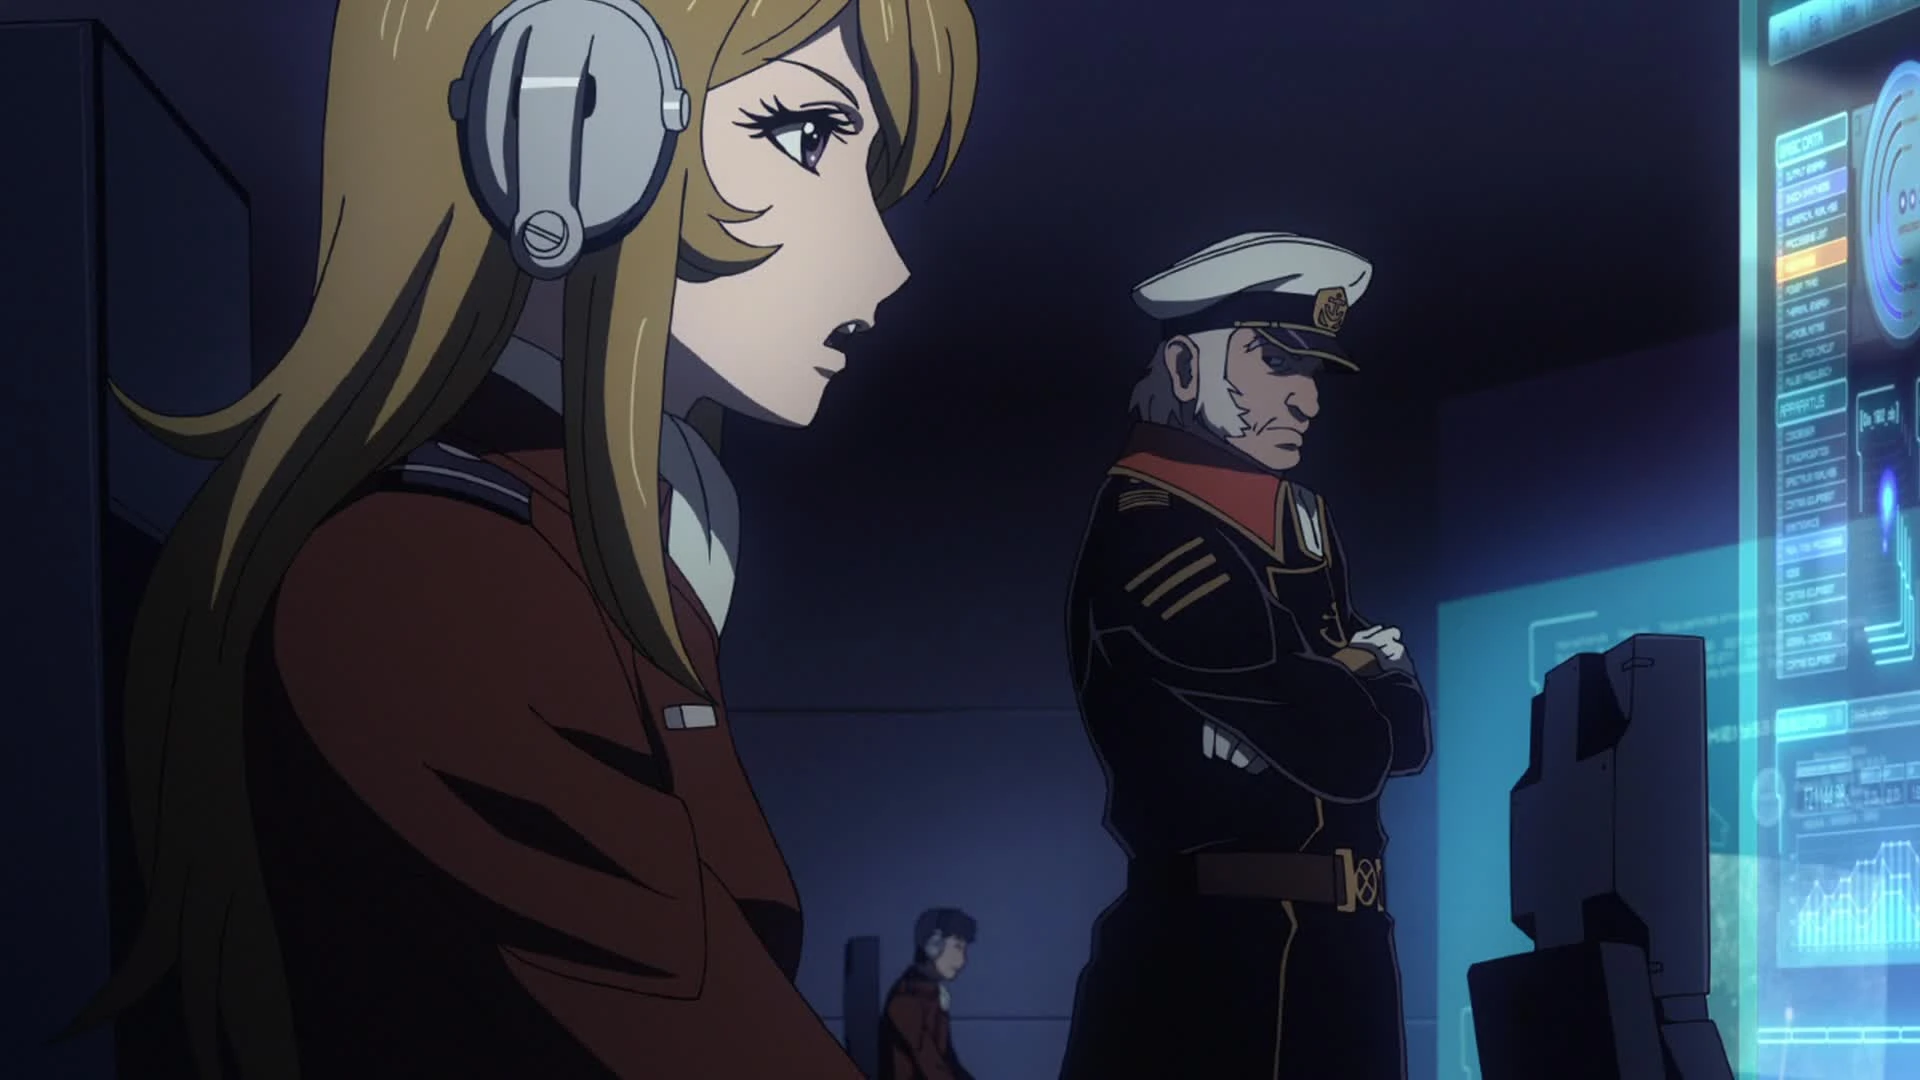
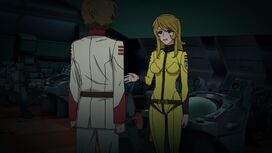
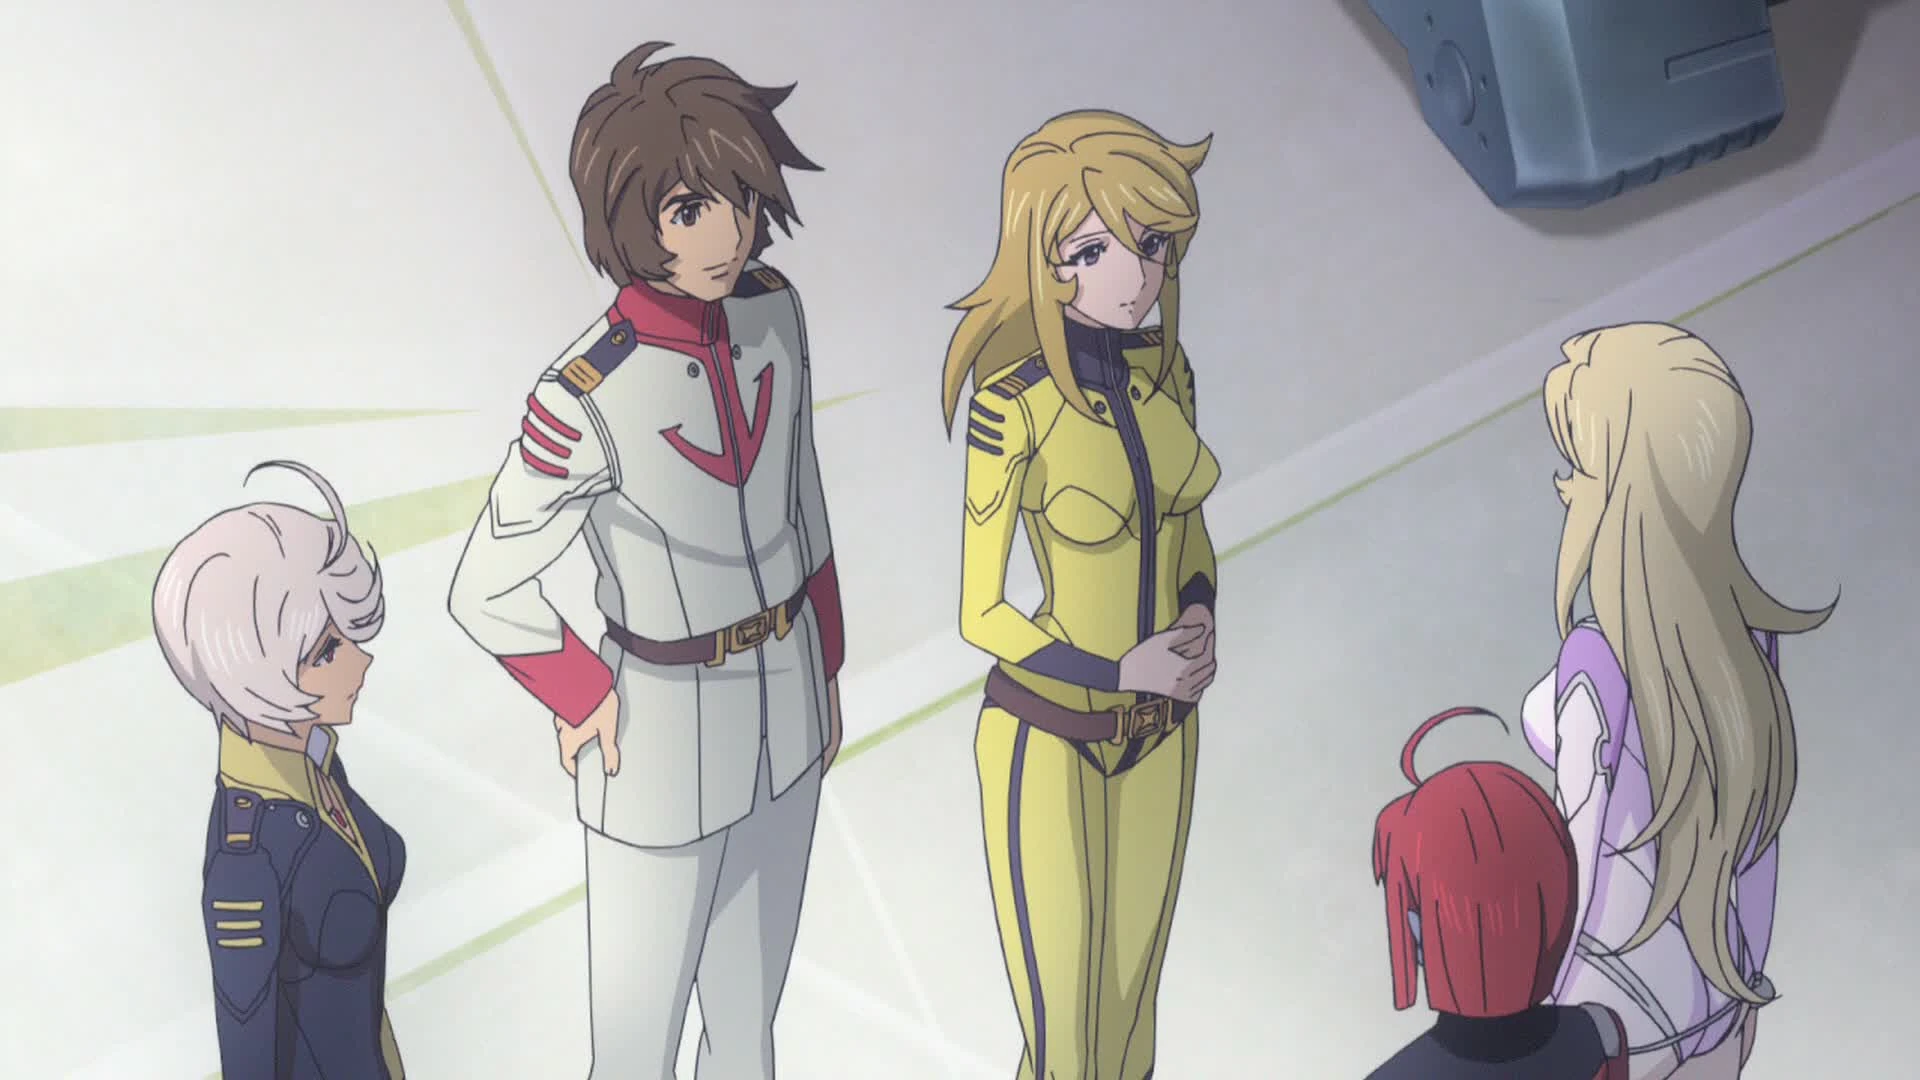
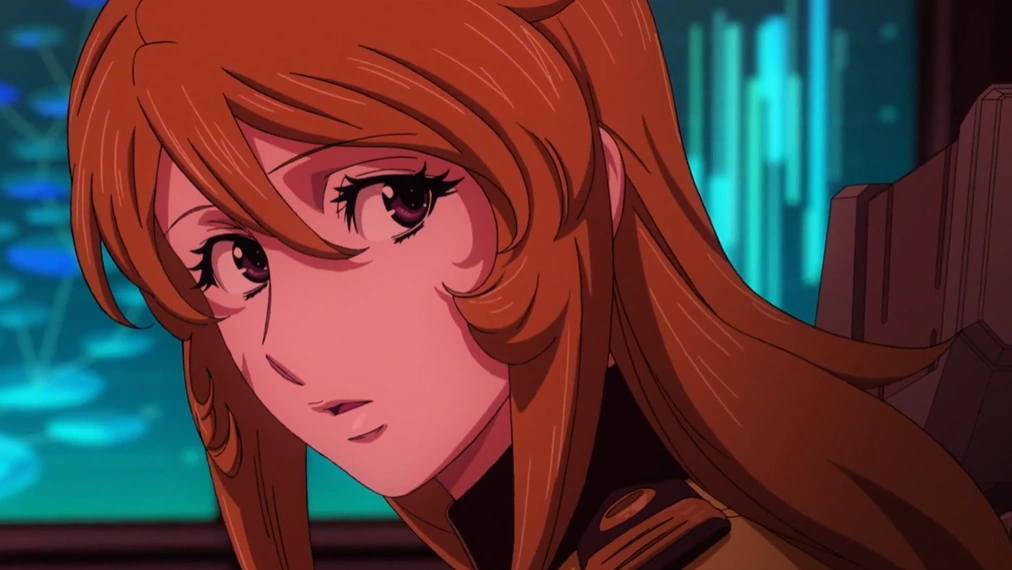
Yuki Mori (森雪, Mori Yuki) is a Earth Federation Cosmo Force officer and the commanding officer of the supply carrier Asuka. She previously served as operations officer aboard Yamato during the Garmillas War and the Gatlantis War.
Prior to the Yamato's mission to the planet Iscandar, Mori came to be closely associated with an Iscandarian emissary, Princess Yurisha Iscandar. That connection placed Mori at the center of key political developments between Iscandar and the planet Garmillas. She later played a key role in the war with the Gatlantis Empire and in Yamato's revolt and journey to planet Terezart. In 2205, she became captain of the Asuka, and embarked on a peace mission to the Salezar system, leading to her involvement in the Iscandar Incident.
She's engaged with Susumu Kodai, current captain of the Yamato.
History[]
Early life and career[]
Mori is the daughter of Naoyuki Mori, a Japanese undersecretary for foreign affairs.[13] The Great Garmillas War, the first interstellar war in Terran history, erupted in 2191, when she was only 11.[14] On April 1, 2198, she joined the war effort, enlisting in the United Nations Cosmo Force.[8]

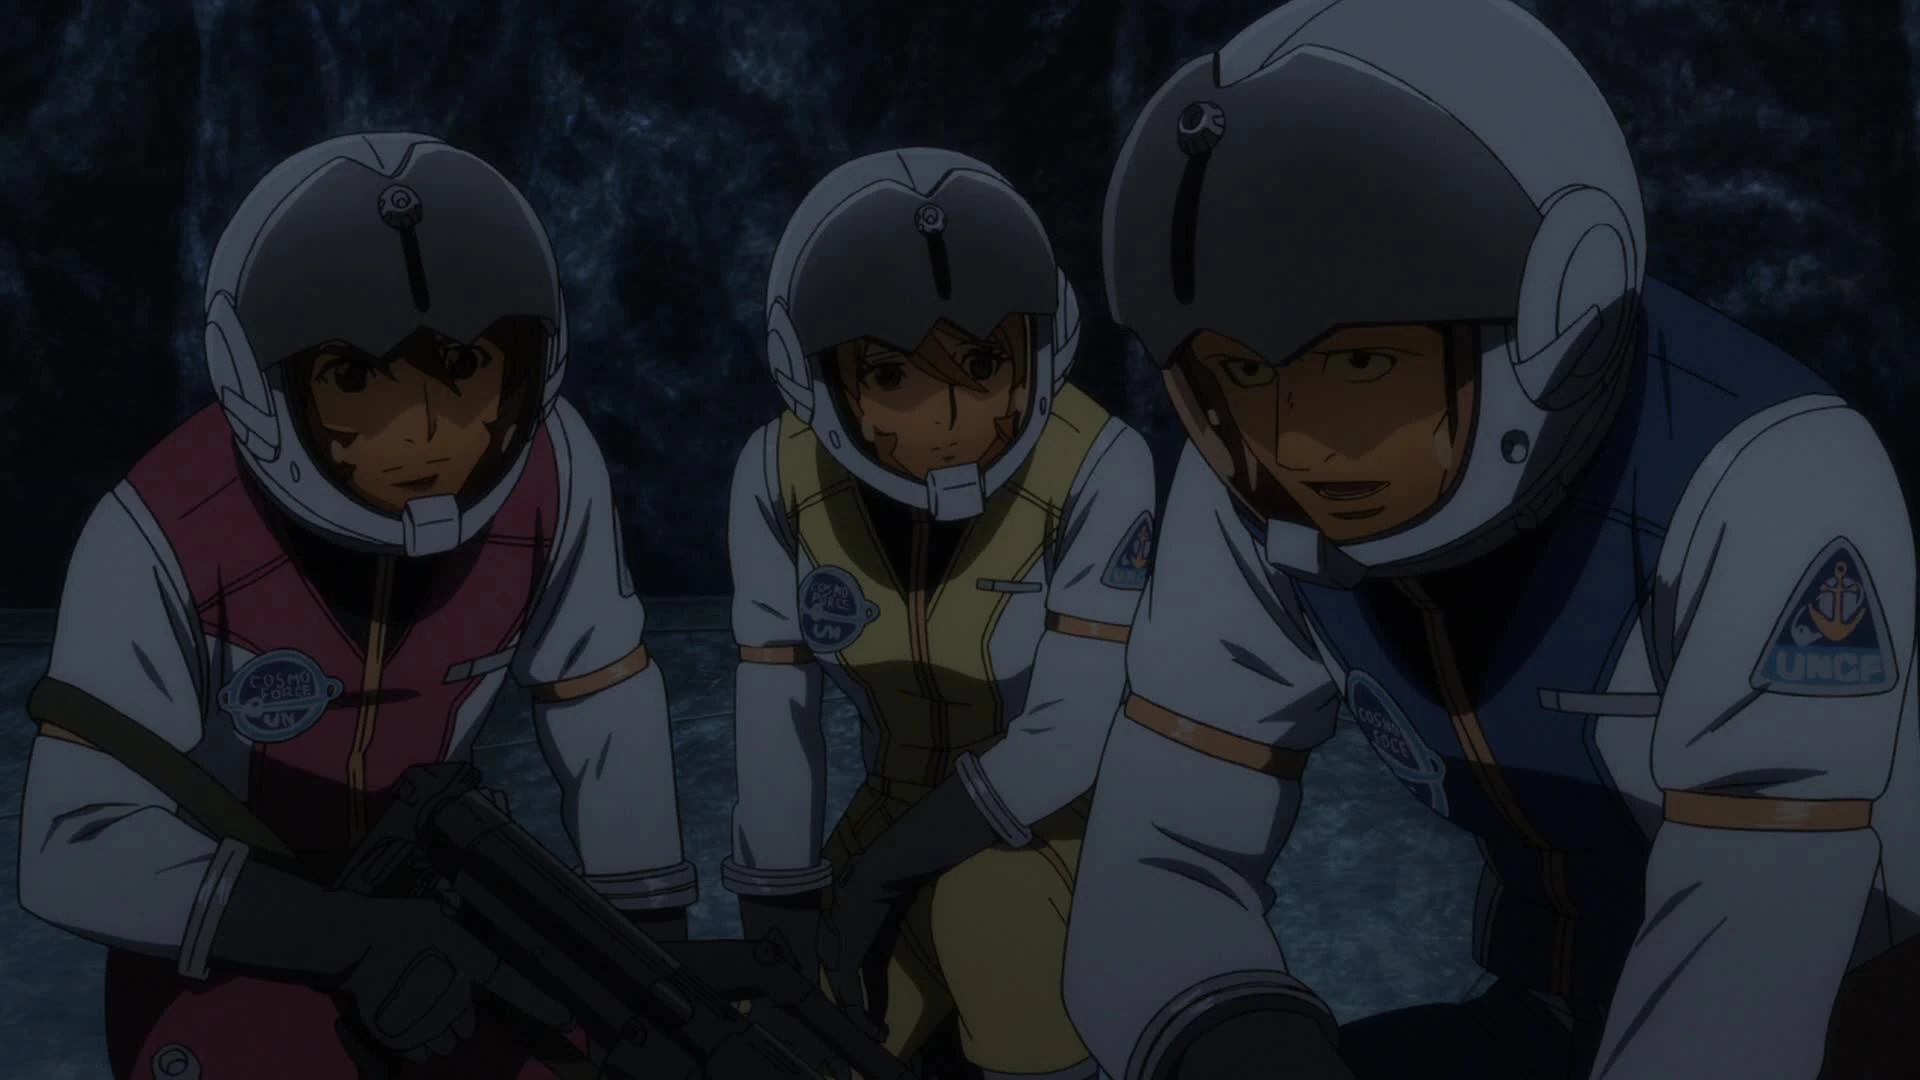
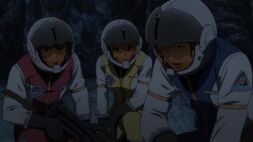
Mori and Princess Yurisha injured.
Mori was assigned to the Far East District Staff Office's Strategic Department 9th Section on September 7, 2198, according to official records.[8] In reality, she had joined the department months[15] earlier, becoming involved in Program Yamato.[16] She served as aide to Princess Yurisha, an envoy from Iscandar with whom she shared an uncanny resemblance. The two rapidly became friends,[17] and Yurisha gave Mori a message capsule containg a holographic message by Queen Starsha Iscandar. In May of 2198,[18] Mori and Yurisha where caught in a car crash in an underground city on Earth, later identified as a possible terrorist bombing. Although both women survived, Mori suffered amnesia and became unable to recall any specific events prior to the attack. With both her father and mother having passed away, Mori came under the guardianship of a family friend, Admiral Ryu Hijikata, who she affectionatly called "Uncle Hijikata".[13][19][20]
She continued to work at the 9th Section, alongisde Hijikata, Chief Administrator Heikuro Todo, and the future commander of Yamato, Admiral Juzo Okita. She also developed a friendly relation with her collegue, Yasuo Nanbu, despite him harboring un reciprocated feelings for her. Outside of her military duties, Mori worked as a teacher with small children.[3]
Operation M and Program Yamato's announcement[]

Mori and Hijikata during Operation M
During Operation M, Mori was assigned to the headquarters operations, where she reported that Princess Sasha Iscandar, another Iscandarian emissary, was approaching Neptune and heading towards Mars. She excitedly affirmed that Program Yamato could begin after theoperation's success, but Hijikata corrected her, stating that they were only just beginning.[3]

Mori confronts Kodai
Weeks later, she attended a class at her second job, where she explained the current state of the Earth to a group of children and speculated that the aliens may be terraforming Earth to suit their needs, just like the Terrans had terraformed Mars. While she was walking back from her lesson, her and Nanbu discussed a news report of a riot in the city. Nanbu also shared a rumor that Operation M had been used as a decoy to distract the enemy. A nearby non-commissioned officer, Susumu Kodai, rudely approached them, asking for more information and the whereabouts of Admiral Okita. Mori broke the two apart, and directed Kodai to the central hospital.[3]
Afterwards, Mori attended the official announcement of Program Yamato. She reported the names of those selected to lead Yamato's various departments and was appointed as the operations officer and radar operator. Her responsibilities included managing information and electronics operations.[5][6]
Voyage to Iscandar[]
Yamato takes off[]
Mori tries to make a fresh start with Kodai
On the day of Yamato's departure, February 11,[21] Mori, now promoted to full Lieutenant,[6] reported to Okita that all the chosen officers had reported for duty. Later, she stood on Yamato's first bridge, musing over a message capsule she had received from Yurisha months prior. Kodai, who had been selected as the battleship's tactical officer, was the first to arrive at the bridge. Mori tried to reintroduce herself to the young man, but he coldly dismissed her, once again wanting to know Okita's location. She stayed at her post, mumbling about her colleague's repeated rudeness. When fellow Lieutenant Daisuke Shima tried to introduce himself to her, she sent him away, telling him he could find the captain in his quarters.[5]
Mori tosses flowers to the deceased Sasha
At that moment, Todo contacted Yamato, reporting an interplanetary ballistic missile heading to their location. At Lt. Commander Sanada's orders, Mori ran to her station and prepared for combat. Yamato successfully took off and destroyed the large weapon.[5] After the ship's take off she spotted the approaching allied ship Kirishima. She attended a meeting in the Central Operations Room on Yamato's FTL systems and its Wave-motion Gun. Mori was surprised that Iscandarian technology had been turned into a weapon of mass destruction. After the meeting's end she asked Kodai for confirmation that Sasha Iscandar had been buried on Mars. As Yamato approached the red planet's orbit, she sent out a flower bouquet to the deceased alien.[22]
On February 12,[21] she was on bridge for the battleship's first warp test. During the jump, Yamato was caught in Jupiter's gravity field and fell into the gas gianst's atmosphere, where Mori reported the presence of a large floating continent. Yamato landed on the continent, and Mori for AU09, the ship's autonomous subcomputer, to collect samples of the local flora. Mori later participated in a battle that errupted between Yamato and the Garmillas forces stationed at Jupiter, which resulted in the destruction of the entire continent.[22]
Mission to Enceladus[]
For this topic in more detail, see Battle of Enceladus

Mori and Kodai on Enceladus
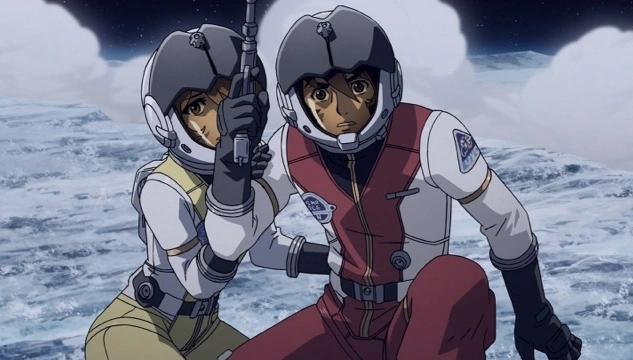
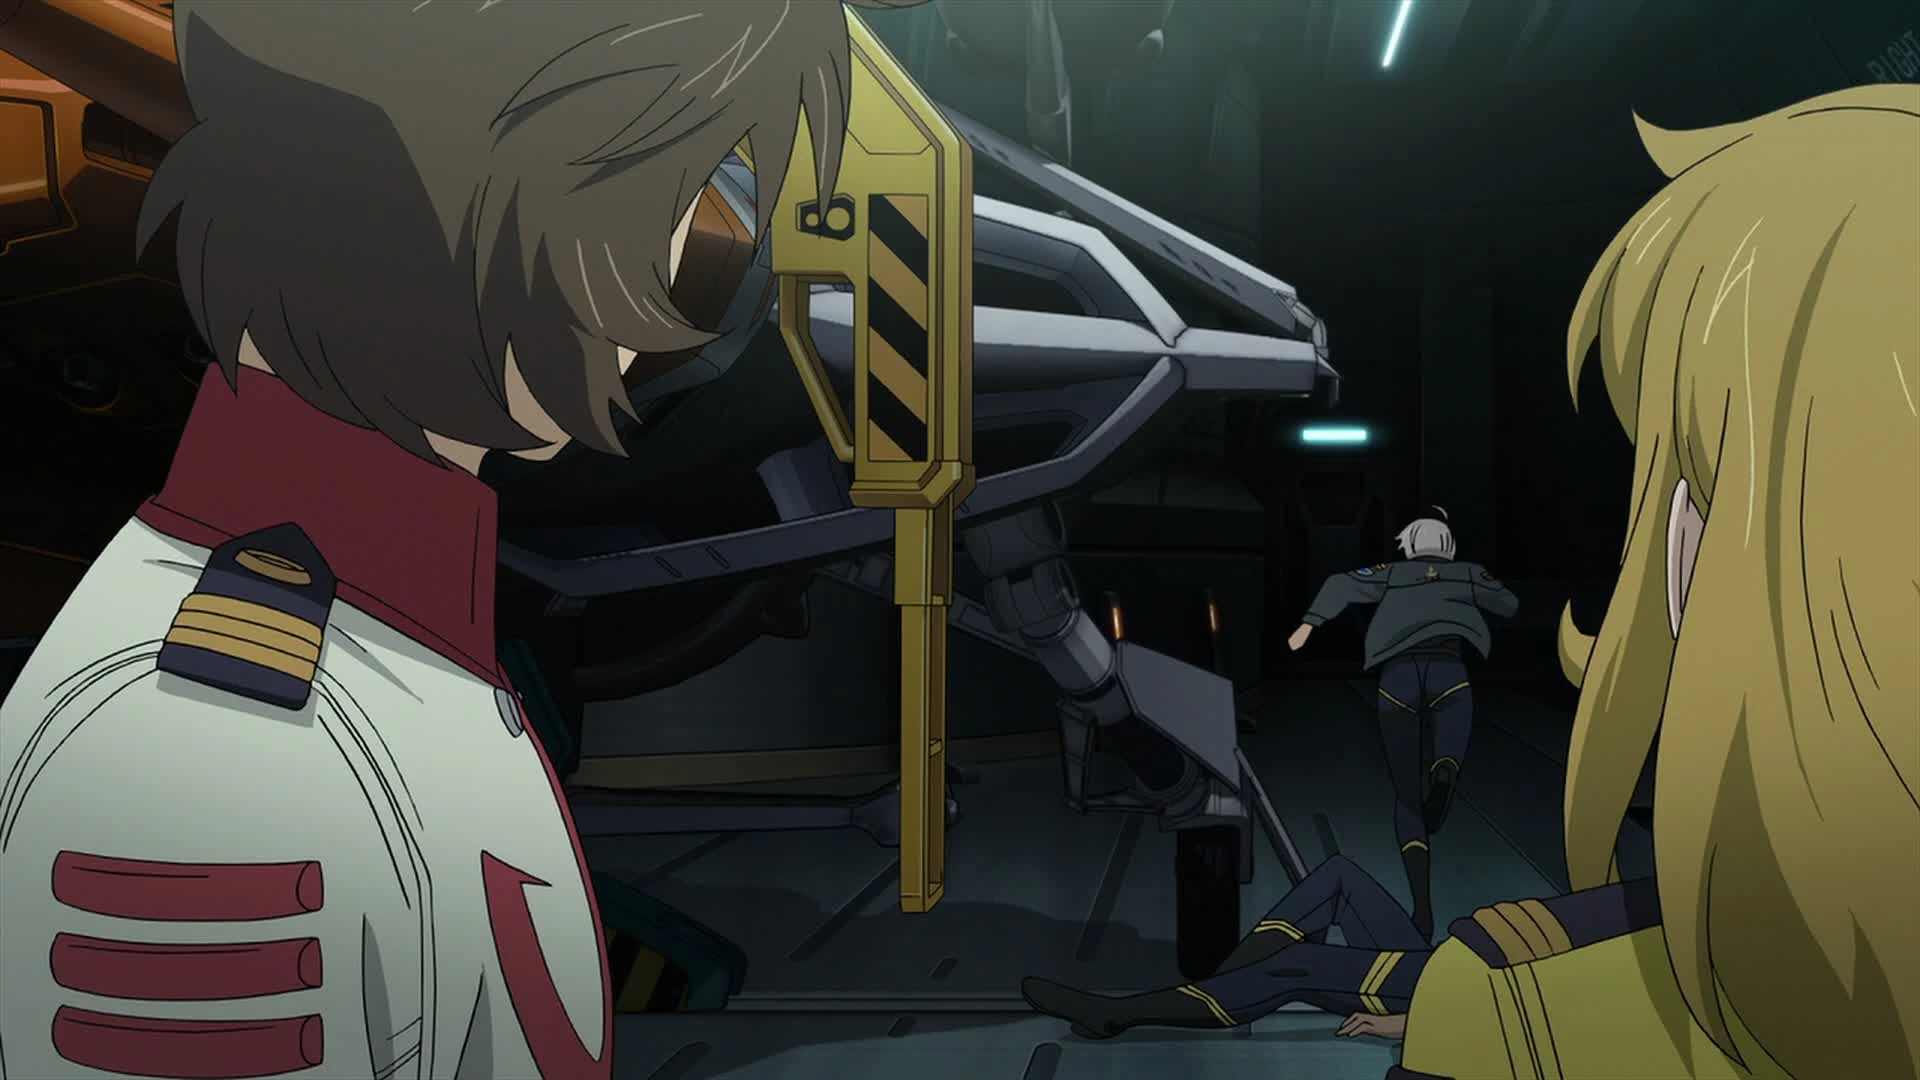
The day after the battle,[23] Mori was joined by Lieutenant Kodai on a search and rescue mission to the surface of Enceladus, where a UNCF distress signal had been detected. Before their departure, she sat at Yamato's mess hall and told two young Warrant Officers not to take Kodai and his friend Shima as examples. While she and Kodai they were making their way to the SOS' origin point, the two bickered profusely, drawing the attention of Makoto Harada, the nurse accompanying them. Suddenly, having noticed the similiarities between Sasha and her, Kodai asked Mori whether she had any alien relatives, much to the confusion of all members of the landing party. The group inspected the wreck of what turned out to be an Isokaze-class Destroyer, finding no survivors. Mori couldn't identify the ship due to ice covering its ID number, and attempted to find out more about it by looking around the bridge. While she was working, the crew was attacked by a Garmillas patrol. She tried to contact Yamato, but found that the battleship was also engaging the enemy. She was kidnapped by an alien automaton and lost conciousness, but managed to free herself with Kodai's help. The two were faced by a group of enemy tanks, but were saved thanks to the sudden intervetion of a Cosmo Zero launched from Yamato.[24]
While she embarassedly thanked Kodai for saving her, the man noticed that the gun he had found laying on the ground belonged to his deceased older brother, who had been killed in action during Operation M. The group erected a makeshift gravestone for the crew of the sunk destroyer, before heading back to Yamato. Kodai and Mori later reported their findings on the Garmillan robot to Sanada.[24] Kodai vented his frustration regarding their superior's cold demeanor to Mori, and she used the occasion to once again thank him for helping her.[25] This series of events made Mori empathize with Kodai, mending their relationship despite their initial hostility towards one another.[24] Their blossoming friendship soon developed into romantic feelings.[19][26] This also came with a certain degree of jelousy on Mori's part, as she was weary of the attention Kodai was giving to Yamamoto, who turned out to be the pilot that had rescued them.[26]
Operation M2 and beyond[]
For this topic in more detail, see Operation M2

Mori at her post during Operation M2
Mori participated in an officers meeting planning Operation M2, an attack on the Garmillas base on Pluto, responsible for the ongoing long-range bombardment of Earth. She partook in the battle from the second bridge. During the fighting, Mori's radar couldn't locate the origin of a series of Garmillas attacks that hit Yamato, which ultimately led the battleship to sink into Pluto's ocean. This suggested to Sanada and his assistant, Lieutenant Kaoru Niimi, that the enemy had been using reflecting satellites to hit Yamato from afar.[25][27]


Mori and Kodai in the rear observation decl
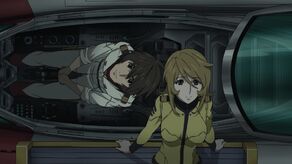
On February 21,[28] Mori approached Kodai in the ship's main elevator to ask him about the bizarre question he had asked her on Enceladus. She suspected it was born out of a possible resemblance between her and Sasha, which Kodai confirmed. He also recalled that another Iscandarian had contacted the Earth in 2198. Mori gave him Princess Yurisha's name but didn't elaborate further. Upon arriving at the bridge, the two were informed that Captain Okita would allow each crew member to contact their loved ones on Earth before Yamato's final departure from the solar system as part of a ceremony for the important milestone. As Operations Officer, Mori would be responsible for handling the communications room. During the celebration, she noticed that Kodai hadn't bothered calling anyone and was outside helping with the ship's repairs with Yamamoto instead. When her turn to call came around, she contacted Admiral Hijikata, and afterward, she approached Kodai in the ship's rear observation deck and asked him why he didn't call anyone. The young man revealed that all of his family members had been killed in the war. Kodai then asked her the same question, and she opened up to him about her memory loss. The two stood there, listening to the ship's internal radio broadcasting, and bid their farewell to the solar system.[26]

Mori unknowingly senses Yurisha inside of the automatic navigation room
On March 5,[21] Mori participated in a battle at the Gliese 581 system, during which Yamato remained trapped between a Garmillan bioweapon and an artificial plasma barrier. She managed to find a weak point in the barrier, but soon found out that the hole would lead the battleship in the furnace of a red dwarf. After Yamato's miraculous escape, Mori once again stood in the observation deck, silently praying.[29] Yamato's navigation continued steadily for the following days, outside of a brief moment of turmoil caused by one of the captured automatons going rogue, and Mori continued to tend to her regular duties and attending officers' meetings. However, she began sensing some kind of presence in the ship's automatic navigation room. While she wouldn't find out until much later, the room was housing the unconcious Yurisha.[30]
The dimensional fault and Dietz[]

Mori awakes an unconcious Yuria Misaki
Almost three weeks later, Yamato fell in a dimensional fault. Mori was sent to investigate the phenomenon in the automatic navigation room, but she found nothing to report except an unconscious warrant officer. The battleship ran into the Garmillan vessel EX-178, which had remained stuck in the fault under similar circumstances, and they sent an envoy, Melda Dietz, to the Terrans to negotiate a ceasefire and find a way out. Mori observed as the Garmillas liaison treated with Kodai together with the rest of Yamato's officer corps. By collaborating, the two ships managed to escape the desperate situation, but the EX-178 was sunk by friendly fire when a larger Garmillas formation appeared to hunt down Yamato. Mori was present for the subsequent skirmish and saluted the wreck of the destroyed EX-178 as Yamato sped off.[31]

Mori confronts Yamamoto in the gym
Dietz had remained stuck aboard Yamato after her vessel was destroyed, and her presence on the battleship started to irritate the crew, especially after she claimed the war had been started by the Terrans and not Garmillas. Shima and Yamamoto, who had both lost close family members in the conflict, were the ones who reacted the worst to this revelation. Mori was concerned by Yamamoto's growing antagonism toward the alien, so when the two met in the battleship's training room, she invited her to relax in the bathing facility and hang out. Mori even told the Ensign about her amnesia and how she couldn't even remember her family. But while Yamamoto was relieved that her superior officer was such an open person, given her reputation, she flatly refused any opinions regarding her attitude toward Dietz. In Yamamoto's mind, since Mori didn't have memories of her family, she had no say in how she dealt with her anger against the invaders. Her brewing anger ultimately led the pilot to steal a fighter plane and face off against Dietz in a dogfight. However, her vehicle malfunctioned, and the Garmillas ended up rescuing her instead of fighting her. When she was brought back to the Yamato, Mori confronted her in the infirmary, and she ultimately agreed that her superior had been right.[32]

Mori and Kodai discuss inside the hangar
Shima's attitude hadn't been dissimilar to Yamamoto's, and him and Kodai had a rough argument over it despite their close friendship. Their immature bickering during an officers' meeting prompted Okita to temporarily relieve them of their duties. Mori visited Kodai in Yamato's second hangar after he had finished his punishment. She playfully asked him if he thought she could one day pilot as well as Yamamoto, and was somewhat taken aback when he replied negatively. Suspecting she wanted to talk about the pilot and Shima's predicament, he stated that he understood how they felt since he too had lost many loved ones in the war. Still, he reasoned that Shima still having a family back home must be a heavy burden for his friend, although that was a burden he was somewhat jealous of. Mori reassured him that he could still create a new family and that Yamato's crew was already a big family. Later, Mori looked happily as Kodai and Shima reconciled aboard the ship's main bridge.[32]
The Witch's attack[]
For this topic in more detail, see Psychic Attack on Yamato


Kodai and Mori, shocked to be called out on their argument by the bridge crew
At the end of March,[21] Mori was on board while Yamato engaged in a battle with a Garmillas dimensional submarine. During the fighting, the battleship's crew completed and tested a subspace sonar, which was placed under the control of Mori's department.[33] As Operations Officer, she was tasked with carrying out a recon mission around the ship for the following days, to ensure that the enemy submarine hadn't been following them. She was accompanied by Kodai, as he had still not been reinstated as Tactical Officer and was thus out of duty. While they were out on the mission Mori asked Kodai to give her control of their Type-100 plane, but he refused, once again implying he didn't trust her piloting abilities. Unbeknownst to the two, their banter was being directly relayed to the first bridge, much to their fellow officers' amusement and to their embarrassment upon being called out.[19]

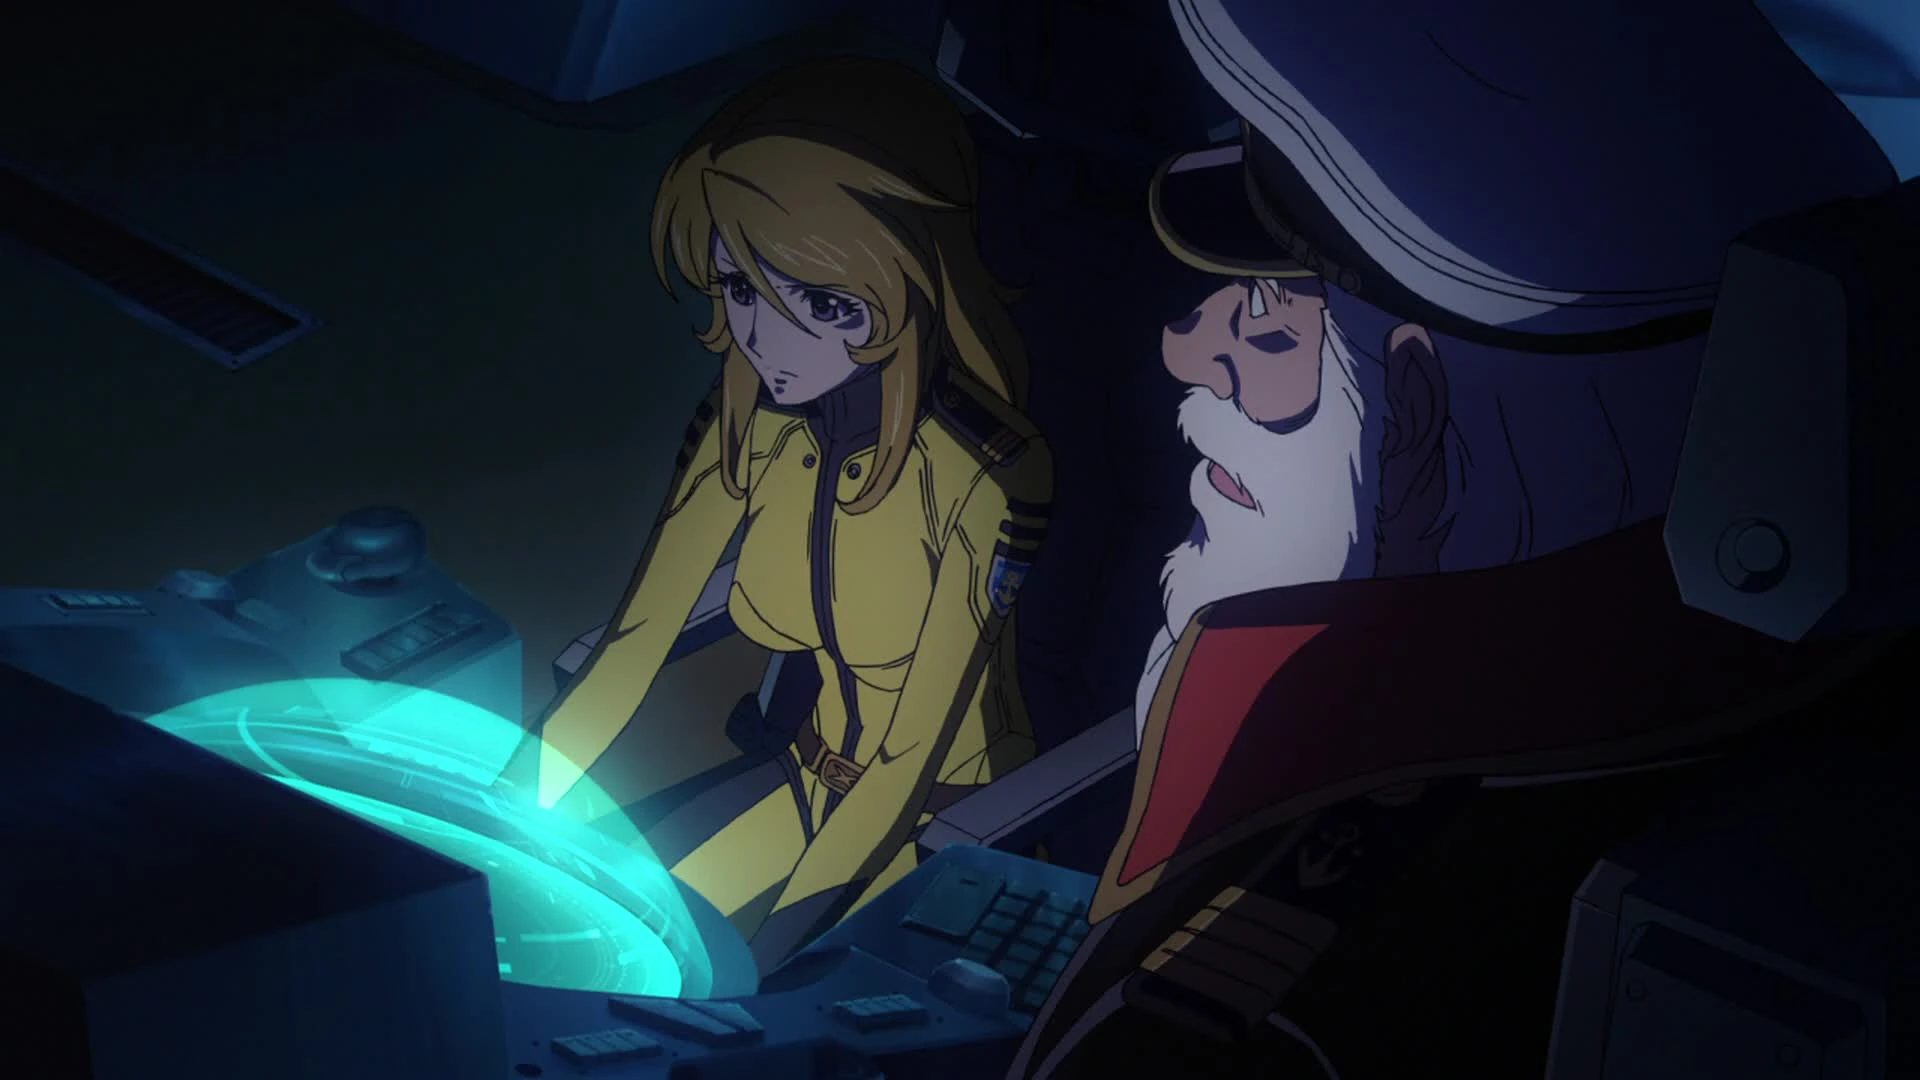
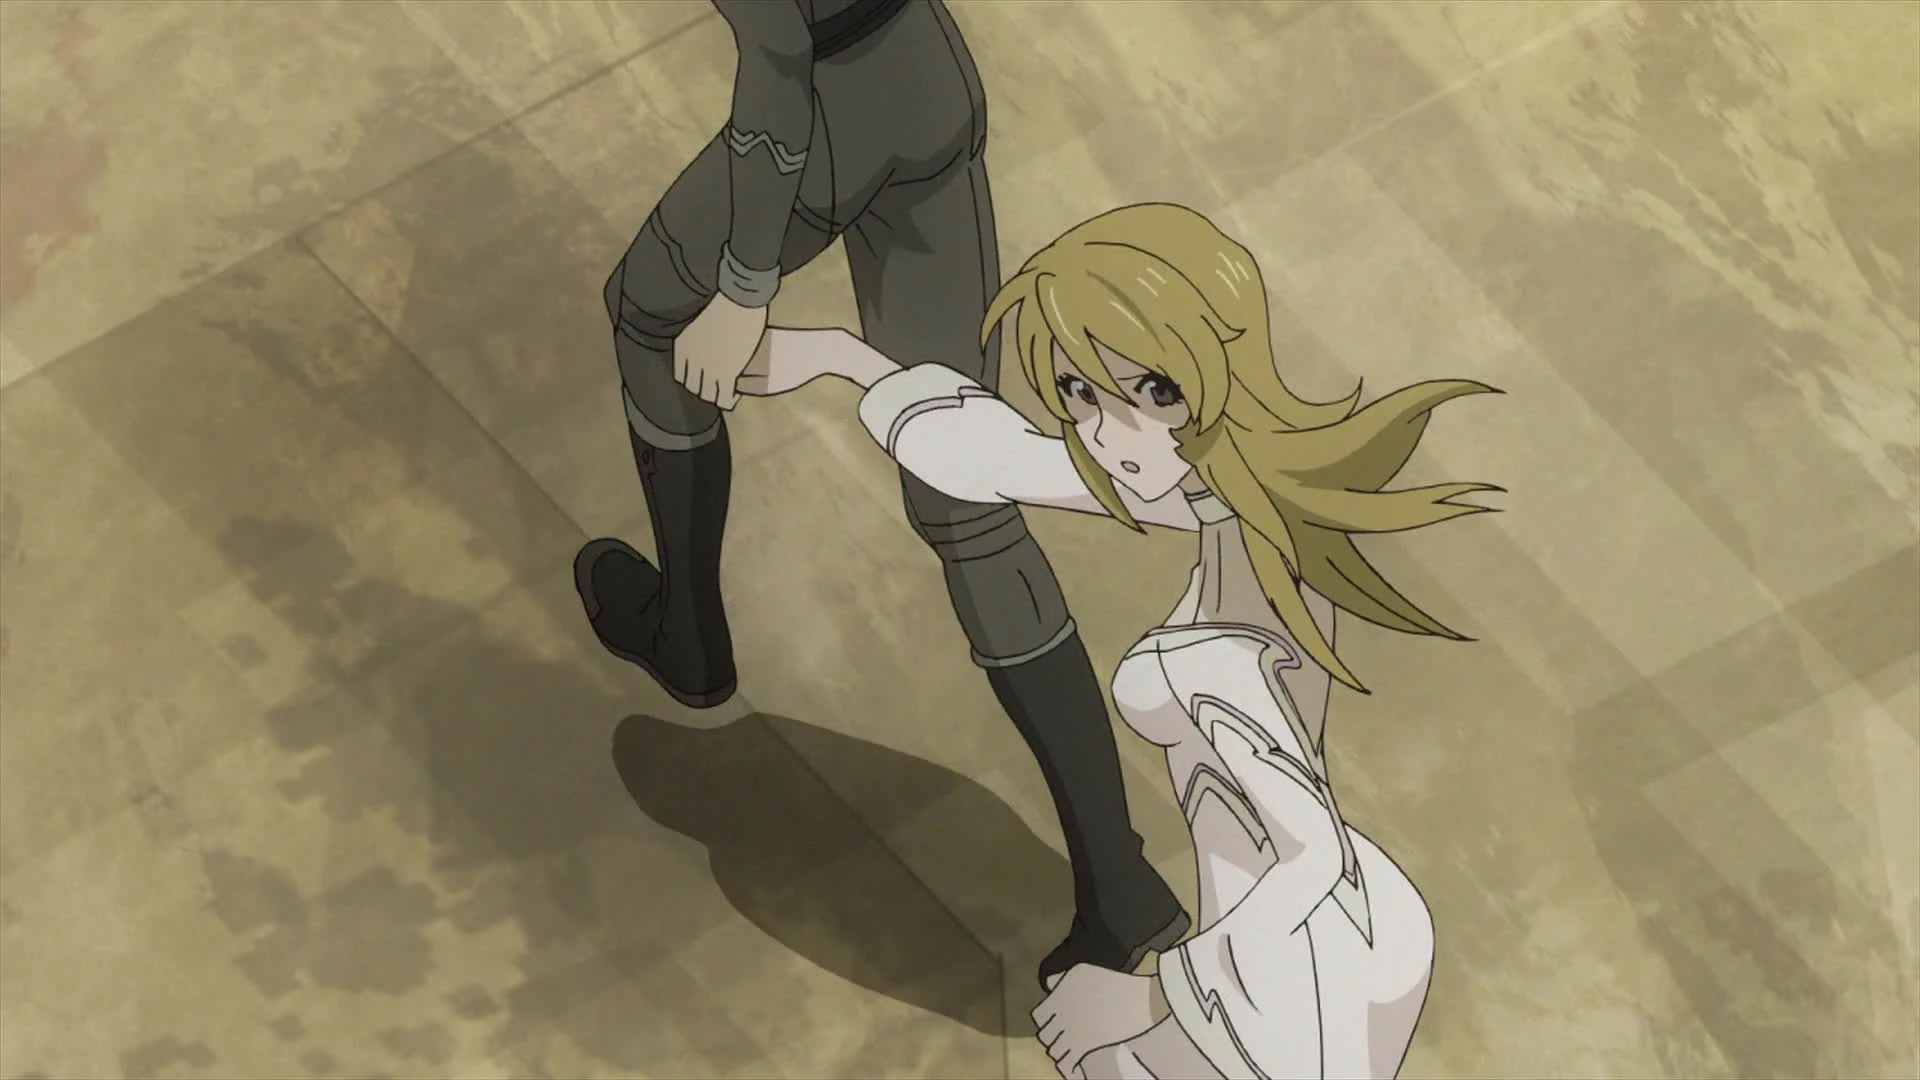
Mori and Kodai find the deserted Yamato
However, the lightheartedness was soon broken as Yamato fell under a psychic attack from Lt. Mirenel Linke, a Jirel agent of the Great Garmillas Empire. Mori and Kodai were spared from the attack since they were outside of the ship. Mori took the chance to take control of the plane and unsuccessfully tried to access the hangar remotely. The two boarded Yamato from a hatch and found its corridors and the bridge to have been emptied of all personnel. The ship suddenly reactivated and began moving on its own toward an unknown destination. Mori and Kodai resolved to inspect the automatic navigation room and the main computer room, the only facilities with control over Yamato's route. She tried to access the elevators, but
i eveaw electrocan sys on refu oftoa tnet omb promptdly them to use the ladders insteadapproaching. KodHe refused Mori's proposition to split off, deeming it too risky, but the two soon fell to Linke's psychic abilities and lost each other.[19]

Yurisha talks to Mori inside her illusion
She found herself inside of a movie theater projecting Kodai's illusion. Hijikata also appeared, and the video switched to a documentary made out of her lost memories. She saw glimpses of her forgotten past with Yurisha, however, in the vision she was the one playing the part of the alien messenger, while the Princess was her assistant. She then heard the crashing noises of the incident they had suffered together in 2198 and awoke inside a recreation of the central hospital back on Earth. The memory being recreated was that of her awakening right after the incident, complete with her receiving her amnesia diagnosis. Mori rose from her hospital bed and looked on the bed next to her to find a comatose Yurisha. But much to her and the telepath's surprise, Yurisha awoke. For the duration of the journey to Iscandar Yurisha had been gradually awakening her consciousness, while her body stayed sleeping inside of the automatic navigation room. After the attack, she had managed to take over the body of Misaki, one of Mori's subordinates. Using Misaki's body, she awoke the Operations Officer from her telepathy-induced trance. The two ran to the central computer room, but Mori was unable to access its navigation systems. Wondering aloud where the enemy might be leading them, Yurisha suggested they could be heading toward a Garmillas ambush. She also stated that the only way to stop the impending warp procedure would be to remove a key component from the ship's engine. Mori rushed to the engine room but told the Princess to stay where she was, not understanding her identity as the one protecting her from the telepath's influence.[19]

The Garmillas psychic controlling Mori
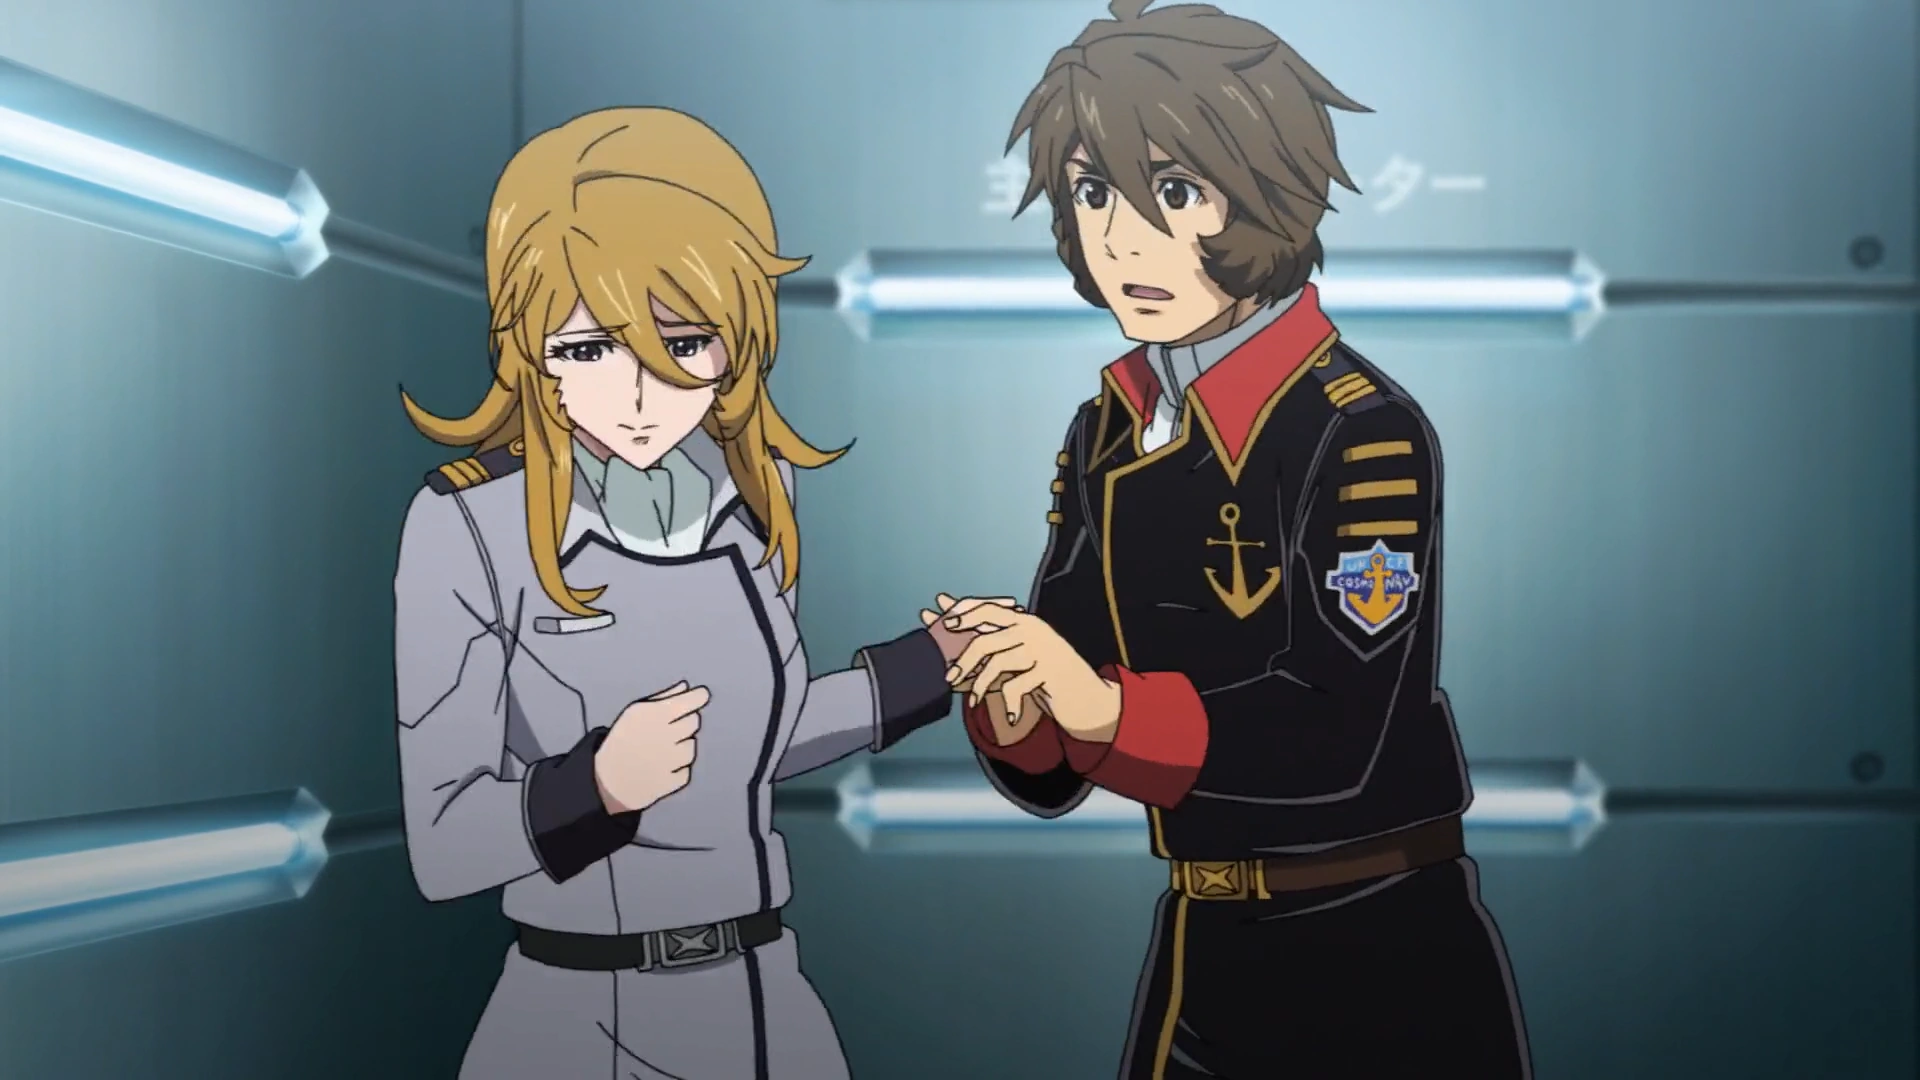
Mori accessed the engine and proceeded to remove its core, but she fell victim to yet another illusion. This time, Hijikata and the telepath compelled her to reactivate the engine, otherwise the Earth would be destroyed. She found herself unable to resist the mental attack, but she subconsciously called out to Kodai for help. The man, now free from his own psychic trap, rushed to the engine compartment and took Mori away from an avatar of Linke controlling her movement. He escaped with Mori, and shut the door of the compartment, trapping the attacker's projection inside of it as the engine reactivated. The surge of energy killed the telepath, freeing Yamato's crew from her influence.[19]
After the attack ended, Kodai and Mori stood on Yamato's second bridge. Kodai shared with Mori that he had seen his deceased family one last time through his illusion. Mori replied ambiguously that she had also seen someone she cared about, confusing Kodai. She then added that he had come to save her in the end, which embarrassed him. When Kodai tried to ask what she meant, Mori ran off laughing and playfully stated that it was a secret.[19]
Battle at Carell 163[]
For this topic in more detail, see Battle of Carell 163

Mori and Kodai watch Yamamoto run away
Days after, Kodai and Mori wandered into the Yamato's second hangar, as Mori was still determined to make him teach her how to fly a Cosmo Zero. While the two bickered, the nearby Yamamoto ran off in jealousy, as she had started to develop feelings for Kodai in the previous months and couldn't stand how close him and Mori had gotten. At that moment, Yamato's alarms went off, and the two rushed to their respective stations on the main bridge. Mori ran an analysis for enemy forces on her radar, but it turned out to have only been an offensive recon rather than an attack. Similar operations had been carried out by the Garmillas forces of the galactic theater for the past days to exhaust Yamato's crew before making a direct assault. Eventually, in late April, Yamato was attacked by a small fleet of warships. Mori detected them on her radar, but Sanada ordered the battleship to warp away instead of fighting them head-on. An ambush had been set up on the other side of Yamato's warp, which Mori rapidly reported. Yamato was encircled and heavily damaged in combat. Despite Okita's best efforts, the battle seemed to be a lost cause, but the Garmillan warships suddenly retreated while at the brink of victory. Mori wondered aloud what might have caused their sudden escape.[13]
Yurisha's capsule and Mori's identity crisis[]
For this topic in more detail, see Mutiny on Beemela 4

Itou inspecting Mori's personal files
The heavy damage forced the battleship to make a stop on the Earth-like planet Beemela 4. There, a faction headed by Head of Security Shinya Itou launched a mutiny against the mission to Iscandar. Having noticed the surprising similarities between Mori and the supposedly dead Yurisha, Itou had grown suspicious of the Operations Officer's identity. He investigated her background and learned of her work with Yurisha before the bombing and her relationship with Admiral Hijikata. Already distrustful of any alien interference, Itou concluded that Mori was herself an Iscandarian and that her reported amnesia was a cover for infiltrating and manipulating the Yamato crew.[13]

Itou presents his evidence
At the start of the insurrection, Itou's forces took all officers, including Mori, hostage. They declared that Yamato would finish resupplying and then head back to Earth. Mori accused the mutineers of treason and threatened to report them to central command once the ship got back to the planet. Itou presented Mori with the message capsule she had been given by Yurisha, accusing her of being an alien in disguise and using the message from Queen Starsha as definitive proof for his claims. The officers were transported and imprisoned in another room. Despite Nanbu attempting to reassure her, Mori expressed her confusion at Itou's claims, not knowing whether or not he could actually be correct. The group was soon liberated by Yamamoto and Mori chose to lead them to a hangar to contact the resupply team headed by Kodai and inform them of the ongoing revolt. The mutiny was eventually stopped, and the resupply team was welcomed back on board. Mori tearfully embraced Kodai as he landed.[34]

Mori listens to Hijikata's message in her cabin
Over the next few days, doubts about her identity continued to haunt Mori. She watched a video recorded by Hijikata on Yurisha's device, where the Admiral told her she could've learned the truth about her past but she mustn't let that sway her. However, this only fueled her already growing self-doubts. Rumors about her presumed alien origin started to spread among the crew. Mori and Kodai were selected to join Sanada on a mission to reactivate a Garmillas-controlled subspace gate, which would provide a shortcut to Iscandar. During the mission, Mori remained silent, only questioning Sanada about the gate's origin. Sanada mentioned it was built by a civilization older than Garmillas, prompting Mori to wonder whether these aliens would have been upset at the Garmillans tainting their site. Sanada responded with a verse from an ancient poem, which Mori recognized as being written by the Japanese 20th-century poet Chuya Nakahara. Kodai realized that Mori's knowledge of the poet implied she couldn't be born outside of Earth, as an alien wouldn't know about Terran's poetry.[20]
Sanada reveals the truth to Kodai and Mori
While Kodai's assertion reassured Mori, she was still worried about her amnesia conveniently matching with Yurisha's disappearance. At that point, Sanada decided to reveal to her the truth about the incident with Yurisha, and that the Princess's body was still aboard Yamato. He also disclosed that the Yamato Program's route was being traced from the unconcious Iscandarian's memories. Mori tried to ask about Yurisha's message capsule, but the group was attacked by a Garmillan patrol robot before Sanada could answer.[20]

Mori looks as Kodai assists a still alive Sanada
The XO proceeded to access a console to try and complete their mission, but realized that doing so would release an harmful ammount of radiation. To protect Mori and Kodai, he shut down the door leading to the console and proceeded to operate the station despite this possibly costing his life. Mori tried to undo the lock to stop him, while Kodai desperately banged on the door, begging his superior not to sacrifice himself. Before Mori could do anything, Sanada's section was flooded by radiation as the subspace gate opened. The door automatically unlocked, and the two rushed in only to find that Sanada had survived by submerging himself in a nearby body of water.[20]


Yurisha reveals herself to Mori
Back on Yamato, Mori visited the Automatic Navigation Room to have a look at Yurisha, still held in suspended animation inside of a medical capsule. While she mused over her forgotten companion she was confronted by the real Yurisha still in Misaki's body, who finally òresented herself as the Princess, revealing her true identity.[20]
Breaking through Balun[]
For this topic in more detail, see Battle of Balun

Mori watches as Yamato arrives at the Large Magellanic Cloud
In mid-May, Mori was present on Yamato's bridge as the battleship's officer discussed Yurisha's sudden appearance and her taking control of one of their comrades. She oversaw Lt. J.G. Shinohara's recon mission beyond the subspace gate to the planet Balun, sighing with relief at a later officers' meeting when it was announced that he had survived the mission despite his plane receiving damage. At the same meeting, it was revealed that on the other side of the gate stood a large Garmillan fleet of about 10,000 ships. Okita chose to risk it by carrying out a breakthrough operation at Balun and escaping through another subspace gate linked with the Large Magellanic Cloud, Iscandar's home galaxy. Mori was on the bridge during the subsequent battle. Yamato completed the operation, arriving at the Large Magellanic Cloud and using the Wave-motion Gun to heavily damage planet Balun, destroying 70% of the enemy fleet in just one shot. After the end of the fighting, Mori stood on the first bridge, smiling at the view of the satellite galaxy ahead of them.[35]
Kidnapped by the enemy[]
For this topic in more detail, see Battle of the Rainbow Star Cluster and Uprising on Prison Camp 17

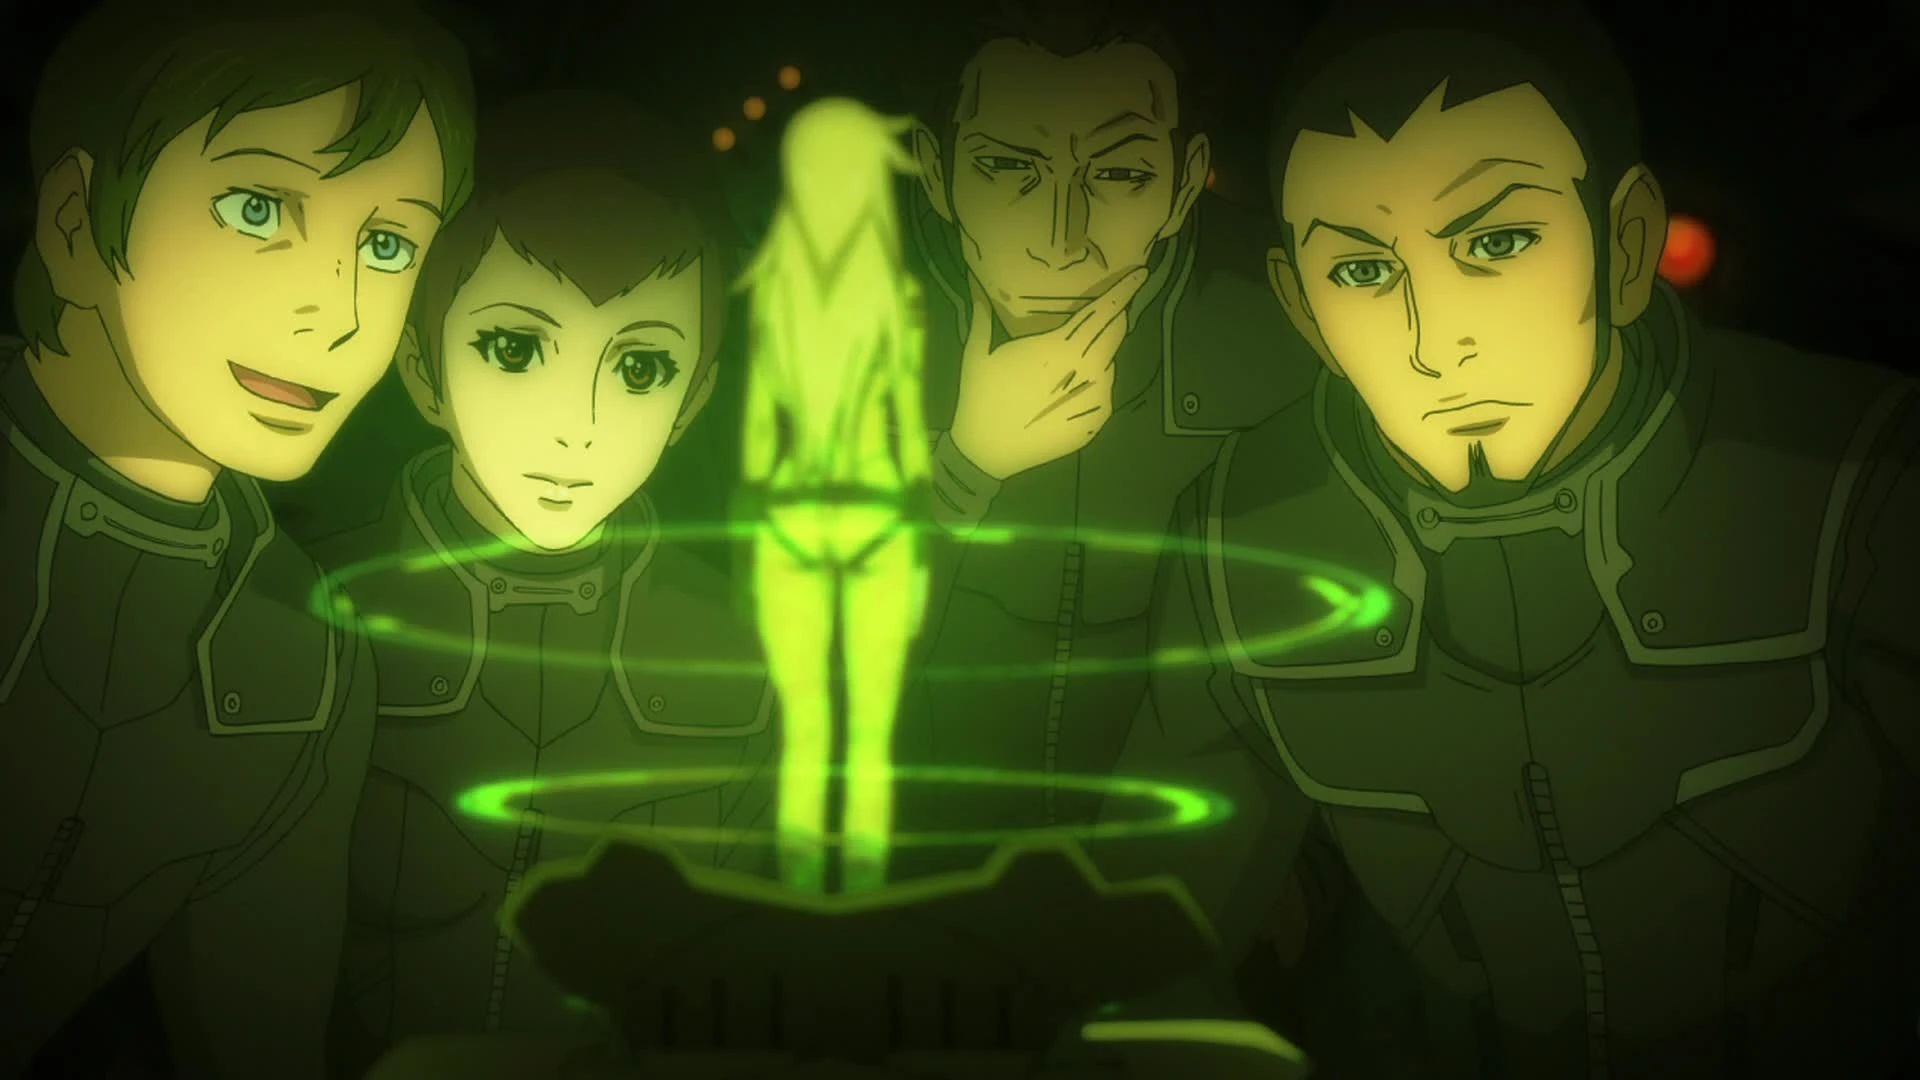
The Great Garmillas Empire mistook Mori for Yurisha
In the aftermath of Linke's attack, the information she had gathered was salvaged by her superiors. Among the information gathered was the presence of an Iscandarian Princess aboard Yamato, but the agent's death caused the report to be compromised,[36] and Mori was mistaken for Yurisha. Seeking to obtain the Iscandarian to further the goal of uniting his empire with Iscandar's, Leader Abelt Desler, ruler of the Great Garmillas Empire, ordered that she be brought to him and entrusted her kidnapping to one of his most capable and loyal commanders.[37]

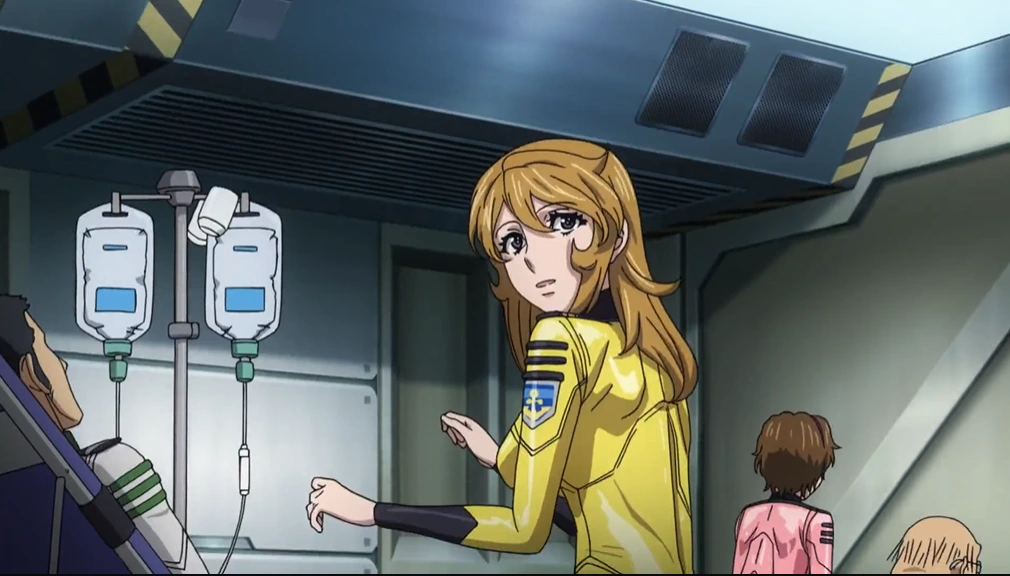
Mori is drugged by Sargeant Reitse
Okita chose to traverse the Rainbow Star Cluster, the fastest way for Yamato to get to Iscandar, despite Mori's report of the area's instability interfering with the ship's cosmo radar. However, the enemy general anticipated this move, and a task force had already been deployed to the cluster to ambush Yamato.[37] Mori was not on the bridge during the bloody battle that ensued. Instead, her subordinate and replacement Miki Saijo operated her console.[37][38] During the fighting, the dimensional submarine UX-01 deployed a boarding team of Zaltzi volunteers to kidnap Yurisha. The group ran into the real Yurisha being escorted by a security officer, but due to their partial intel, they did not recognize her. However, their shooting down of her escort caught Mori's attention. She was immediately recognized by the boarders as their target, narcotized, and taken toward the group's escape vehicle.[38]

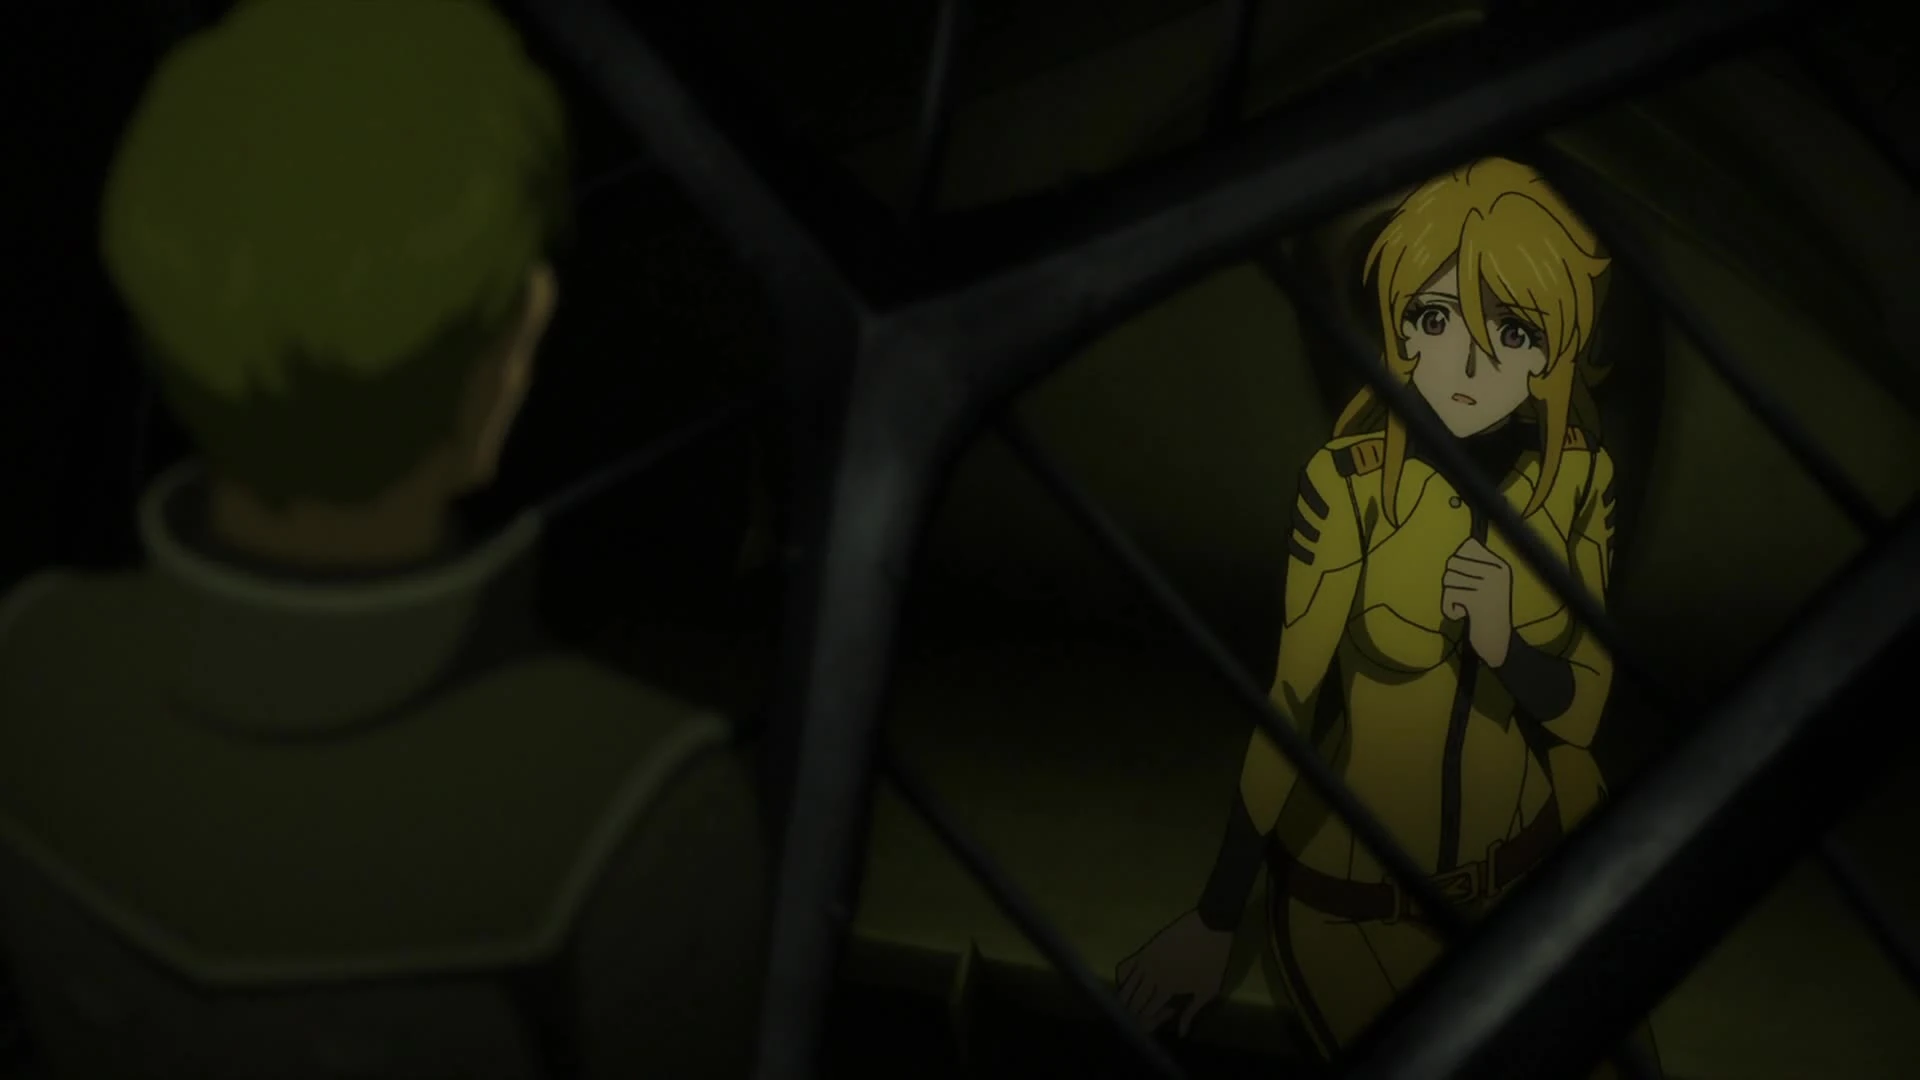
Mori is confronted by Oshetto in her cell
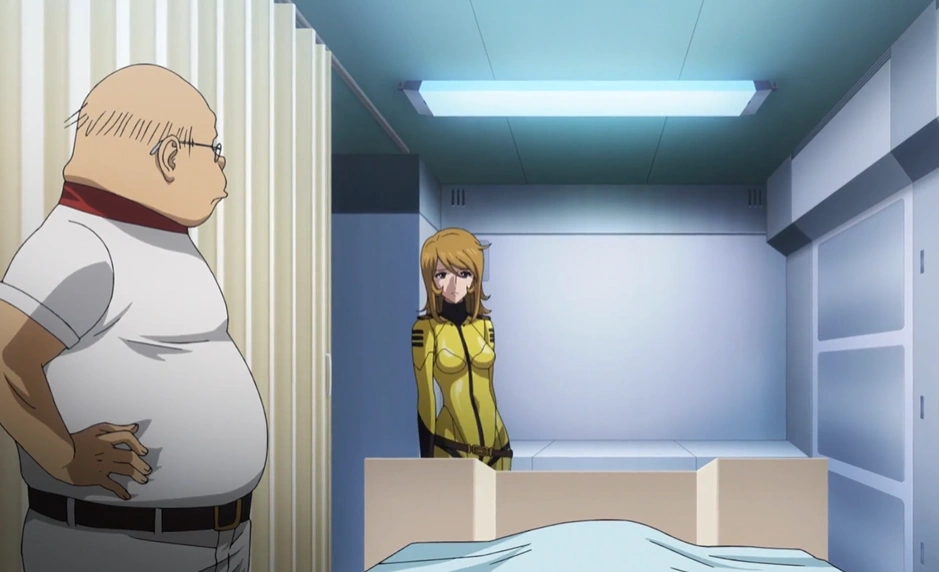
Mori was kept inside the UX-01's cells as the submarine traveled to Leptapoda, an imperial prison planet. She was entrusted to Corporal Norren Oshetto, the last surviving member of the platoon that had kidnapped her. Since he couldn't speak fluent Iscandarian, Oshetto applied a translator to her neck. The man introduced himself to her as soon as she woke up. Mori was initially startled, as the Zaltzi soldier did not resemble the Garmillas she had already met aboard Yamato. Before Oshetto could answer her question, the UX-01's intercom announced the submarine had reached its destination. Mori tried to ask where she was being taken, and the Corporal informed her she would be presented to Leader Desler.[39]

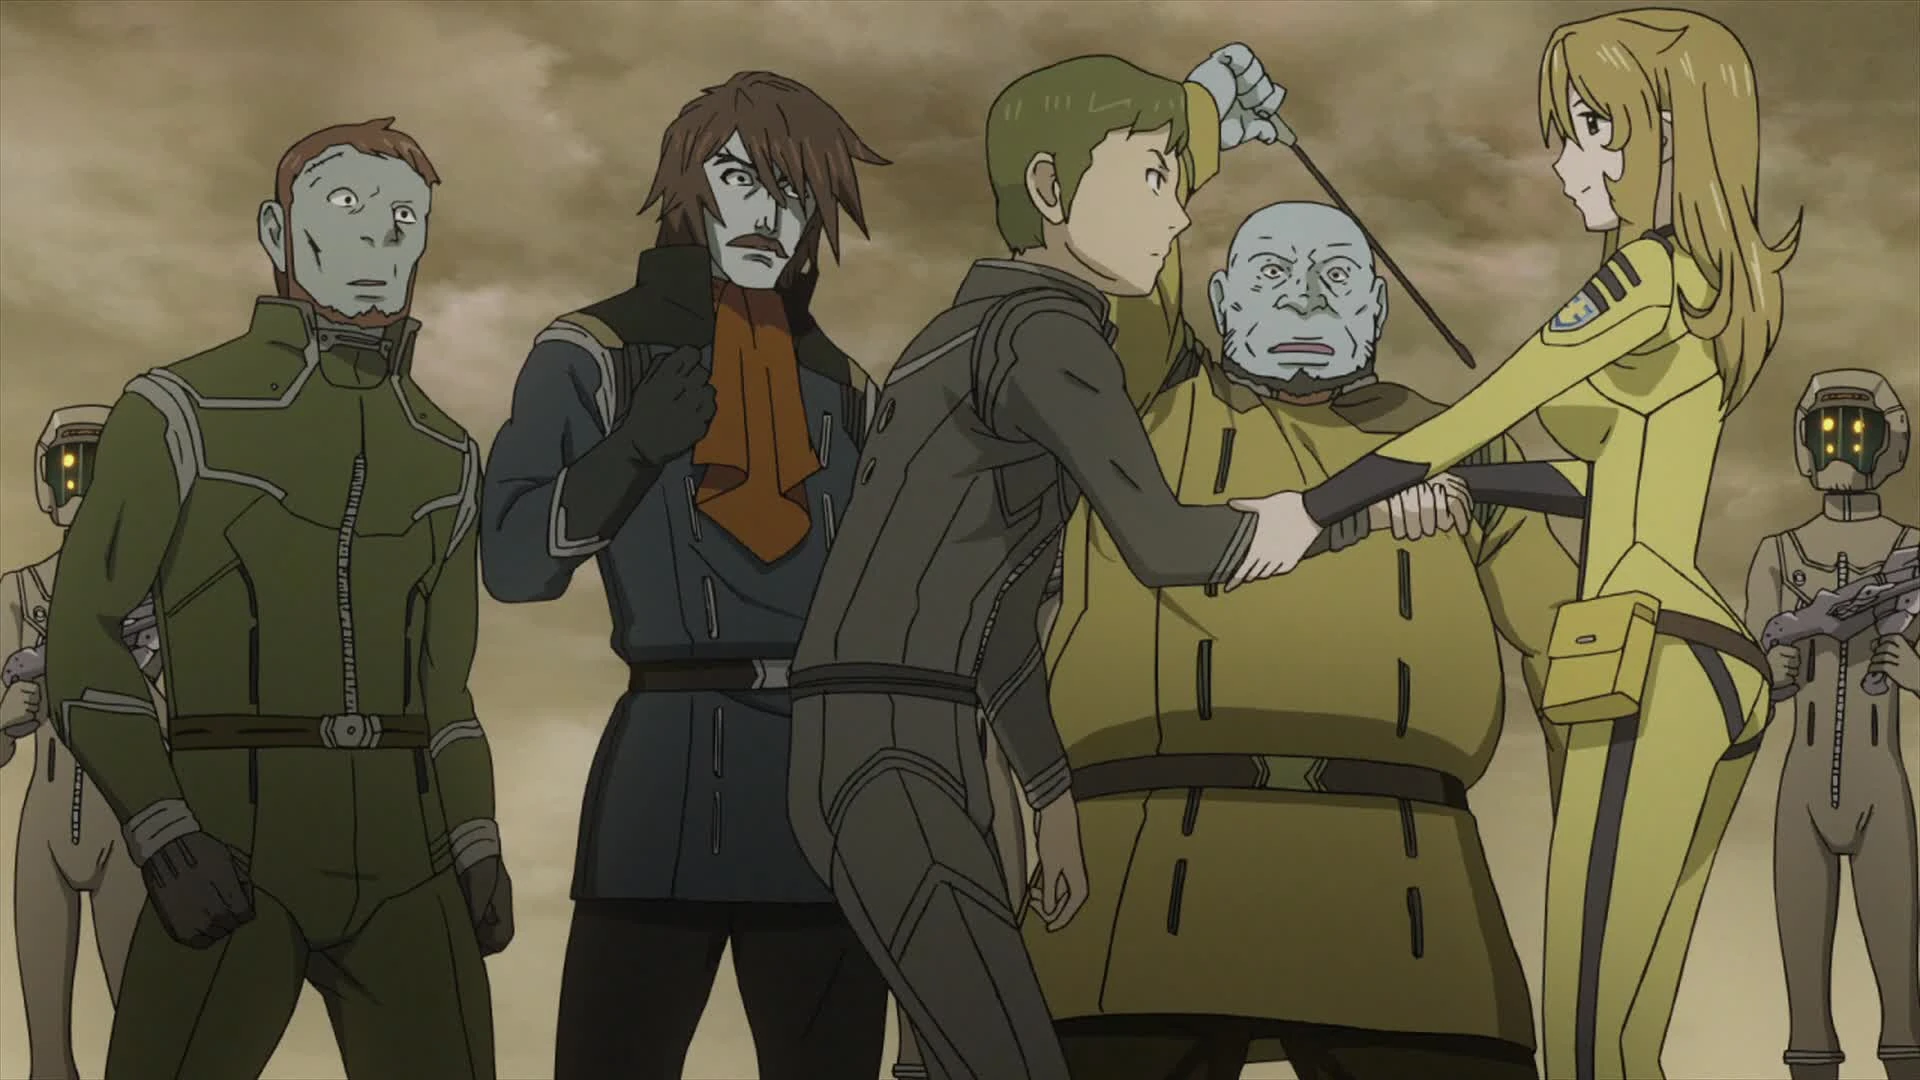
Mori helps Oshetto get up after Bosen hit him
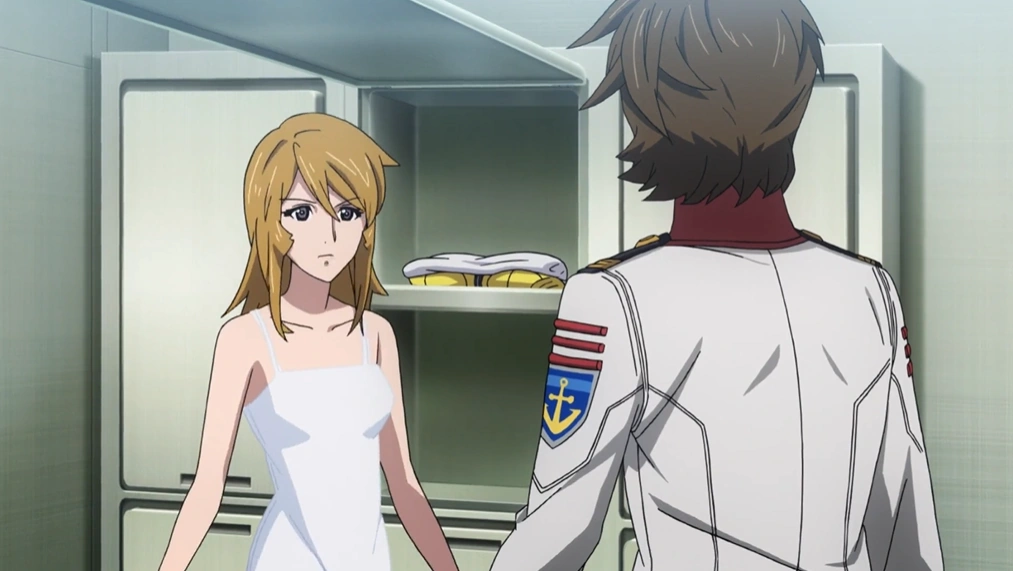
Upon descending on Leptapoda, Mori and the UX-01's crew were met by the prison's warden, Debarzo Bosen, who assigned one of the camp's prisoners, Elisa Domel, to accompany her and help her get dressed. When Oshetto tried to follow the two, Bosen began hitting him and berating him for being a second-class Garmillan. Mori stepped into the commotion, demanding the warden to stop and helping Norren get up, stating Iscandar was asking him to carry on with his mission, much to the stupor of all those surrounding her. Mori was given an Iscandarian dress by Domel and was asked to change into it. The woman complimented her, and Mori thanked her. Before Domel could take away her uniform, she took Yurisha's message capsule out of its pouch, claiming it was a gift from her sister. She opened the message to show it to Domel. The capsule's opening was sensed by the real Yurisha aboard Yamato, making her aware of Mori's position.[39]

Mori is taken away by Oshetto
Coincidentally, Yamato was approaching Leptapoda to resupply after the devastating battle at the Rainbow Star Cluster. Kodai took a landing plane to inspect the planet and was joined by Yurisha, who had managed to return to her original body[38] and wanted him to join her to rescue Mori. The two crashlanded on Leptapoda's surface after their plane was hijacked by Itou and another survivor of the mutiny and they were arrested by a squad of automatons. At the same time, Mori was taken to Bosen's office, but their meeting was interrupted by a video call reporting the capture of Yurisha and the Terrans. Seeing the real Iscandarian Princess in the video while Mori stood right in front of him, Bosen rushed out of his office to investigate the matter, but at the same time, a riot broke out among the camp prisoners. Fearing his ward's safety, Oshetto told Mori they would escape to the dimensional submarine, but right outside of Bosen's office, the two were confronted by a rampaging Zaltzi prisoner. The Corporal pulled Mori down for cover and shot the rioter down. Mori was horrified at the sight of her escort being forced to gun down one of his compatriots. The pair safely reached UX-01 and took off for planet Garmillas.[39]
Yurisha of Garmillas[]

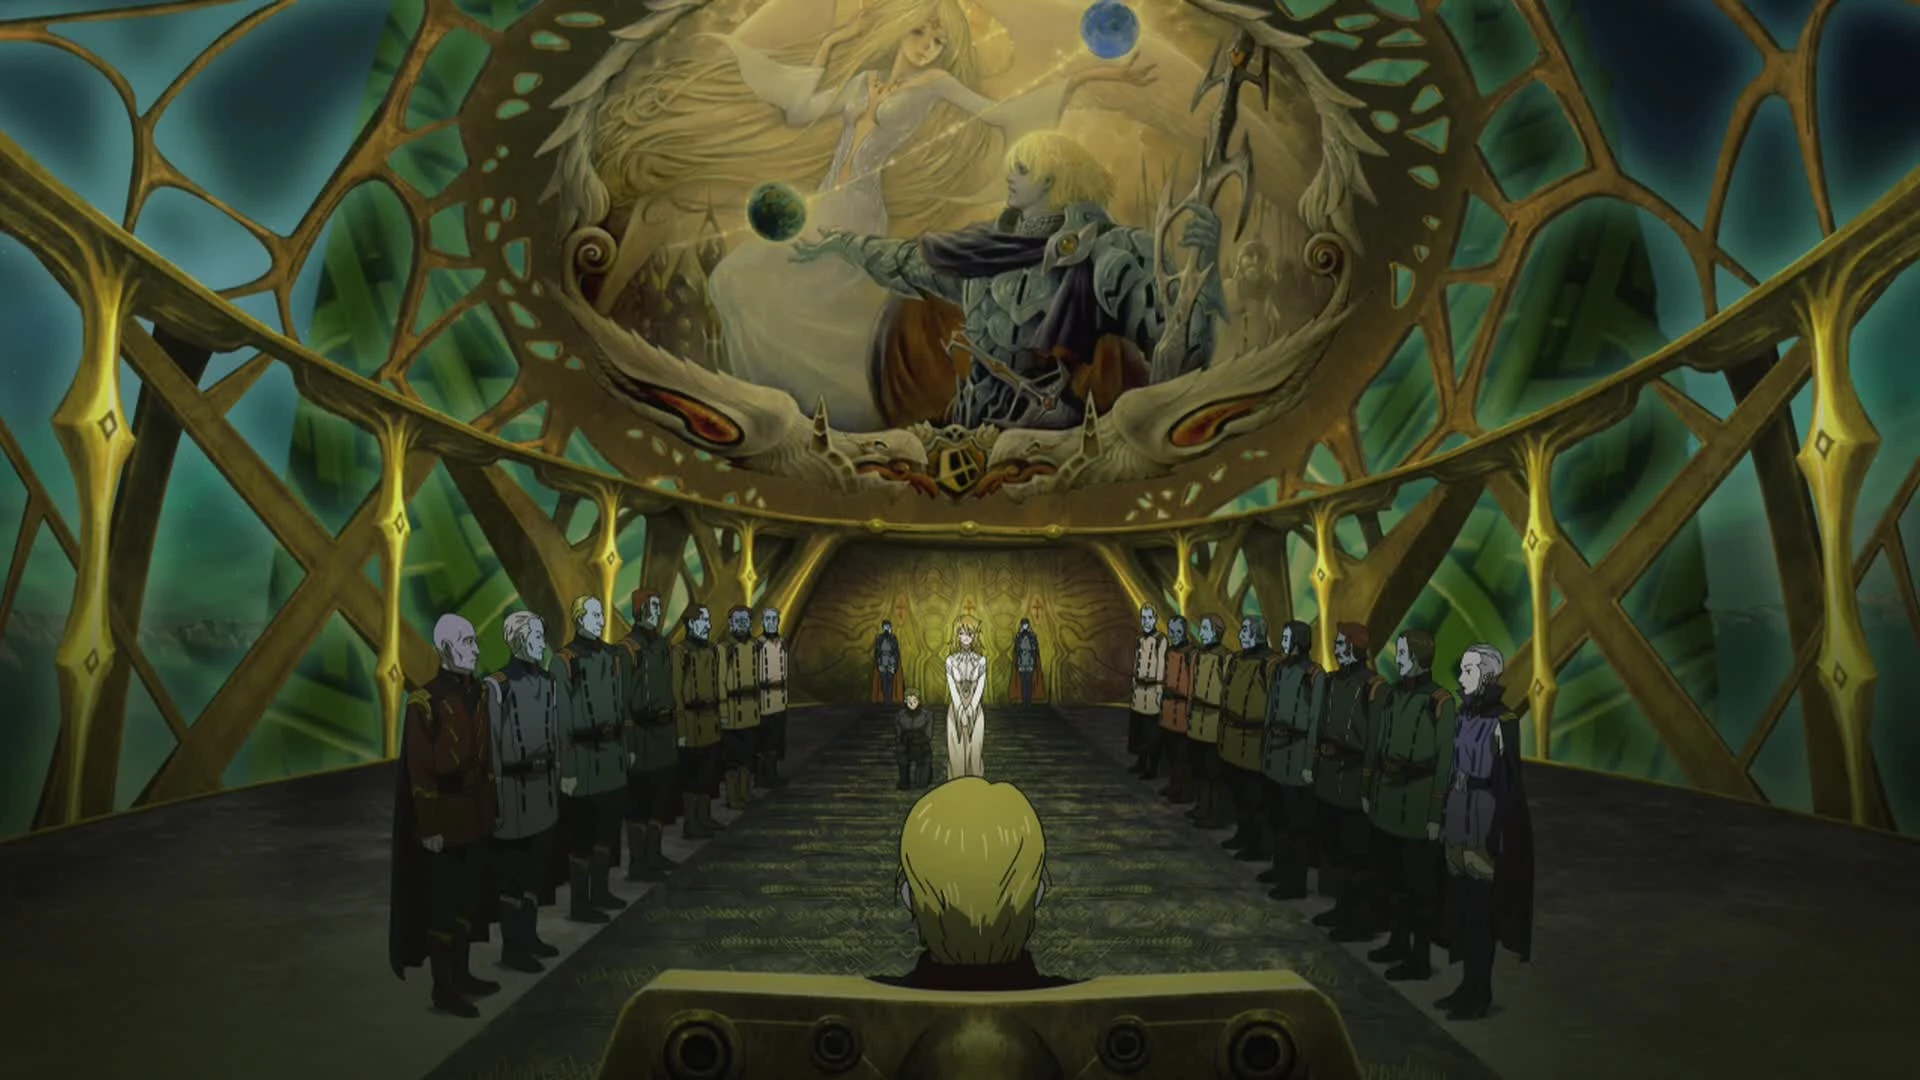
Mori is presented to Desler and his men
Mori arrived on Garmillas and was introduced to Leader Desler and the members of his government. The Leader tried to start a conversation with her, even asking if she had forgotten who he was, but Mori remained silent. She was invited by the empire's Minister of Propaganda, the Jirel Miezela Celestella, to her home. As she was being driven by Oshetto to Celestella's residence, Mori watched the night sky and commented to her guard on the beauty of Garmillas' moon. Unbeknownst to her, she was not looking at a moon but at Iscandar, her supposed home planet. Oshetto immediately corrected her but stated that, even after receiving confirmation that she wasn't the real Princess, he would continue to protect her nonetheless as it was his duty.[40]


Mori and Celestella have their tea
Celestella and Mori were served tea by a Zaltzian maid. The minister mentioned that the girl and Mori's chaperon were from the same species, and that the maid's father had been killed in action against the Yamato. Ignoring her interlocutor's surprise, Celestella continued by stating that she too had not been born on Garmillas but that, just like the girl, she was a Garmillas. She asked Mori if she knew who she was. The woman responded that she was Yurisha of Iscandar, but was interrupted by the minister, who said that she was now Yurisha of Garmillas, a political pawn in Desler's hands. Celestella asked what Mori thought of the prison planet she had been on. Mori described it as horrible. Much to her surprise, Celestella told her that she had been imprisoned in a similar place in her youth and that she was only alive because Desler had saved her. Noticing something in the minister's voice, Mori asked if she was in love with the Leader. This caused Celestella to burst into laughter. She apologized but dodged the question, instead changing the subject to how good the tea they were having was. After the end of the meeting Celestella was sure that the woman she had talked to was not the real Yurisha. She reported her findings to Desler, but he chose to go ahead with the plan anyway as he only needed the populace to believe he had Yurisha in her hands, whether she was real or a fake did not matter.[40]

Mori accompanies Abelt Desler during a speech in the Garmillas capital of Baleras.
Some time after, Desler held a state funeral for one of Garmillas' war heroes, who had recently perished in battle against Yamato. Mori was present at the cerimony, and was used by the Leader to prove to his people that Iscandar had finally agreed to his "Great Unification" of the two empires.[40]
Battle over Garmillas[]
For this topic in more detail, see Battle of the Imperial Capital

Desler and Mori witness the firing of the Leader's WMG
Mori was taken to Leader Desler at Baleras Tower. The Leader was preparing for the upcoming battle with Yamato. Mori was relieved to know that the battleship had survived and was approaching Garmillas. However, when the Leader stated he would greet the battleship after its long journey, she asked him what he was planning to do. Desler coldly responded that she would witness a war. As Yamato warped out along the orbit of the gas giant Epidora, at the edge of Garmillas and Iscandar's star system, Mori watched in horror as Desler ordered to fire a Garmillas-made Wave-motion Gun to destroy the battleship, shocked to discover that the Leader had built his version of the weapon.[40] Seeing Mori distressed, the Leader caressed her hair, and told Oshetto to carry her away to rest. But as Mori would soon find out, the battleship had survived the close call, and was hurdling at near-light speed toward Garmillas. It was engaging in battle over the Imperial Capital and eventually rammed into Baleras Tower. Within the building's corridors, Oshetto proposed Mori to escape from the Leader's palace. Mori agreed and ripped her dress to move more freely, stating she had been waiting for him to suggest this. However, as the two tried to flee, Desler detached the tower's escape vessel. He, his staff, Mori, and Oshetto were on board. The spacecraft exited the atmosphere and landed on the space station Baleras II, where Desler's Wave-motion Gun was located.[41]

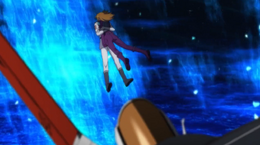
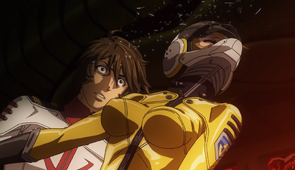
Oshetto forces Mori inside the airlock to save her
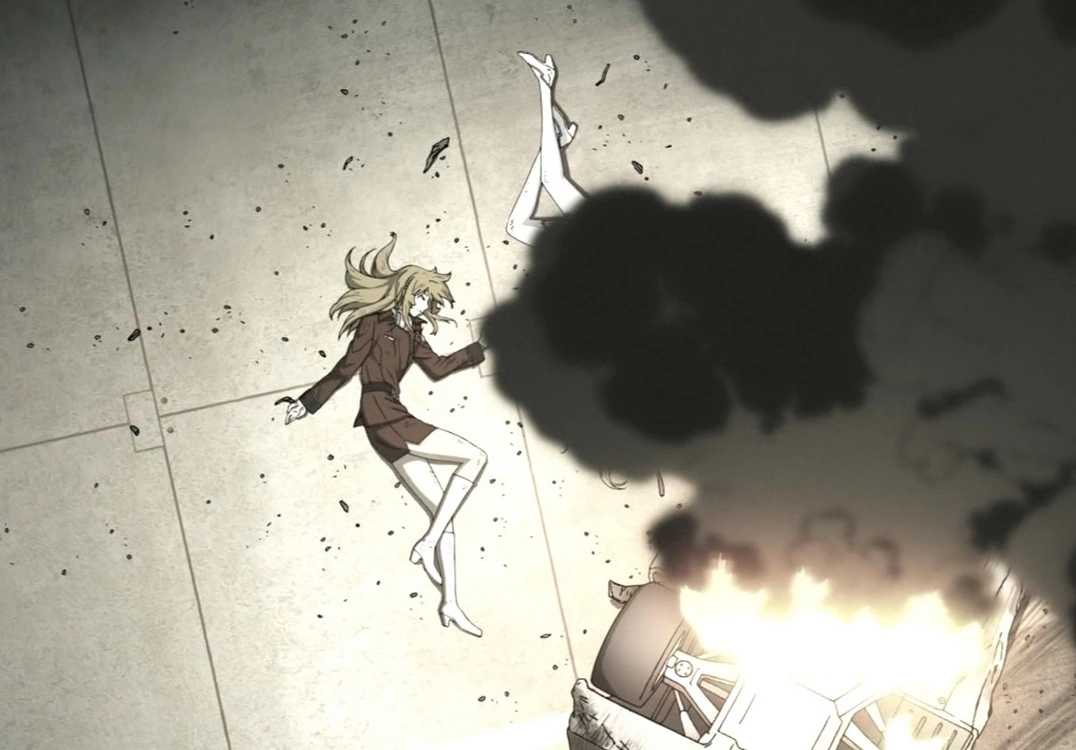
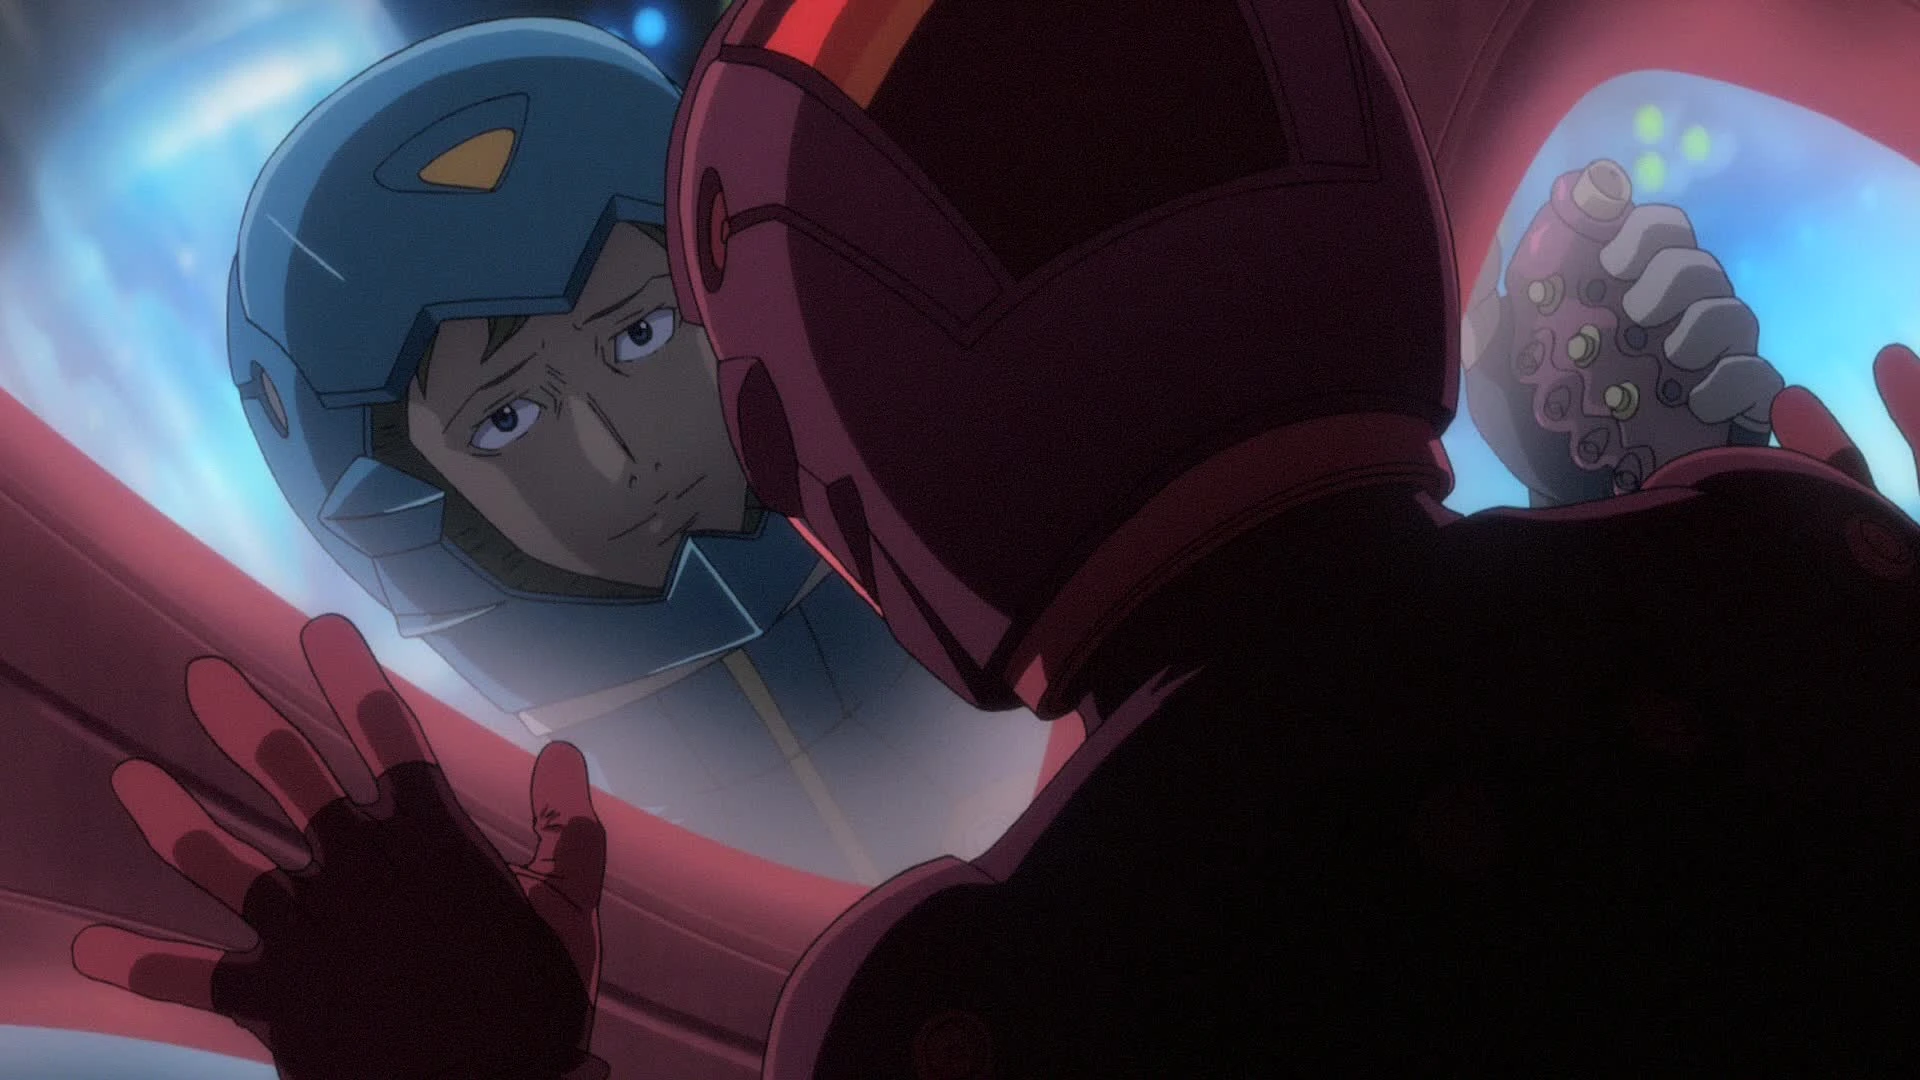
Mori turned the tables against her captor as he prepared to fire the weapon at the capital underneath. Trying to prevent an act of mass murder, she and Oshetto donned space suits and entered the station's control room. When Oshetto questioned her actions, she revealed she would set the station's reactor controls to overload and destroy the entire structure and the weapon it housed. She told her companion to escape, thanking him for having helped her so far. When Oshetto confusedly asked her why she would sacrifice herself, Mori simply answered that she was doing what only she could. She was surprised when Oshetto drew his sidearm and ordered her toward an airlock. He stated that by saving his Leader's superweapon, he would achieve great honors on Garmillas, perhaps even full citizenship. He bid her farewell, but instead of shooting, he pushed her inside and blew her into space, preventing her from going out with the station.[41]

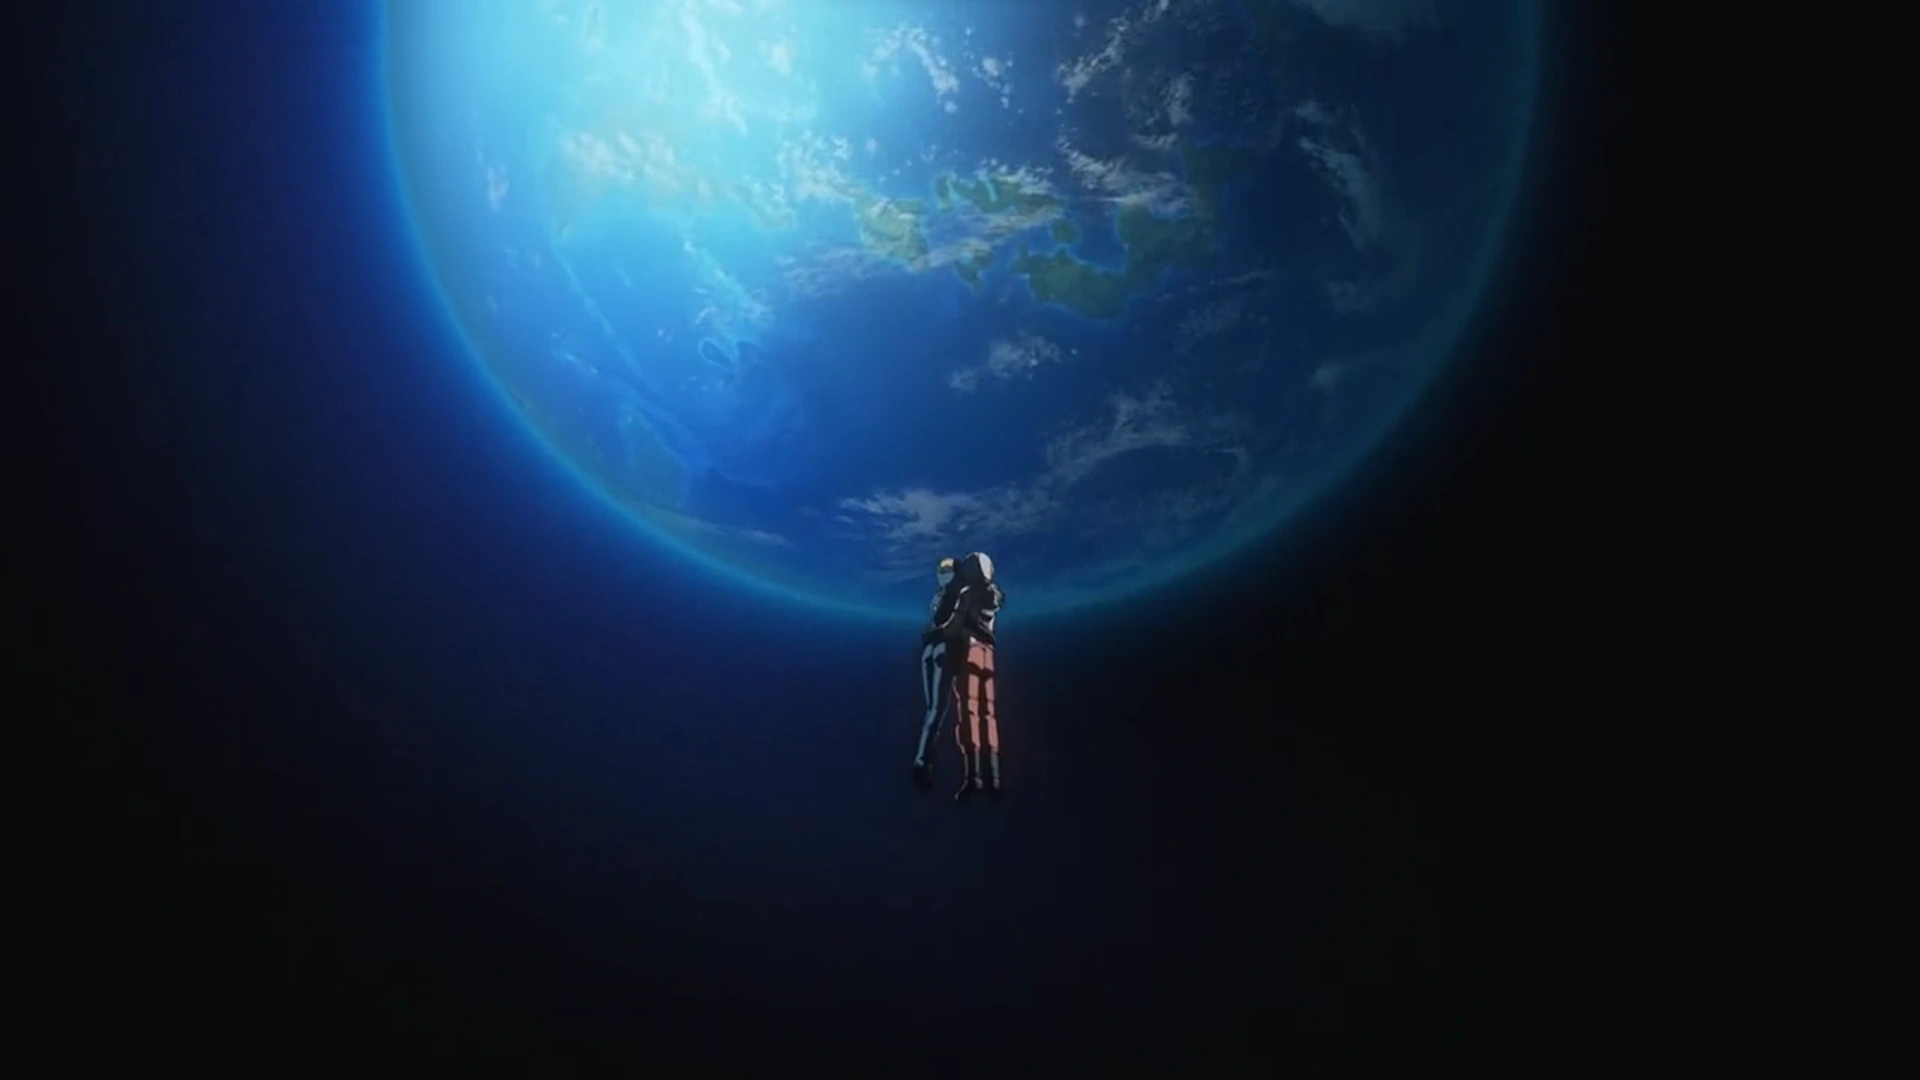
Kodai and Mori look over Iscandar
Mori watched as the station exploded into a ball of fire, grieving for her friend and calling him a terrible liar. After the explosion subsided, Mori noticed another figure in a spacesuit maneuvering toward her: Kodai, who had come to rescue her accompanied by Yurisha. After reuniting, Mori asked Kodai to reassure her she wasn't dreaming, to which he affirmed. The two held each other close and watched their destination, planet Iscandar.[41]
Stay on Iscandar[]

Mori was part of Yamato's delegation to Starsha
Mori, Kodai, and Yurisha, who had accompanied him, were soon retrieved by Yamato, and the battleship finally landed on Iscandar's capital. As Okita had suffered a relapse in his condition due to the stress of the previous battle, Sanada assembled a delegation to meet Queen Starsha at her palace. Initially, he only intended to bring Yurisha, Kodai, and his assistant. Still, upon noticing the Princess clinging to her newly rescued friend, Sanada agreed to bring Mori alongside them. Upon meeting the delegation, Starsha initially mistook Mori for the deceased Princess Sasha before being corrected by Yurisha. The Queen initially refused to give the Terrans the coveted Cosmo Reverse System, the device she had promised them, citing their usage of Wave-motion Energy-powered weapons as the cause of her predicament. Yamato thus remained on Iscandar for the time being, waiting for the Queen to make a final decision.[42]

Yurisha hugs Mori
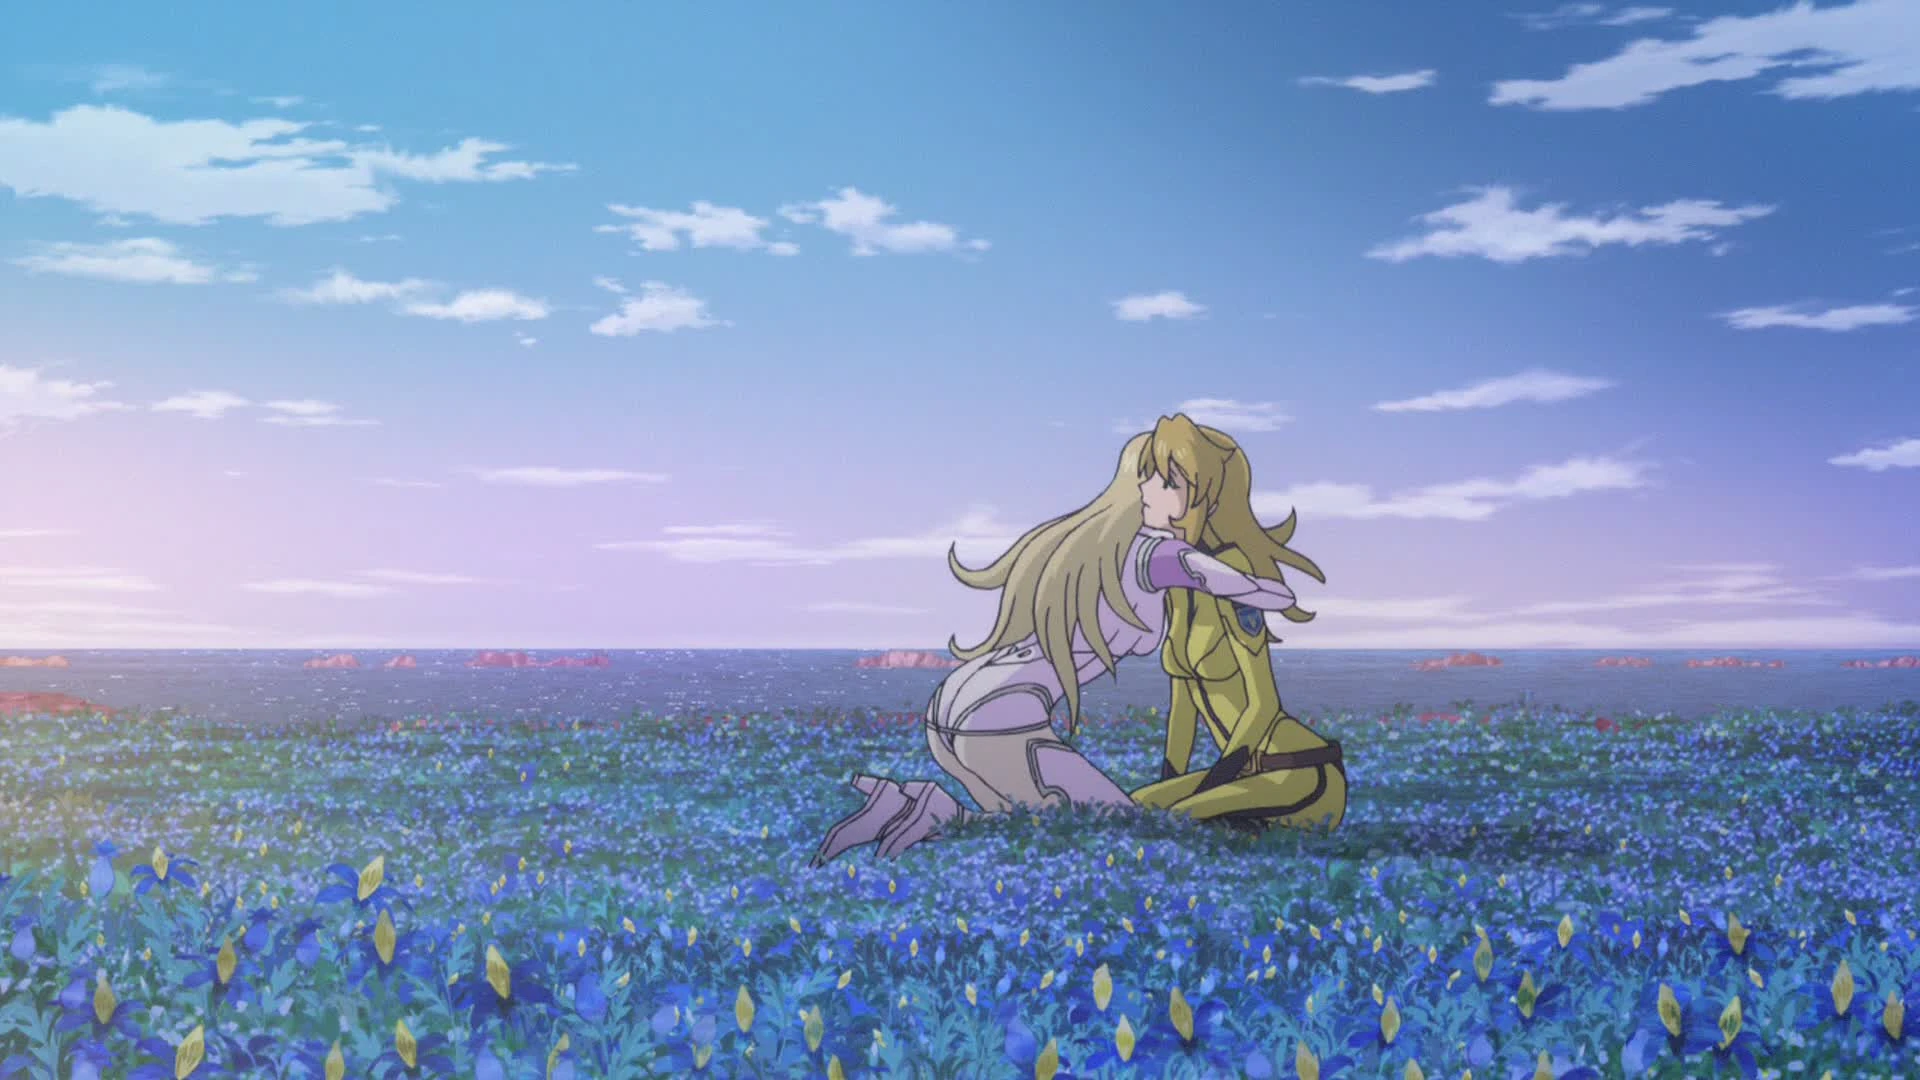
Later, Mori and Yurisha sat together in a flower field, and Mori asked what flowers they were looking at. Yurisha explained that they were Blue Crystals, which represented hidden lives and emotions in the Iscandarian flower language. She further explained that hidden lives are the sum of memories of all lives on a planet, crystalized beyond time and space as Wave-motion Energy. She told Mori that the Cosmo Reverse System used these memories to restore life, meaning it would never have worked unless the Yamato crew had come to Iscandar. Mori was amazed, but before she could ask any more questions, Yurisha hugged her, answering yes to an unasked inquiry.[42]

Mori and Yurisha say their goodbyes
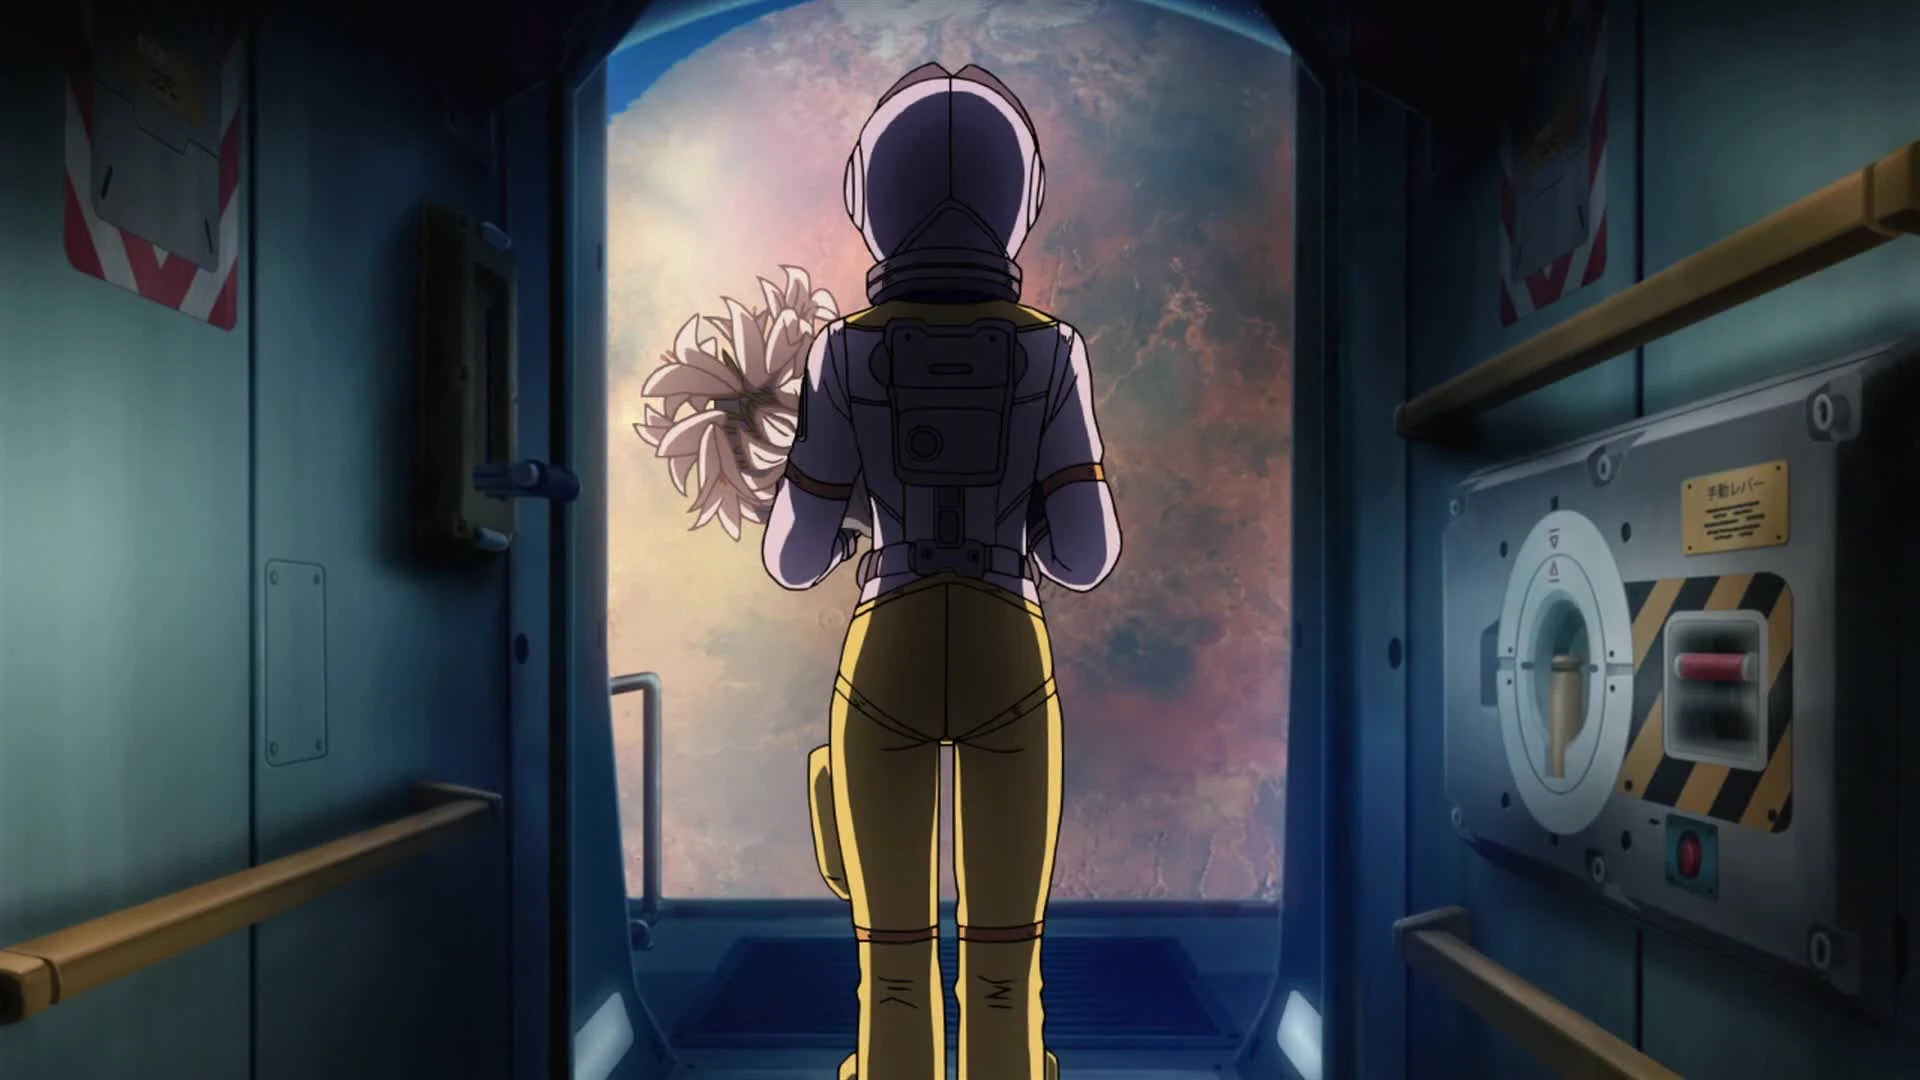
Eventually, Starsha agreed to give the Earth the Cosmo Reverse after Okita promised her the Earth would never build Wave-motion Guns again, even adding this promise as a provision to the armistice the crew had already signed with Garmillas after Desler's seeming death.[43] On July 27, after staying on the planet for 11 days,[21] Yamato prepared to finally depart toward the Earth. Mori, Kodai, and Yamamoto met Dietz and Yurisha on the dock where the battleship was anchored, and the Princess announced she would go to Garmillas to help their people rebuild in the wake of Desler's fall. She gifted Mori a vase with Blue Crystal blossoms as a symbol of the bond they shared. Mori looked as Kodai bid Dietz goodbye and as Yamamoto, now reconciled with the alien, joined him. She boarded Yamato and took her place on the first bridge as the battleship took off.[42]
Returning to the Earth[]
Encounter with Gatlantis[]
For this topic in more detail, see Hunt for the World of Tranquillity

Mori pinches Kodai as they take their photo
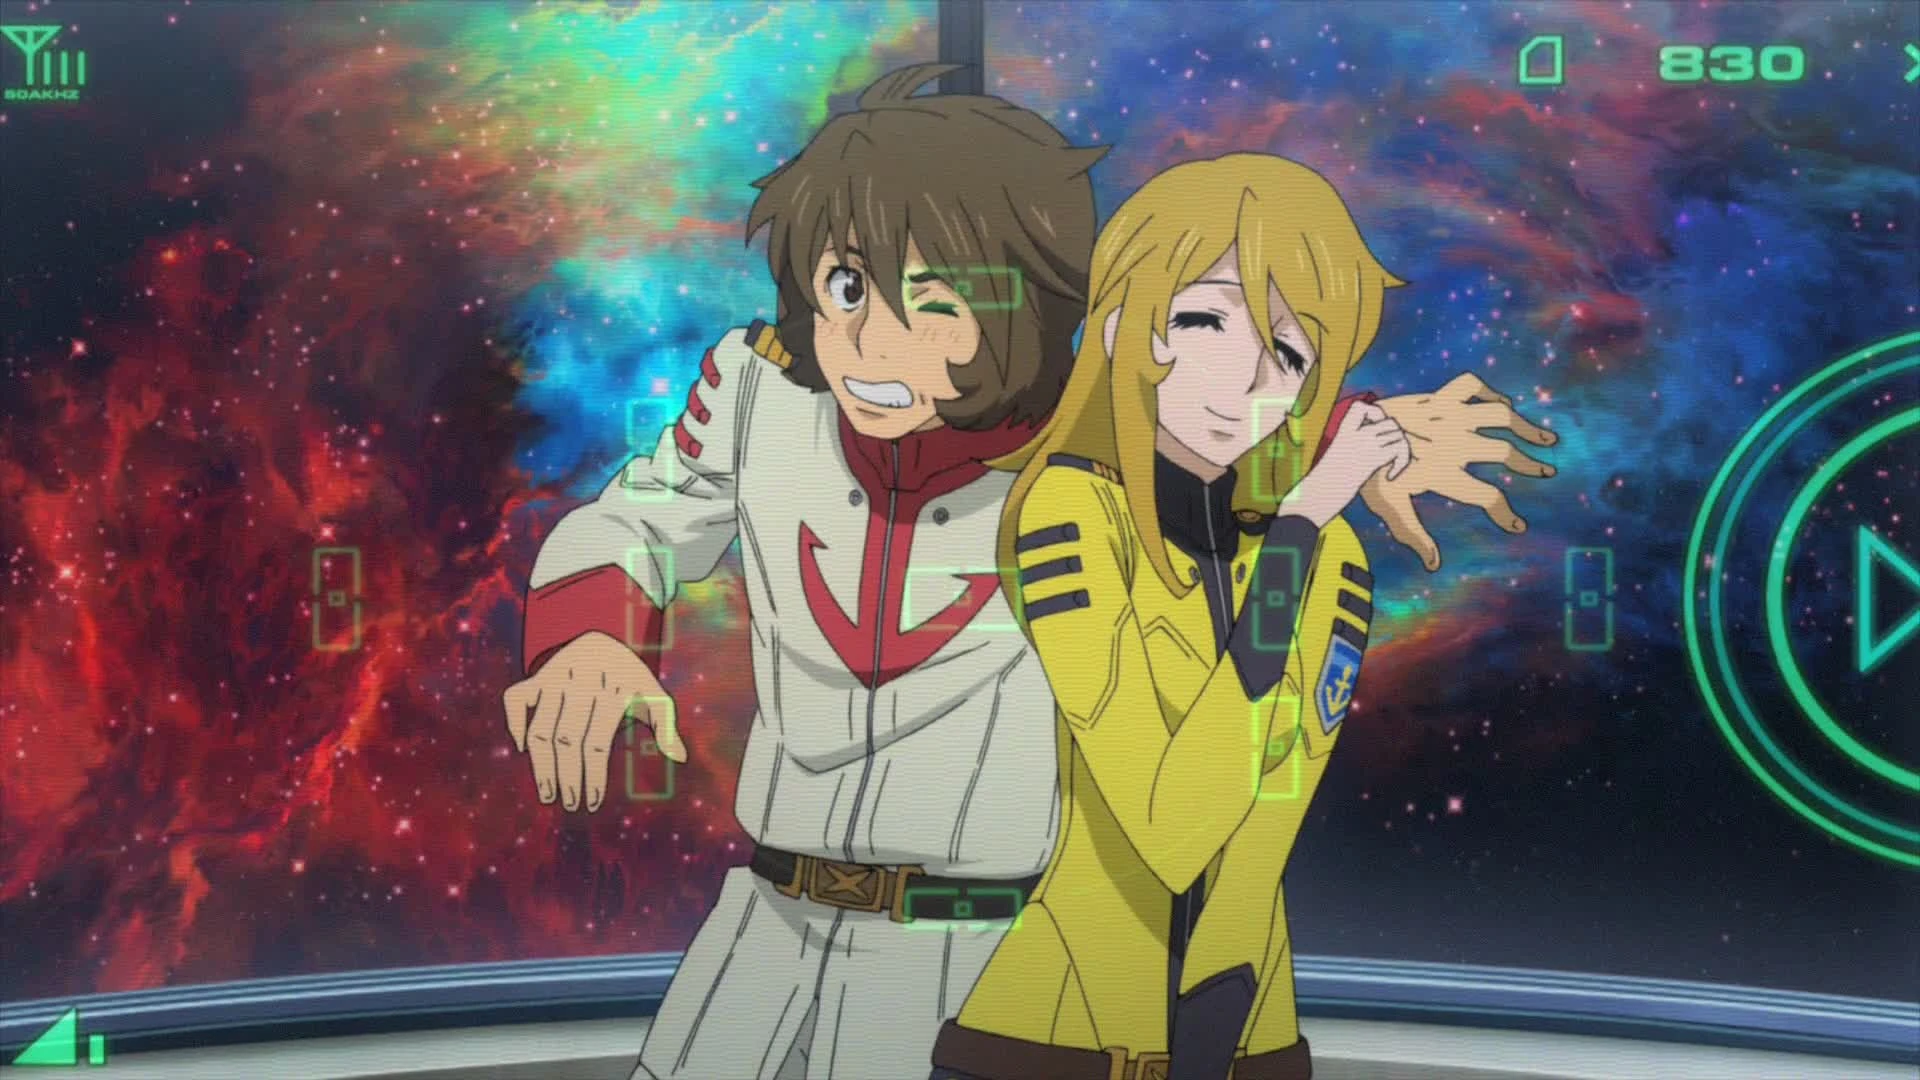
A month after Yamato's departure from Iscandar, Kodai and Mori had planned to go on a date on the battleship's rear observation deck. But just before Kodai could join her, he was intercepted by Shima and Yamamoto, and the two joined the couple on their outing. Shima insisted on taking a few photos with the group. When it was Mori and Kodai's turn to take a picture together, Kodai tried to put his hand on her shoulder, but Mori playfully pinched him instead. He called her mean, but she jokingly scolded him, telling him not to be a crybaby and that it would make a good memory.[43]

Mori notices Sanada, but he stops her from getting up
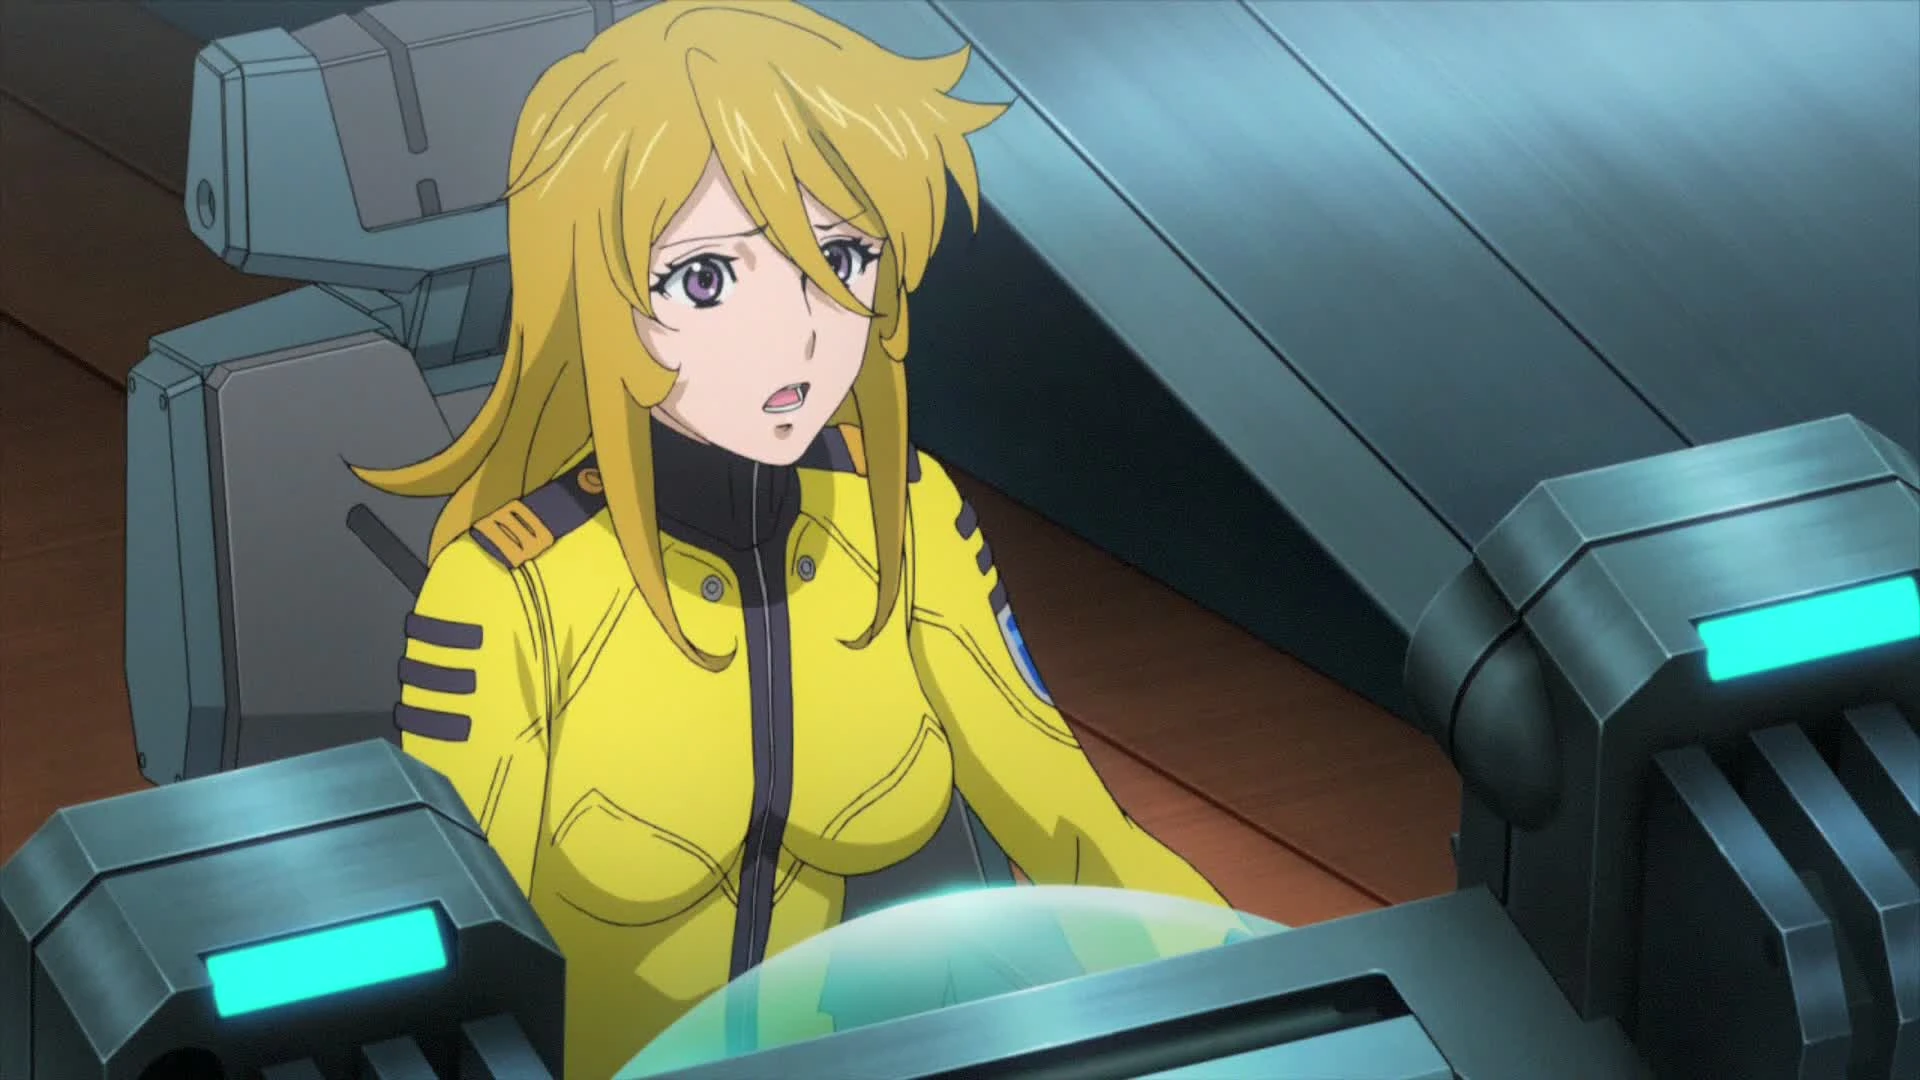
The tender moment was interrupted by a sudden attack from an unidentified strike force. Kodai, Mori and Shima rushed to the bridge, and, due to Sanada's temporary absence, Kodai took command and Mori manned his station. The enemy was identified as a fleet of warships from the Gatlantis Empire. During the ensuing battle, Mori noticed Sanada arriving on the bridge. However, he stopped her from surrendering her staiton to him, so that he could observe Kodai's tactics. Mori then analyzed a nearby planet and reported that it possessed a complex cavity structure. Kodai decided to use the cavernous planet to hide from the enemy rather than engage in a fight. As Yamato tried to maneuver through the planet's surface, a group of native life forms attached to it and began draining its energy. Mori suggested that the dimensional resonance of a warp could have dislodged the creatures, and Sanada agreed. In a bid to escape from both the Gatlantean fleet and the energy-feeding creatures, Yamato performed an emergency warp and managed to get away safely.[43]

Mori during the Battle of Shambleau
Not having calculated the warp's trajectory, the battleship unexpectedly ran in a dimensional fault containing a mysterious planet. The battleship went out of control and began being pulled in toward the world. Mori reported that the planet was surrounded by some sort of fluid, and Yamato stopped near a large cross-shaped monolith of seemingly artificial origin. Mori remained on the bridge while Kodai assembled a team to explore the planet's surface. However, after their vehicle descended into the planet's atmosphere, all communications were cut off and the planet was then surrounded by a physical black barrier, which made it impossible to contact Kodai, leaving Mori worried about his safety. Hours later, the Gatlantis force that attacked Yamato traced the ship's location and began bombarding the planet's dark surface. Mori reported that the structure was starting to crumble under the enemy's attack, and Kodai's vehicle was escaping through the cracks and returning to Yamato. A battle broke out between Gatlantis and Yamato, with Mori participating. The Terrans fought against the Gatlantean fleet with the help of a ragtag Garmillan force that Kodai's team had befriended during the recon mission.[43]
Despite heavy losses among the Garmillas, the battle was a success. Mori and the rest of the bridge crew saluted their allies as Yamato continued its journey toward the Earth.[43]
Trouble at the Galactic Theater Gate[]

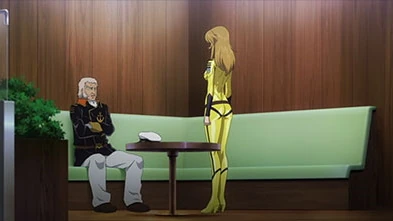
The embarrassed Mori after her colleagues spit out her coffee in disgust
In September, Yamato planned to travel to planet Balun to reuse the subspace gate to reach the Milky Way faster. At some point during the journey, Mori prepared some coffee for the navigation department staff, but much to her embarrassment, it ended up tasting badly.[12]
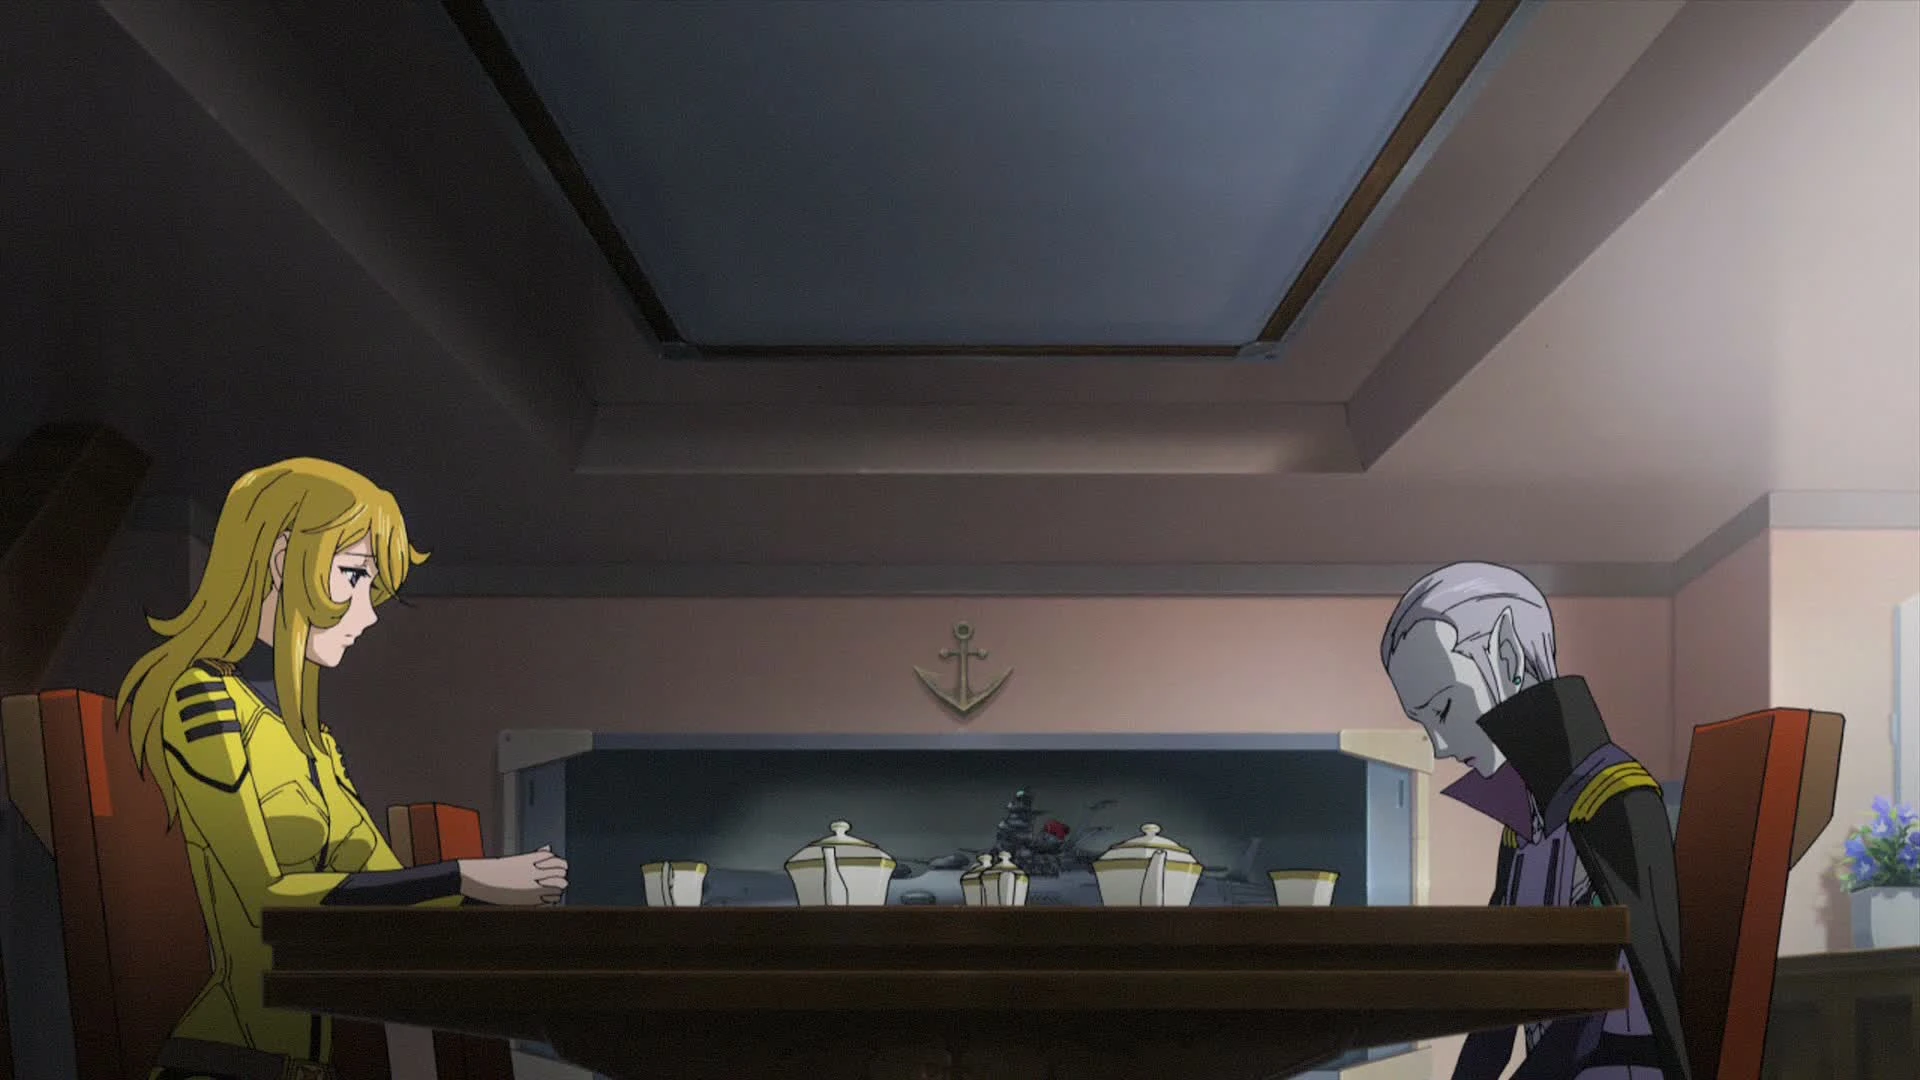
Mori listens to Celestella's desperate confession
On the way to Balun, Yamato picked up a Garmillas distress signal and rescued former minister Miezela Celestella. Mori was assigned to tend to the Jirel, and the two sat in Yamato's officers' room while being served some tea. Mori smiled, noting the similarities between the current situation and the time they'd spent on Garmillas, and informed Celestella they would repair her vessel and send her on her way. She listened as Celestella revealed her feelings about Leader Desler and how life on Garmillas had become unbearable now that he was gone. Celestella had no intention to return there, nor did she have any other home to return to since her people had been wiped out. Despite Mori confirming that Desler had died in the previous battle, she refused to acknowledge it, stating the Leader couldn't have died without her.[12]


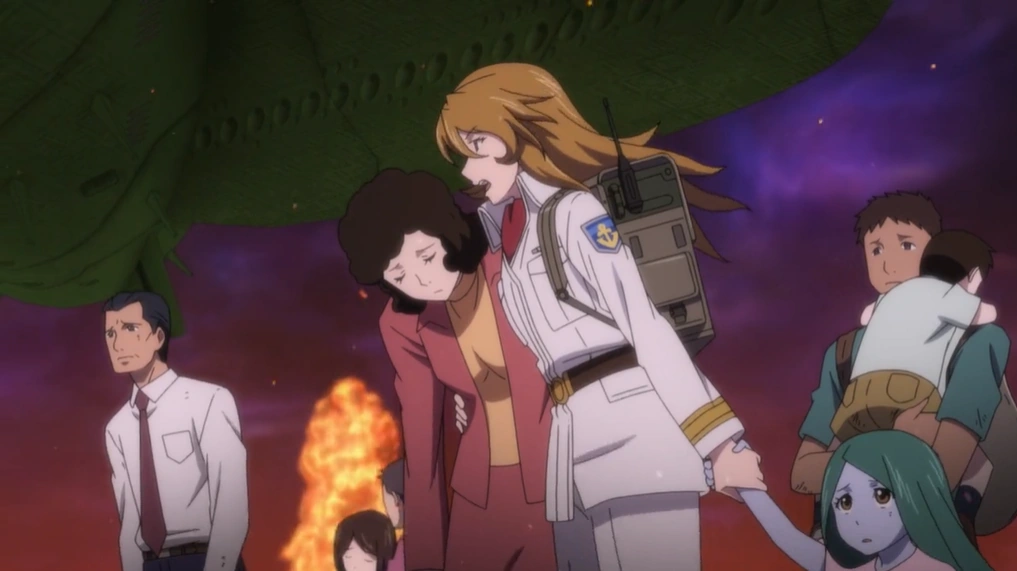
Desler captures Moro
Yamato was ambushed and boarded a short time later by rogue Garmillas forces headed by the surprisingly still-alive Desler. Mori and the security department escorted Celestella to Mori's private quarters. She apologized for not having a better place to keep her safe before leaving her to join the battle. An explosion near Mori temporarily stunned and disarmed her. As she tried to pick herself up, she was met and captured by Abelt Desler. She angrily refused his demand to be brought to Admiral Okita. As they struggled, Celestella suddenly appeared and joyfully called out to Desler, who spun around in terror and shot her. Mori broke down in tears, asking Desler why he'd do something like that to someone who loved him so much. She told him there had never been any need for Earth and Garmillas to fight and that their peoples could have cared for and loved one another..[12]
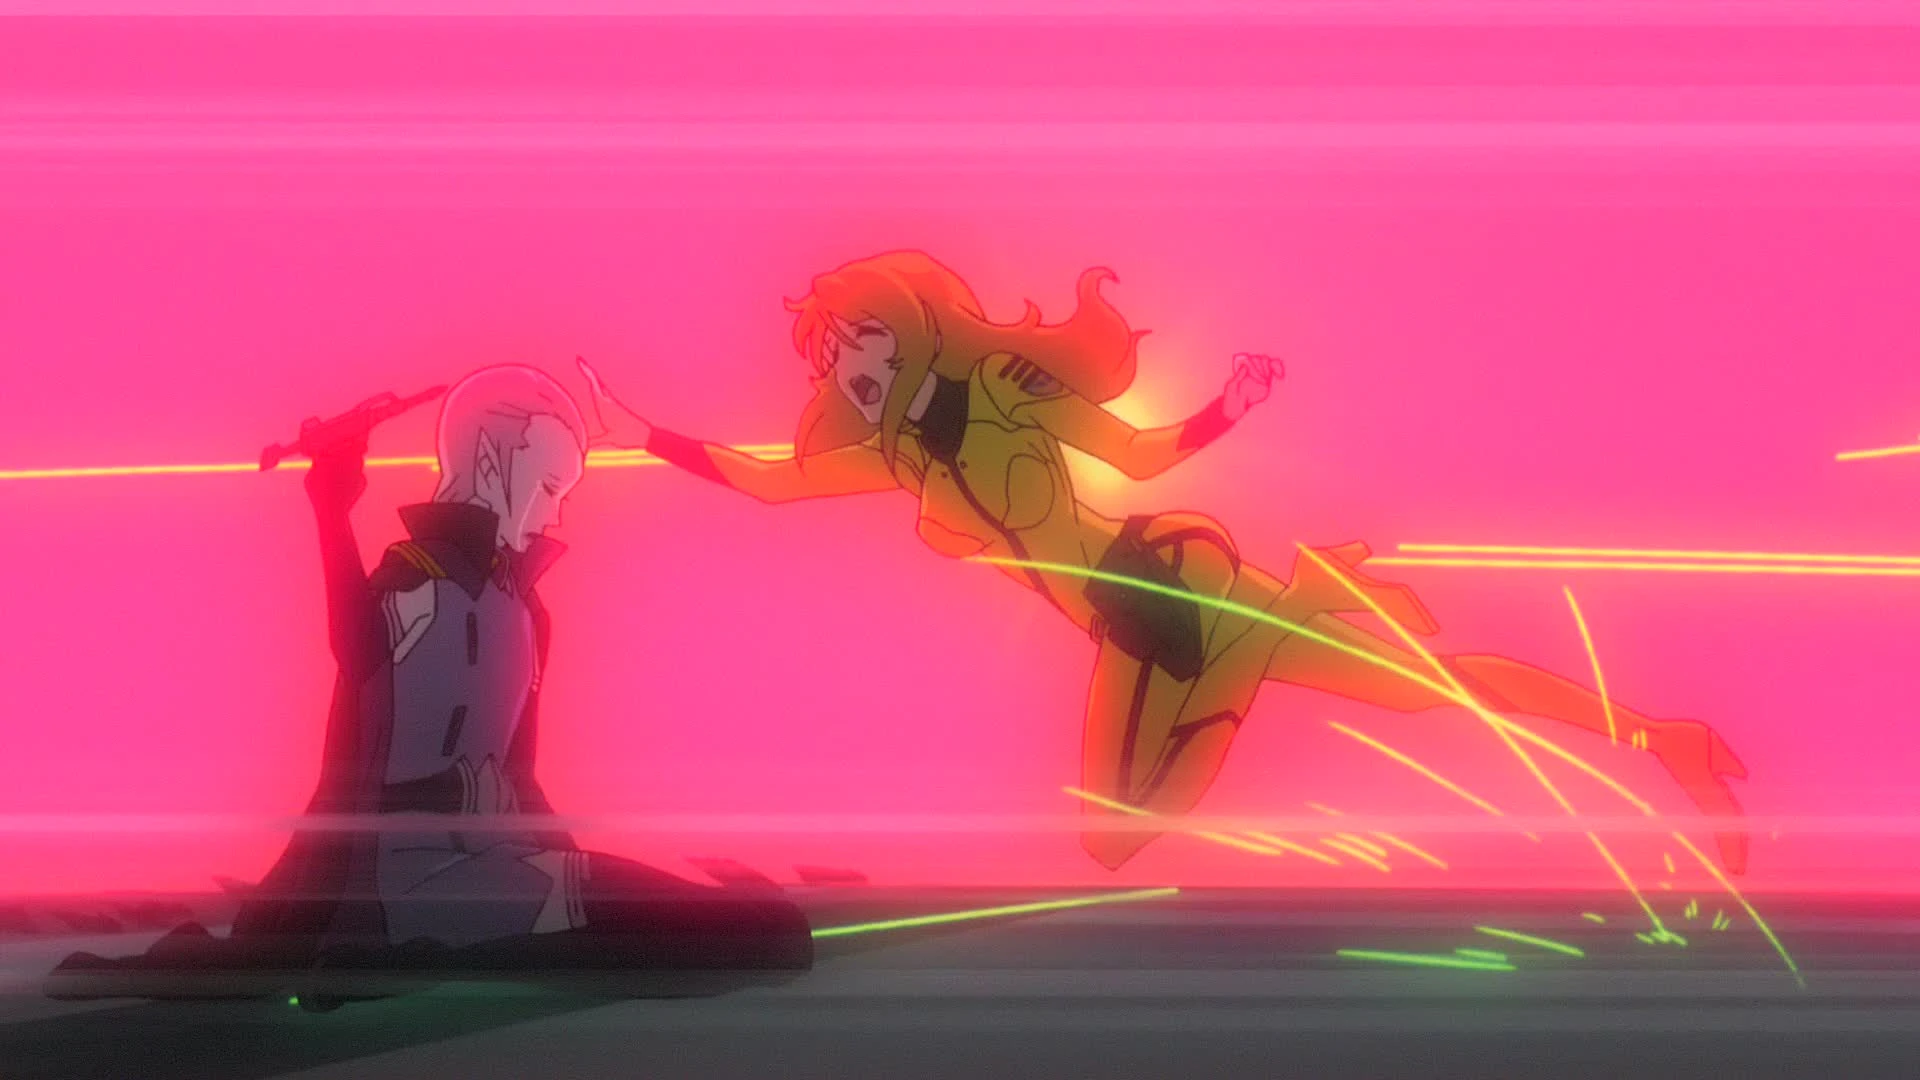

Celestella and Mori are gunned down
After a moment, a heartbroken Celestella recovered and put Mori's lost sidearm to her own head. Mori leaped toward Celestella to stop her, but Desler's bodyguards opened fire on both of them, killing the Jirel and gravely injuring Mori.[12]
The Gift[]
For the following months, Mori laid in a coma and was kept in the chamber that once housed Yurisha in hopes that she could survive until Yamato's return and get better treatment at a proper medical facility. She was watched over by the ship's medical team and Kodai. Their efforts failed, however, and she awakened just long enough to ask for Kodai before dying.[2]

Kodai welcomes Mori back from the dead
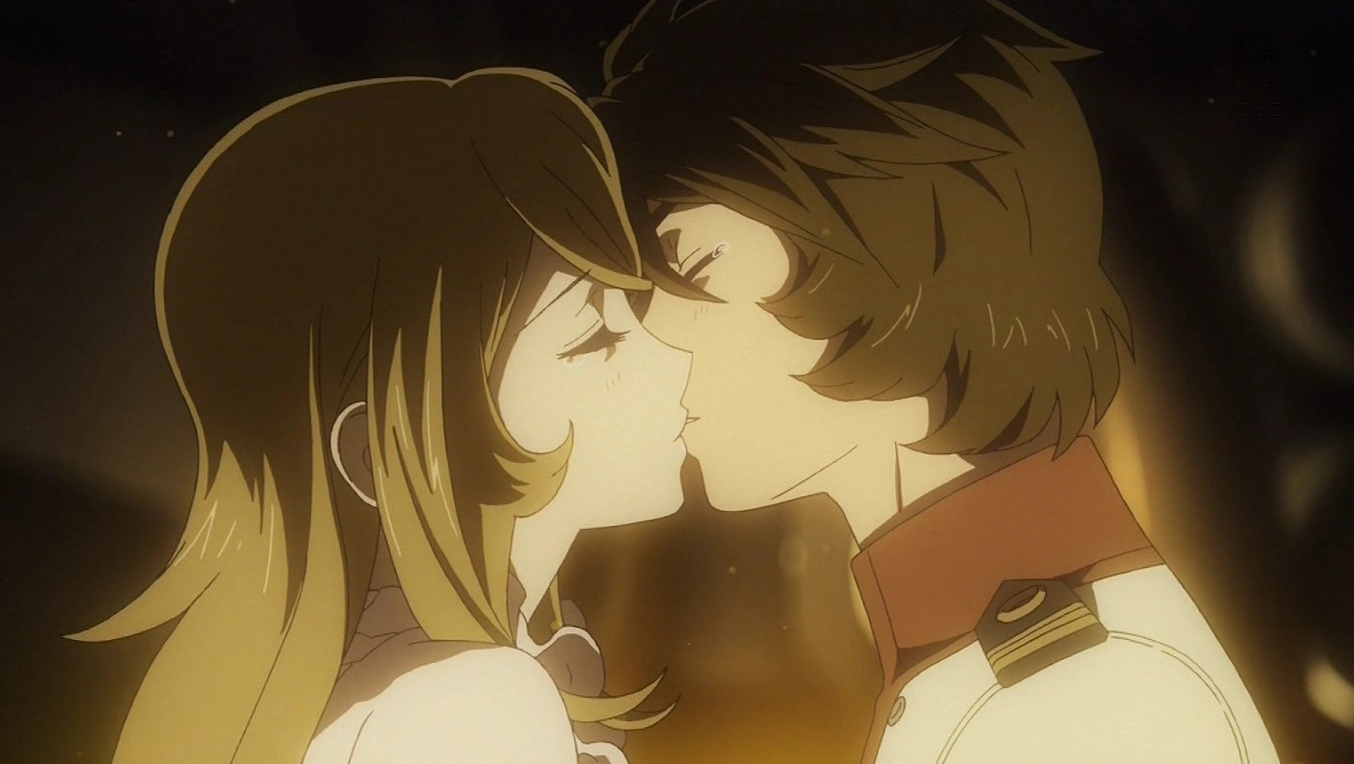
In order to maintain morale among the crew, Kodai requested that her passing be kept a secret. Unknown to them, a consciousness operating inside the Cosmo Reverse System took pity and self-activated the device, restoring life to Mori. Kodai, who was visiting her dead body, was greeted by a resurrected Mori asking him what had just happened. Kodai dismissed her death as a bad dream, and the two shared their first kiss.[2]

The couple walked to the first bridge, where they were greeted by their adoring shipmates and by the sight of Earth as the ship neared home.[2]
Opposing the Wave-motion Gun fleet plan[]
After Yamato's return, the Earth was restored to its original blue state,[2] and the Great Garmillas War ended.[4] Yamato was decommissioned and turned into a museum ship.[44] However, in 2201,[45] the newly-formed Earth Federation[46] proposed the Wave-motion Gun fleet plan, a rearmament plan that aimed to rebuild the Earth's forces by equipping ships with Wave-Motion Guns, despite Captain Okita's promise to Queen Starsha. Yamato was to be rebuilt and re-enter service as part of this plan.[4]

Mori and the rest of Yamato's officers discuss the rebuilding of the battleship
Mori and the rest of Yamato's former crew, supported by Admiral Hijkata, opposed this decision. As a result, the leaders of the Earth Federation Defense Force removed him from his post and sent him to a backwater base at the edge of the Solar System. Just before he left, Hijikata met with Yamato's officers, including Mori, and encouraged them to not give up hope. At a later meeting, the crew members discussed the situation, and Sanada announced his intention to rebuild Yamato as per his orders. This greatly angered Kodai, who hit Sanada in the face despite Mori and another officer trying to stop him.[47]
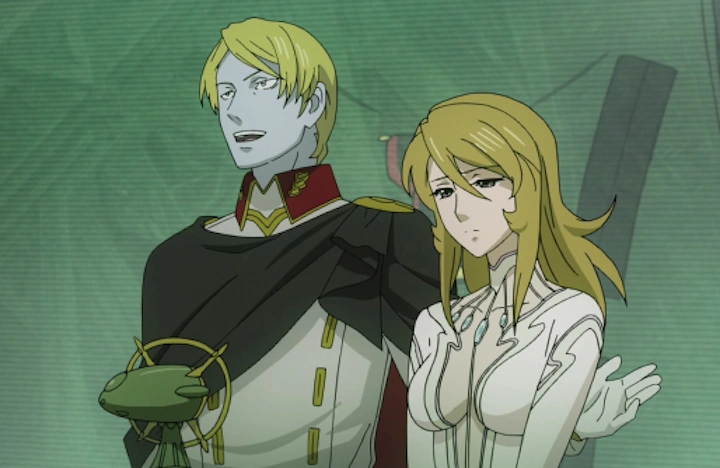
Despite this unfortunate event, Mori and Kodai continued to live their lives in relative peace and happiness. Mori continued to work with the Cosmo Force at the Earth Defense Force's HQ, and by late 2202, she and Kodai had gotten engaged.[4][48][49]
Teresa and Yamato's revolt[]
The 8th Floating Continent Recapture Operation[]
For this topic in more detail, see 8th Floating Continent Recapture Operation

Mori reacts to Plan A's announcement
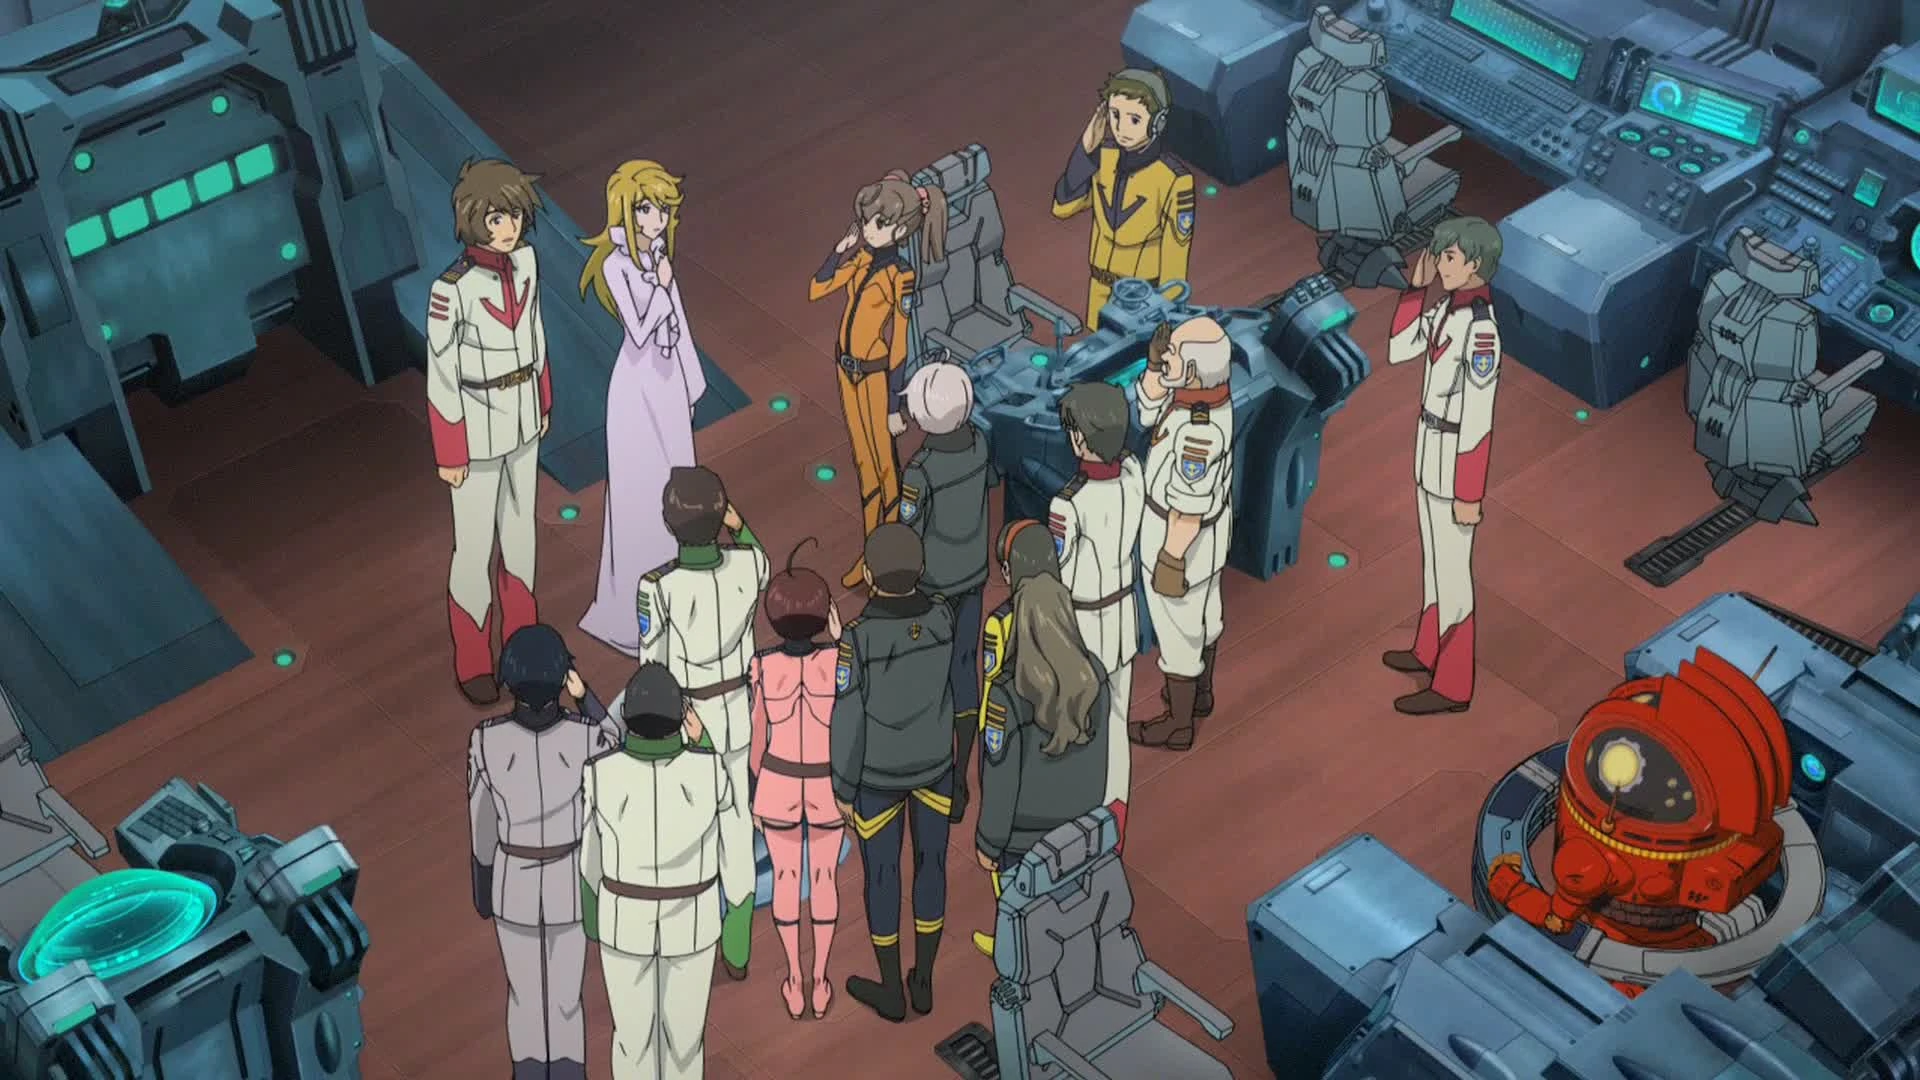
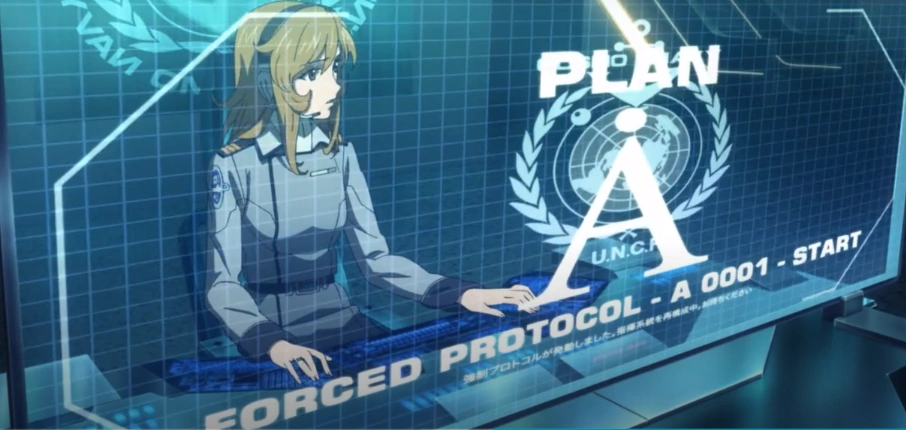
On December 2, 2202,[21] Mori monitored ship activity during a joint operation against Gatlantis Empire forces by the United Nations Cosmo Navy and the Garmillas Imperial Astro Fleet. Kodai also partook in the battle as Commander of the battleship Yuunagi. As the tide of the battle turned against the joint forces, Heikuro Todo, now General Commander-in-Chief of the Earth's military, and his deputy Kotetsu Serizawa activated Plan A. Much to Mori and her colleague's stupor, the secret directive had already been registered on the fleet's network, and it consisted in the debut of the Andromeda, the first battleship produced by the Wave-motion Gun Fleet Plan. Shocked and angered, Mori turned around to address Todo, asking him whether that was the response the Earth had matured to Starsha's begging.[4]

Mori took matters in her own hands and activated the evacuation program
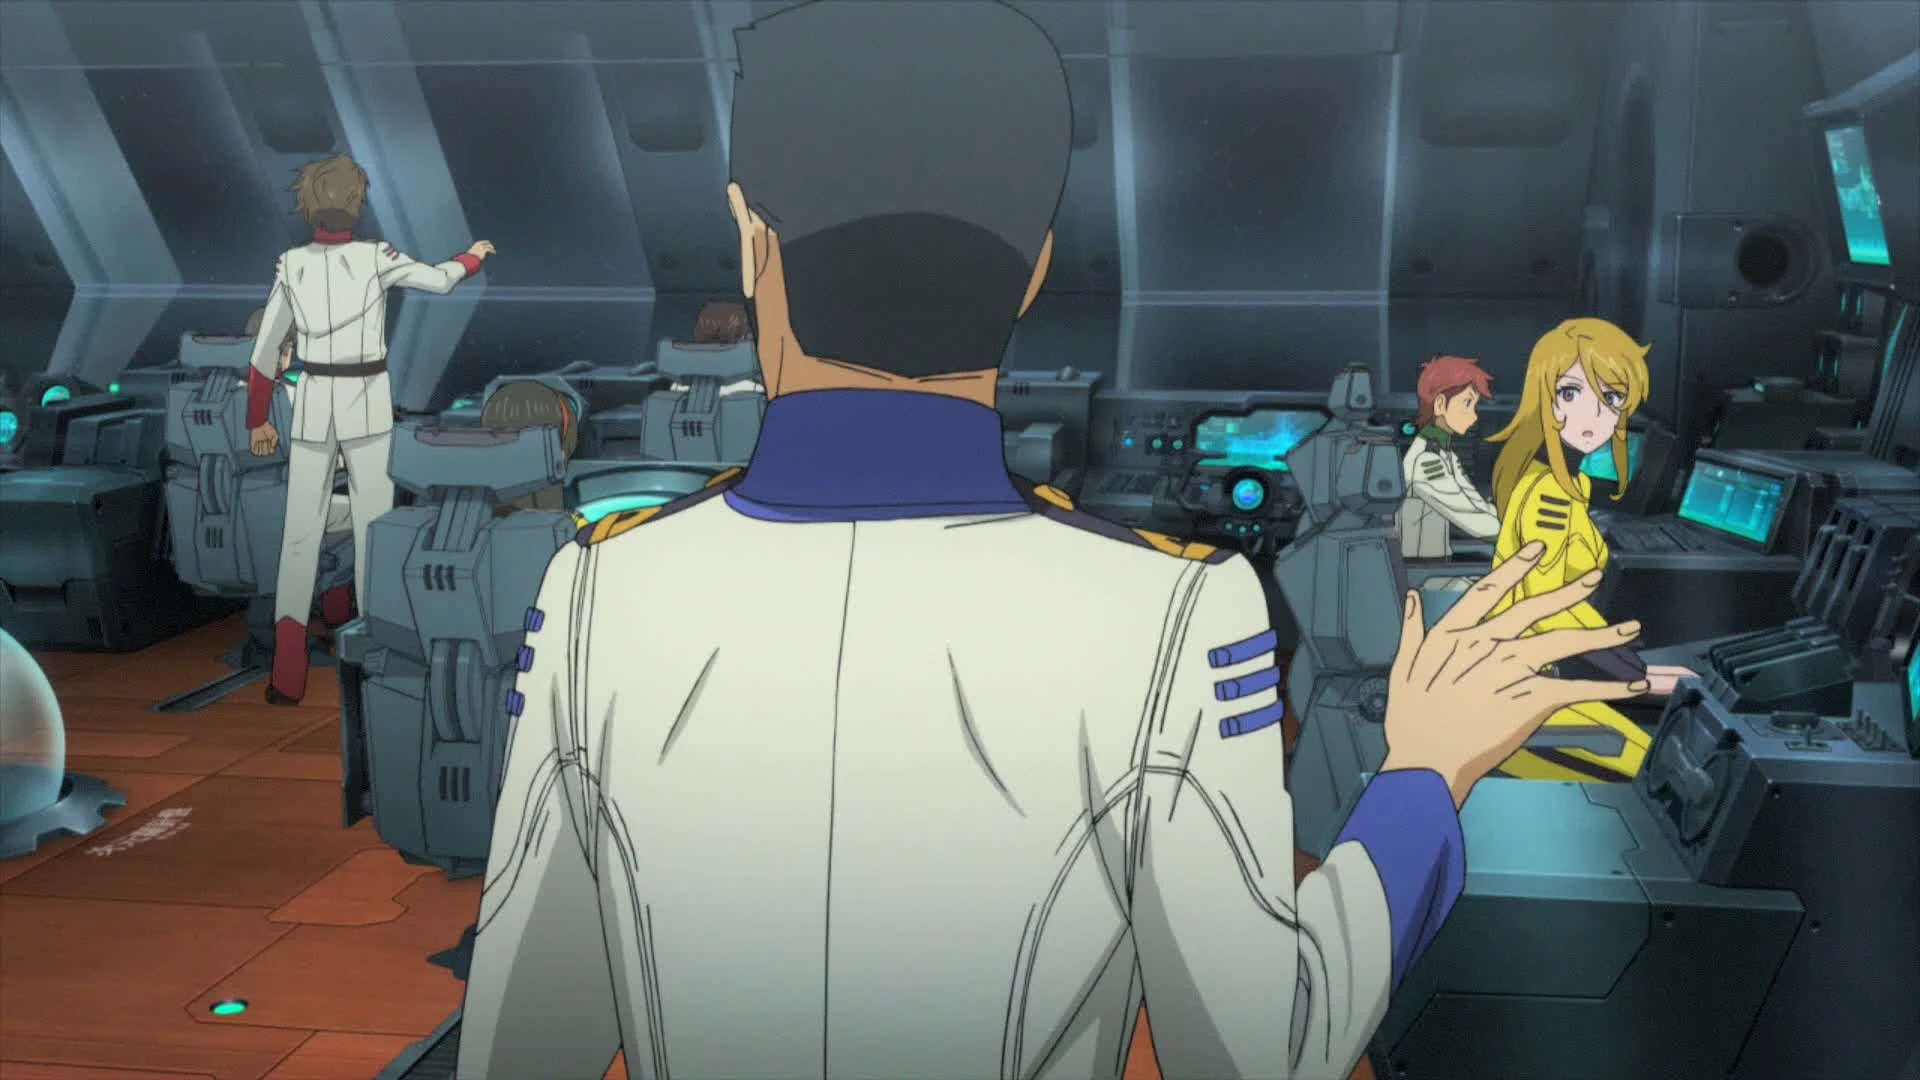
Even though Andromeda's superior WMG seemed to have wiped out all hostile forces, a lone Gatlantean battleship reactivated and warped to the orbit of the Earth. As the warship closed in on the Earth's new capital, threatening a suicide run, Mori activated the city's evacuation program. Without waiting for any order, Kodai warped back to the Earth to try and use Yuunagi to change the Gatlantean warship's trajectory. Although his efforts failed, Mori contacted him on a secret channel, and patched him through to Sanada. Their former superior had taken control of the still under-repair Yamato and intended to use Kodai's data on the battleship's trajectory to shoot it down from the Earth with Yamato's superior guns.[4]
Okita's anniversary and Teresa's call[]

Yuki and Kodai at the café
On December 8,[21] Kodai was court-martialed for his actions during the operation. Mori waited for him outside the courtroom, playfully saluting him as he left. While they drove toward the capital in their car, Mori tried to make him vent his frustration, ironically stating he should've rebutted his superiors' accusations as he was in the right. She yelled out that Kodai had just saved the Earth for the second time and that everyone should be grateful to him, also adding that it had worried her. Kodai apologized in a jokingly stern manner, causing them both to burst out laughing. Later, at a café, Mori commented on how the Earth almost looked like what it was before the Garmillas War, prompting Kodai to carelessly ask if she had regained any of her former memories. He immediately apologized, but Mori didn't care much, instead asking if he had any anxieties about marrying someone with only four years worth of memories. Kodai stated that those were the only years that mattered and that they would find their happiness. She stopped him and clutched his hand, proclaiming she was already happy.[48]

Mori and the crew salute Okita's statue
They later joined their former comrades of the Yamato crew at Hero's Hill, the monument where the body of the late Okita had been enshired, to celebrate the third anniversary of Yamato's return and the Admiral's death. The group saluted the commander's statue and remained at the monument until late at night. Mori found out at that moment that all members of the crew had received a vision of their dead loved ones, urging them to board Yamato. However, she had not been called by anyone, presumably because her memory loss meant she didn't have any actual dead loved one to talk to.[50] She separated from her friends and looked pensively at the sea before Kodai reached her. She asked him who he had seen in his vision, admitting she hadn't seen anyone.[48]

Mori at Doctor Sado's house
In the following days, the Garmillas Ambassador to the Earth contacted Kodai regarding the crew's visions and called him to the Garmillas lunar embassy. Mori remained on Earth, once again questioning her identity and why she hadn't been sent any message, unlike her former companions. To sort out her worries, she visited Yamato's former Chief Medical Officer, Doctor Sakezo Sado. He mentioned having heard rumors about Kodai's escapade, but Mori was certain he would be alright. Sado stated that it did not matter who Mori was since everyone knew her very well. He went on to say she had no doubts when it came to believing in Kodai, and that was who she was. Heartened, Mori asked the Doctor if he had seen anyone in his vision, with Sado replying he had seen his cat's ancestors.[51]

Mori runs away from Kodai
After returning to Earth, Kodai met with the former officers corps of Yamato. The Ambassador had revealed to him their shared visions were a message from the goddess Teresa of planet Terezart. Convinced that the goddess was calling them for help, Kodai and the rest of the crew decided to board Yamato once more, even if it meant going against the Earth Federation's wishes. The group was also told about the existence of the time fault, a hidden area of time distortion where the E.F. had set up a large military factory. Mori and Kodai began preparing for their upcoming departure. Mori mentioned that she needed to get some spare clothes, but Kodai stopped her and asked her to stay behind on Earth. Mori was confused and asked him why he was treating her differently from anyone else. She asked if Kodai's concerns were because she did not receive Teresa's vision, but he replied that he did not want to drag her into a rebellion. He tried to grab her hands and convince her to listen, but Mori refused and ran away, telling him that they knew nothing about each other. As she left, she removed her engagement ring.[51]
Despite Kodai's predicament, Mori secretly boarded the battleship with Sado and Yamamoto's help, for the following days, she assisted Sado as a nurse.[51] During the Battle of the eleventh planet, she listened to Kodai as he vented his frustration about having to fire the Wave-motion Gun to Sanada.[52]
Terezart and the Gatlantis War[]
The battle on Stravaze and reconciling with Kodai[]

Mori cofronts Kodai while undressing
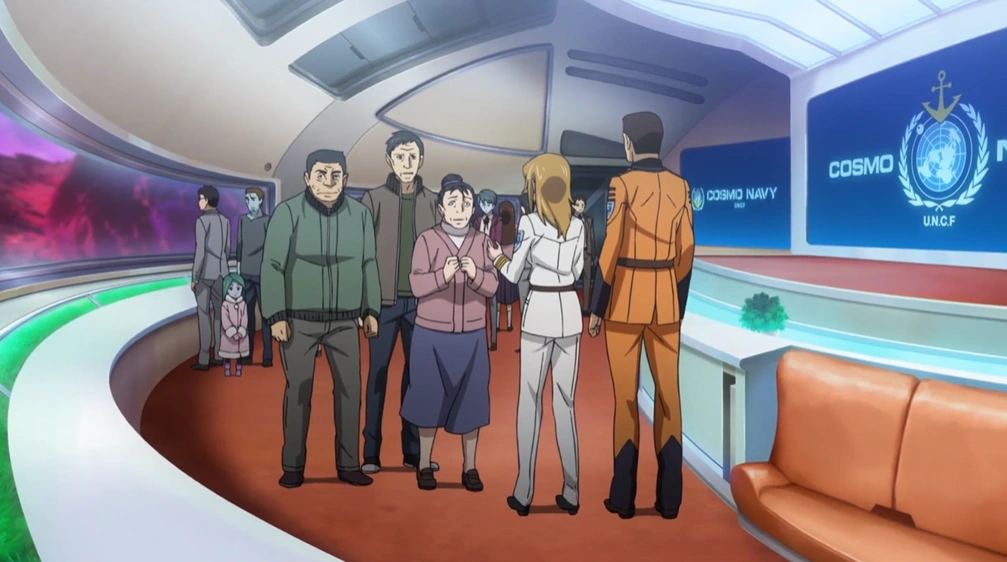
In the aftermath of the battle of the eleventh planet, Mori ran into Kodai along Yamato's corridors and he followed her to Sado's office. Sternly, Mori asked Kodai to remain silent when entering the med bay. Trying to stay formal, Kodai asked her to identify herself, stating she wasn't on the personnel list for this journey. Even though Sado tried to claim it was a mistake, Kodai, who was now serving as Yamato's acting captain, claimed he couldn't maintain military discipline in these conditions and asked Mori to leave the battleship. Mori accepted the order. She told Sado to attend to his more urgent matters and began removing her uniform, embarrassing Kodai and breaking his act. He confusedly asked what she was doing, to which Mori coldly replied that she had been ordered to leave and that she'd find her way home even if it meant having to space-walk from the eleventh planet to Earth. Faced with this dangerous and outlandish proposal, Kodai asked Mori to stop and gave her a new order. Yamato had rescued 200 refugees, as well as multiple military personnel, including Admiral Hijikata, from the previous battle and would leave them in the care of a Garmillas fleet on the nearby planet Stravase. Mori was tasked with tending to the civilians and escorting them from one vessel to another.[53]

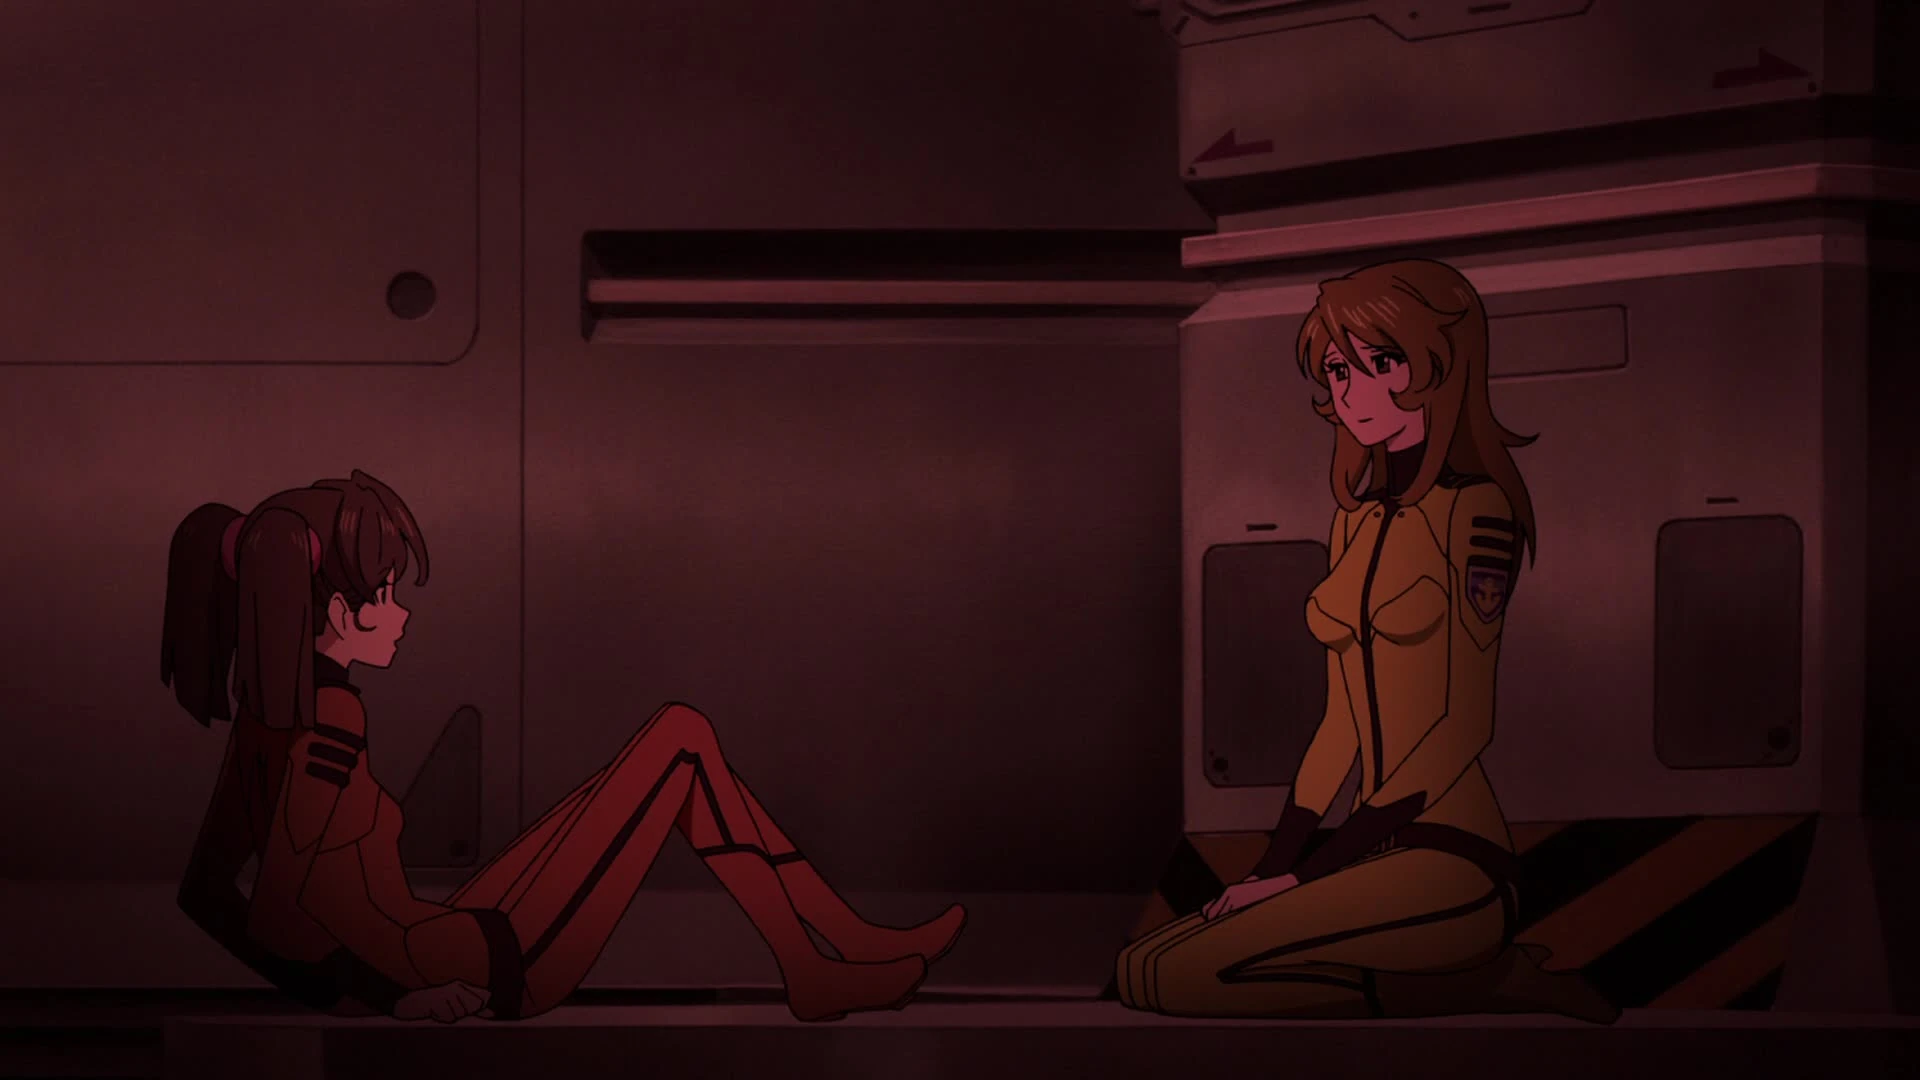
Mori and Yamamoto have a talk on Yamato's open air deck
Before Yamato departed, Mori stood on the ship's hull contemplating the night sky. Yamamoto interrupted her musings, jokingly asserting that her cover had been blown. Mori apologized for wasting their efforts to hide her. Yamamoto hand-waved her worries, telling her the bond between Yamato's female crew was strong, but questioned why she would allow herself to be found out. Mori told her she just needed some fresh air before remaining pensively silent for a moment and adding that there was a limit to things. Yamamoto asked if she was talking about Kodai, but Mori replied she was referring to herself. She said she knew that revealing herself would probably get her thrown out but stated that she didn't want to remain a burden for the rest of the crew. With a sad smile, she added that as long as she was on board, she'd try to prove to Kodai she was there for him. The two laughed, and Yamamoto concluded she was envious of the couple.[53]

Mori and Lt. Hirata reassure the refugees
As Yamato warped-out near Stravase, Mori entered the ship's first bridge to report for duty. Still keeping up the formal facade, Kodai told her that if no problems arose, they'd begin the transfer as soon as the ship landed. Once again, Mori coldly acknowledged her orders. She left to tend to a group of passengers, worried about journeying back to Earth aboard Garmillan vessels. Mori tried to reassure them by saying she'd be aboard with them. However, their worries were only quelled by Second Lieutenant Hajime Saito, the commander of a UNCM regiment that Yamato had rescued during the previous battle. Mori asked for a word with him, after which Saito left. As he passed by Kodai, he congratulated him on having found himself a "responsible and attractive woman". While on the ground, Mori was entrusted with a short-distance communication device that would allow her to stay in contact with the other ships without using the Garmillan lines. She thanked Shiori Nagakura, the Cosmo Marine tending to her, but asked why she would be given such equipment. She was answered that Saito had insisted on it.[53]

Mori leads the refugees to their shios
As she prepared to leave, Kodai ran out of Yamato to talk to her one last time, but at that moment, someone stole a plane from one of the battleship's hangars, forcing Kodai to leave aboard a recon plane to go after the thief. Coincidentally, Stravase fell under attack from a rogue Garmillan rebel group, and the bridge linking Yamato to the Garmillas patrol ships was destroyed. Mori proceeded to escort the refugees to their ships as she had been ordered to, telling them to split into three groups and board whatever ship they could, since they were all heading to Earth, before boarding one herself and watching as the battle raged on.[53][54] As the planet began collapsing under the explosions of multiple Interplanetary Ballistic Missiles, Kodai opened communications with the Garmillas vessels. The thief he was chasing had turned out to be under the control of the Gatlantis Empire, and he was used by the nation's sovereign, Great Emperor Zworder, to communicate with Kodai. He had revealed to him that a Gatlantean suicide bomber had been hidden in each ship and that Kodai could choose to only save one. After addressing the refugees, revealing only that an unexpected situation had arisen, but that Mori would be with them to Earth, he began talking directly to Mori. He asked her for forgiveness for his previous actions, admitting they had been brought on by his fear of losing her, and revealed to her how happy he had been to find her on Yamato. He added that whatever would happen then had nothing to do with her, but that he could not stand the idea of losing her.[54]

Kodai rescues Mori
Mori tried to contact Kodai to no avail before turning to the Cosmo Marines to ask what had happened to him during the chase. Sensing Kodai was going to make a horrible decision for her sake, Mori chose to eject herself from the ship, falling down as the planet exploded. Now, Kodai couldn't bring himself to choose any of the ships, so Zworder sabotaged all of them. Fortunately, Hijikata and Sanada intervened quickly, reversing the planetary collapse, and leaving the vessels floating in space. Meanwhile, Kodai flew his recon plane to rescue Mori from falling to her death. They held each other in the cockpit of the damaged vehicle, and Kodai asked Mori to marry him once again. Mori asked him how many times he wanted her to say yes before hugging him and telling him to never let her go. Later, Kodai fell asleep, and they were located by Yamamoto from her fighter before being rescued and taken on board.[54]
Crisis of the space fireflies[]

Mori visits Hijikata
Sometime after their rescue, Mori convinced Kodai to undergo a medical examination by Doctor Sado. He confirmed the captain was physically healthy, but both the doctor and Mori were worried about his mental state, as the stress of captainship had started taking a toll on him. After an officers' meeting and a call from headquarters, both of which were attended by Mori, Kodai agreed with HQ's proposition to use Yamato to gather info on the White Comet, a gigantic pulsar seemingly tied to the Gatlantis Empire, which was heading directly toward the Earth. Mori was unsure of the mission, but Kodai reassured her the battleship was not changing its objective and that they would continue as planned. She later visited Hijikata in his room, where he was being treated for the wounds he had sustained on the 11th planet, and she overheard a conversation between him and Sado talking about Kodai's situation and how the fear of having to use the Wave-motion Gun was affecting him profoundly. She interrupted them, and Hijikata heartened her by saying he was sure Kodai would make it and that she would have to support him the most.[55]

Mori and Kodai talk to Hijikata
Yamato was suddenly invaded by a swarm of flying creatures similar to fireflies, which affected the crew's mood. The creatures infected Mori, but she was broken out of their control by Nagakura. Kodai and Saito had fallen under the fireflies' influence and were about to start fighting each other. She intervened to break the fight apart, but ultimately, the creatures were neutralized by Sanada's efforts. After the crisis was dealt with, Yamato's crew received yet another vision from Teresa, and Mori was again left out of it. She and Kodai later visited Hijikata and asked him to join the crew officially. Much to Mori's dismay, he replied that he was a loser, a predicament he had started to develop after his exile and his defeat on the 11th planet. However, he stated he wanted to tag along, as he had seen the vision.[55]
Battling the White Comet Empire[]

Mori talks to Hijikata about transferring captainship to him
As the Yamato was en route to Terezart, it was suddenly attacked by a fleet of Gatlantean ships. Mori was present on the bridge when the battleship was surrounded by a swarm of missiles, and the crew was forced to warp away. However, they ended up falling inside a dimensional fault. Once again, Hijikata came to the rescue and helped Kodai and the bridge crew escape the dangerous situation. Mori then asked Hijikata to take command of the battleship moving forward, but the Admiral refused, stating that he was merely helping them out of an enemy trap that he had partially helped them fall into. Mori tried to object, stating that Kodai believed Hijikata to be the fittest candidate for the position. But Hijikata declined and said that Kodai would have to overcome the difficulties himself. However, he added that just like Mori's parents had been there for each other their whole lives, Mori could do the same for Kodai now.[56]

Mori observes Katsuragi's interrogation
Sometime later, the Yamato encountered the White Comet and was caught in its gravity field. Although no battle broke out, it became clear that the celestial body was the Gatlantean capital. Mori was present on the bridge during the encounter and later listened as Hijikata briefed the crew on the orders they had received from HQ after Earth had received their report.[57] During the ordeal, it was revealed that Toko Katsuragi, a civilian who had been rescued on the 11th planet and left behind on Yamato after the events on Stravase, was a Gatlantean spy. Katsuragi was apprehended and later interrogated by Kodai in the presence of Mori and the rest of the officer corps. However, no significant information was shared by the prisoner, except for her real name, Shifual Saberah. Sanada noted that she was not a Gatlantean or a human that had been tampered with by the empire. Saito and Hijikata explained that any other Gatlantean would have blown themselves up rather than been captured, indicating that Saberah was unique. Sado also observed that she had reproductive capabilities, which went against what the Terrans knew of Gatlantean biology and society.[58]
War on Terezart[]

Mori gives Yamamoto the news of Jiro Tsurumi passing away
On March 2203,[21] Yamato closed in on Terezart, and the crew planned a strategy based on the information they had received on the planet. The plan was explained during an officers' meeting. As Hijikata recounted the dangerous nature of their mission, Mori looked at Kodai worried but was reassured after the Admiral commented that the element of surprise could help them achieve victory. The operation started on March 26.[21] During the battle, a series of unforeseen events left Yamato with no option but to fire the Wave-motion Gun directly at the enemy forces, much to Mori and everyone else's dismay. She was surprised as the other officers on the bridge began expressing their camaraderie to Kodai, who was preparing to fire the weapon, but quickly resumed her composure in support of her fiancée.[58] Afterward, Mori departed from Yamato aboard a Cosmo Seagull to rescue an injured pilot from the surface of Terezart, where the vanguard had engaged against a Gatlatean tank division.[59] She later assisted Sado and another nurse in an attempt to save the boy's life, but all their efforts failed, and the young airman died aboard Yamato. She was the first one to come out of the operating room, where Yamamoto had been waiting for news on her subordinate's condition, and she silently let her know of his passing.[60]

Mori senses Teresa
In the aftermath of Yamato defeating the Gatlantean occupational forces, Leader Abelt Desler was revealed to be still alive and at the head of a large fleet, which imposed a blockade around the planet. Mori continued to help the Medical Department deal with the injured. While working, she heard Teresa speak to her directly, who cryptically stated that all the bonds had been put in place. As she returned to the main bridge, Hijikata noticed her breathlessness, and worriedly asked her what had happened. She reported to him the goddess' message: "Don't forget". After the end of the hostilities, she welcomed Kodai and Sanada back on board from a trip to Teresa's sanctuary. She and Kodai later stood on the bridge, holding hands as they looked at the disappearing Terezart.[60]
Another amnesia[]

Mori is shocked upon hearing Hijikata's evacuation order
After freeing Terezart, Yamato headed back to the Solar System to prepare for an incoming Gatlantean invasion. As the battleship approached its destination, it received a large quantity of data from HQ, including some messages to the crewmembers from their families, which Hijikata asked Mori to relay to their recipients. Later, she was present when Sanada explained to the bridge crew that he had developed a boosted variant of the Wave-motion Gun, which they could only fire once.[61] They planned to use it against the White Comet, which was preparing to engage the UNCF forces at Saturn. However, as the ship warped out near the ringed planet to face off against the Gatlantean capital, Katsuragi managed to sabotage Yamato's engine, rendering the ship immobile and making it fall prey to the White Comet's gravitational forces.[62] After Mori reported the ship was only 8000 leagues over the capital, Hijikata ordered all hands to abbandon the ship.[63]


Mori is hit as she tries to push Yamamoto out of harm's way
Mori went to Katsuragi's cell to try and persuade her to evacuate, but Katsuragi refused to move, convinced that she had lost all purpose to her Emperor. Mori asked Yamamoto for help, but the gravitational forces soon began affecting the brig's roof, which started to fall apart. Mori managed to push Yamamoto out of danger but was hit by the falling ceiling and fell unconscious. After Yamato crash-landed on an unknown planet, Mori was found and taken to the med bay, where she was put to rest. Kodai watched over her but eventually fell asleep. Mori's injury caused her to regain her lost memories from before 2198, but in an ironic twist of fate, this also made all her memories after the incident with Yurisha completely disappear.[63]

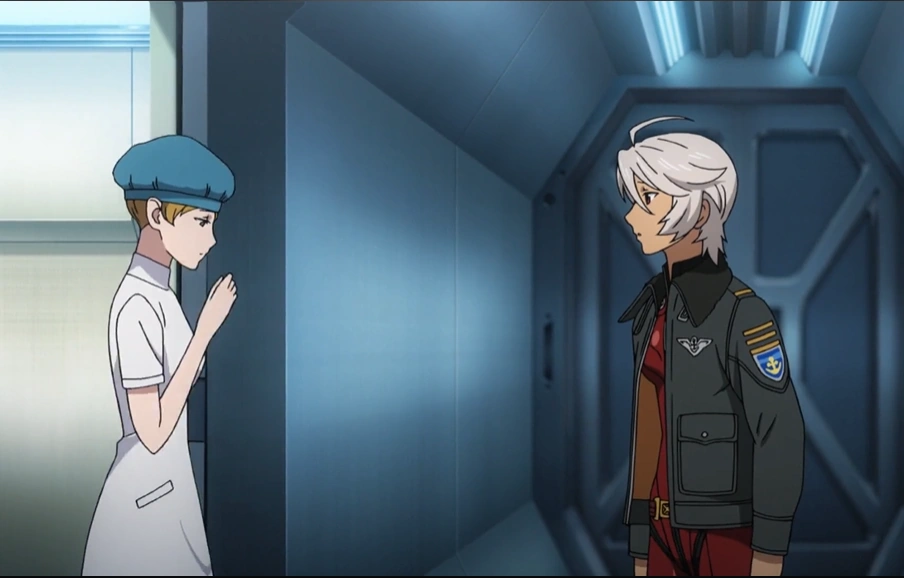
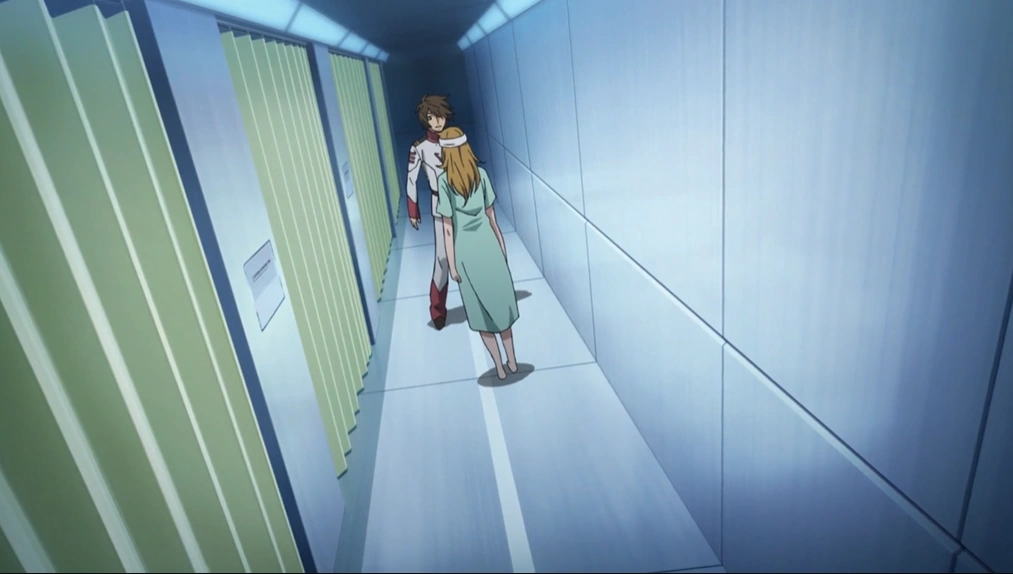
Kodai discoveres Mori has forgotten him
Later, Mori woke up and was confronted by Saito, who was currently being possessed by Emperor Zworder. From Saito's eyes, Zworder used his psychic abilities to inspect Mori's mind and found out about her memory loss, and decided to let her go. Kodai noticed that Mori had woken up and caught up to her in the corridor next to the infirmary. He offered to contact Doctor Sado, but he was horrified to find out that she had no memory of who he was.[64] Afterward, Mori went into Yamato's video room to view the journals Okita recorded during the journey to Iscandar. She listened as the deceased captain detailed her capture by the Garmillas forces and her rescue during the battle on Garmillas. She looked up at Kodai's picture in the log before looking down at the engagement ring on her hand with a blank expression. Mori then went to the bridge and was reintroduced to her duties by Miki Saijo. She apologized for her memory gap, but Saijo tried comforting her by saying her memories would come back with time. Mori looked at Okita's basrelief, installed over the captain's seat. When Saijo explained who the man was, she replied that he knew his name and that he had died in battle aboard Yamato, but outside of these facts, she had forgotten everything about him too.[65]

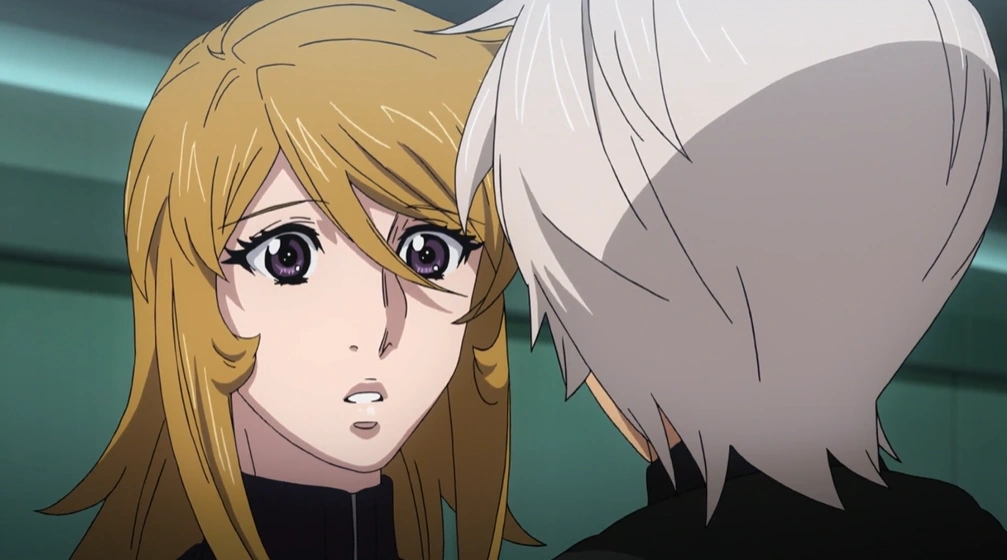
Mori and Yamamoto discuss Kodai
Yamato eventually escaped from the White Comet[66] and was anchored at an emergency drydock on Mars to be repaired. During the battleship's stay at the dock, Mori ran into Kodai as he left the main elevator, but the two only glanced at each other and exchanged no words. She then helped Doctor Sado with the transfer of an injured officer from Yamato to a transport craft. Mori also participated in a later strategic meeting, where the crew discussed their plans for the coming confrontation with the Gatlantis Empire's capital. Having come to know of a device that could kill all Gatlanteans instantly thanks to Katsuragi's confession and information retrieved while inside the White Comet, Yamato planned to assault Zworder's throneroom and activate the weapon to win the war in one swift move. Despite the tragic situation and the Gatlantean forces closing in on the Earth, Kodai suggested a diplomatic approach, using their attack to convince the Great Emperor to cease his war effort. Mori was surprised by Kodai's insistence and questioned Yamamoto on why he would push on alone for such a solution despite everyone being opposed to it. Her friend answered that was the nature of the man she had loved and that she had never seen a more loving couple than them in her life.[67]
A love that breaks all barriers[]
For this topic in more detail, see Battle against Neu Deusura
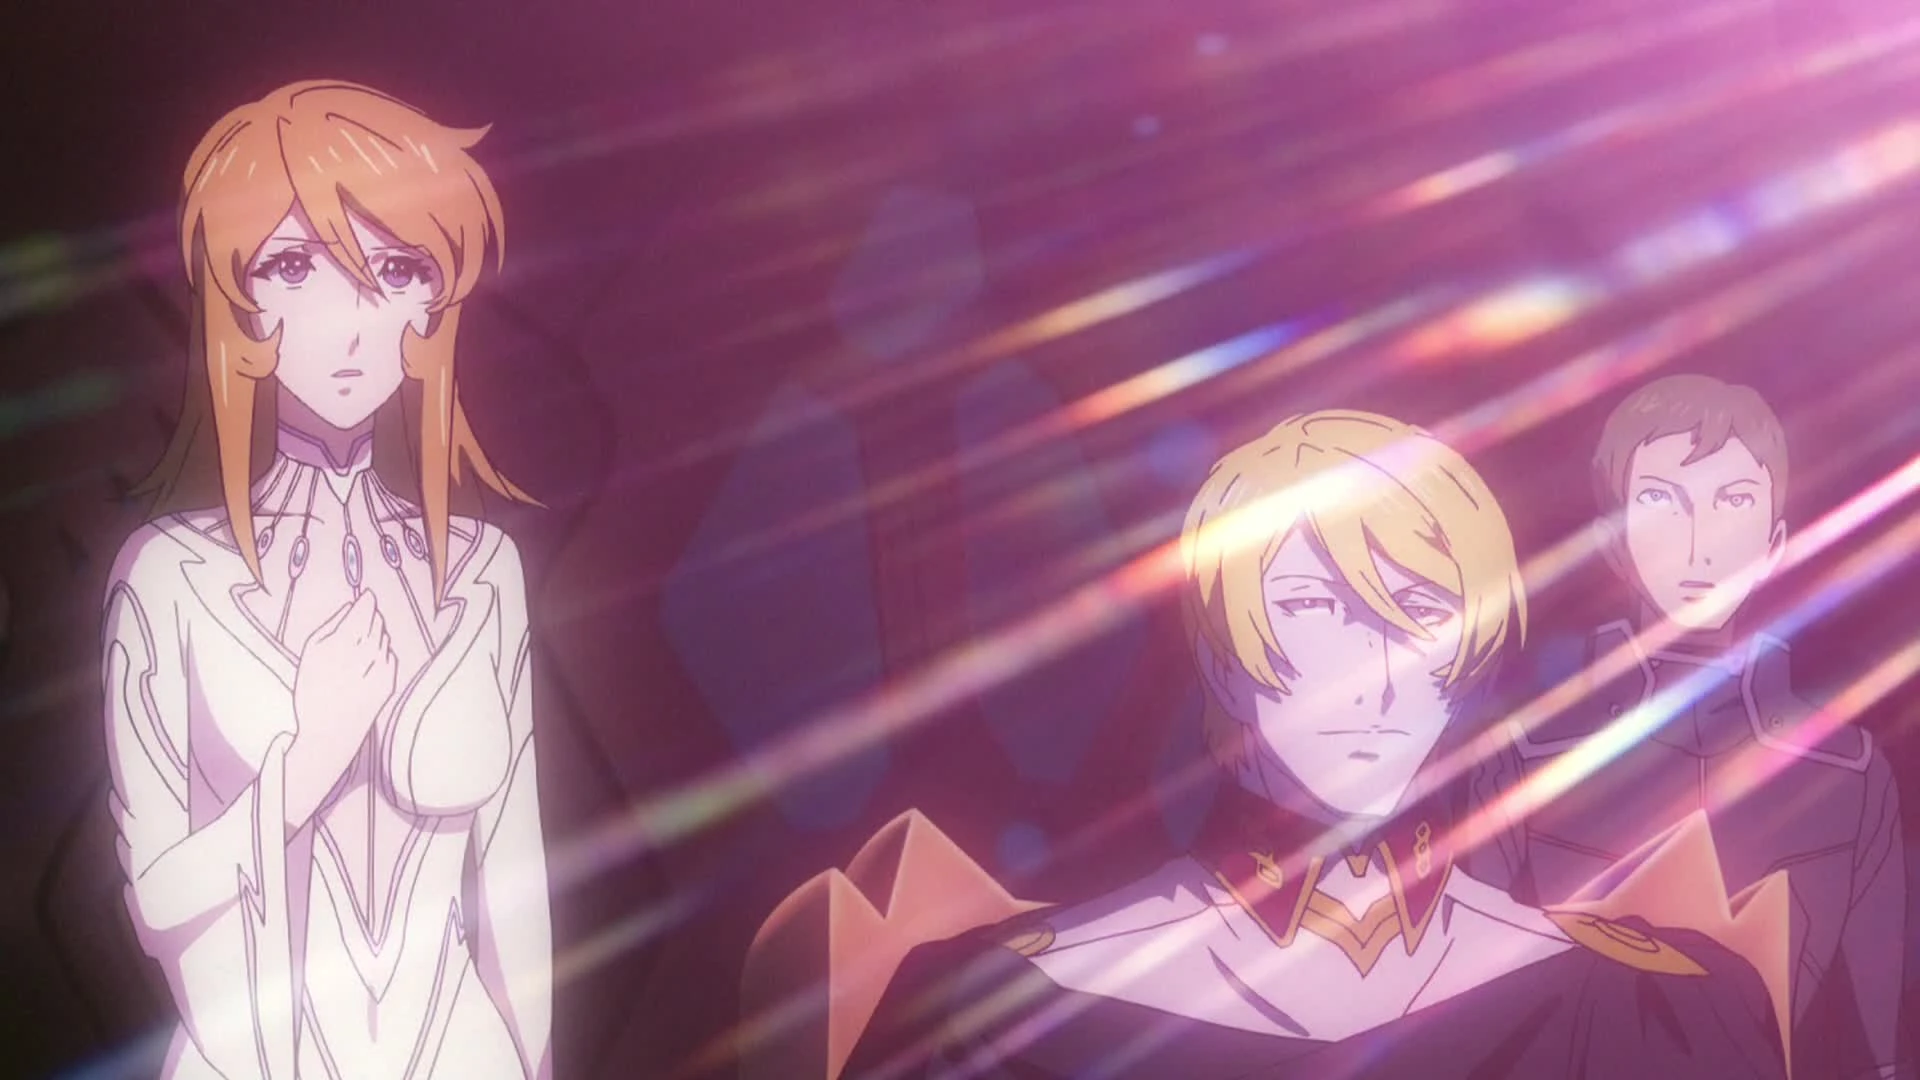
On June 1,[21] as Yamato approached the inner Solar System, it fell under attack from Desler's flagship. The Leader was now in service under the Gatlantis Empire in an attempt to secure their support for finding a new home planet for his people in place of the dying Garmillas. Mori was initially stationed in the med bay with Dr. Sado, looking over an unconscious Katsuragi, but as she heard that Kodai would lead the boarding of the enemy ship, she stood up to join the assault force.[67]
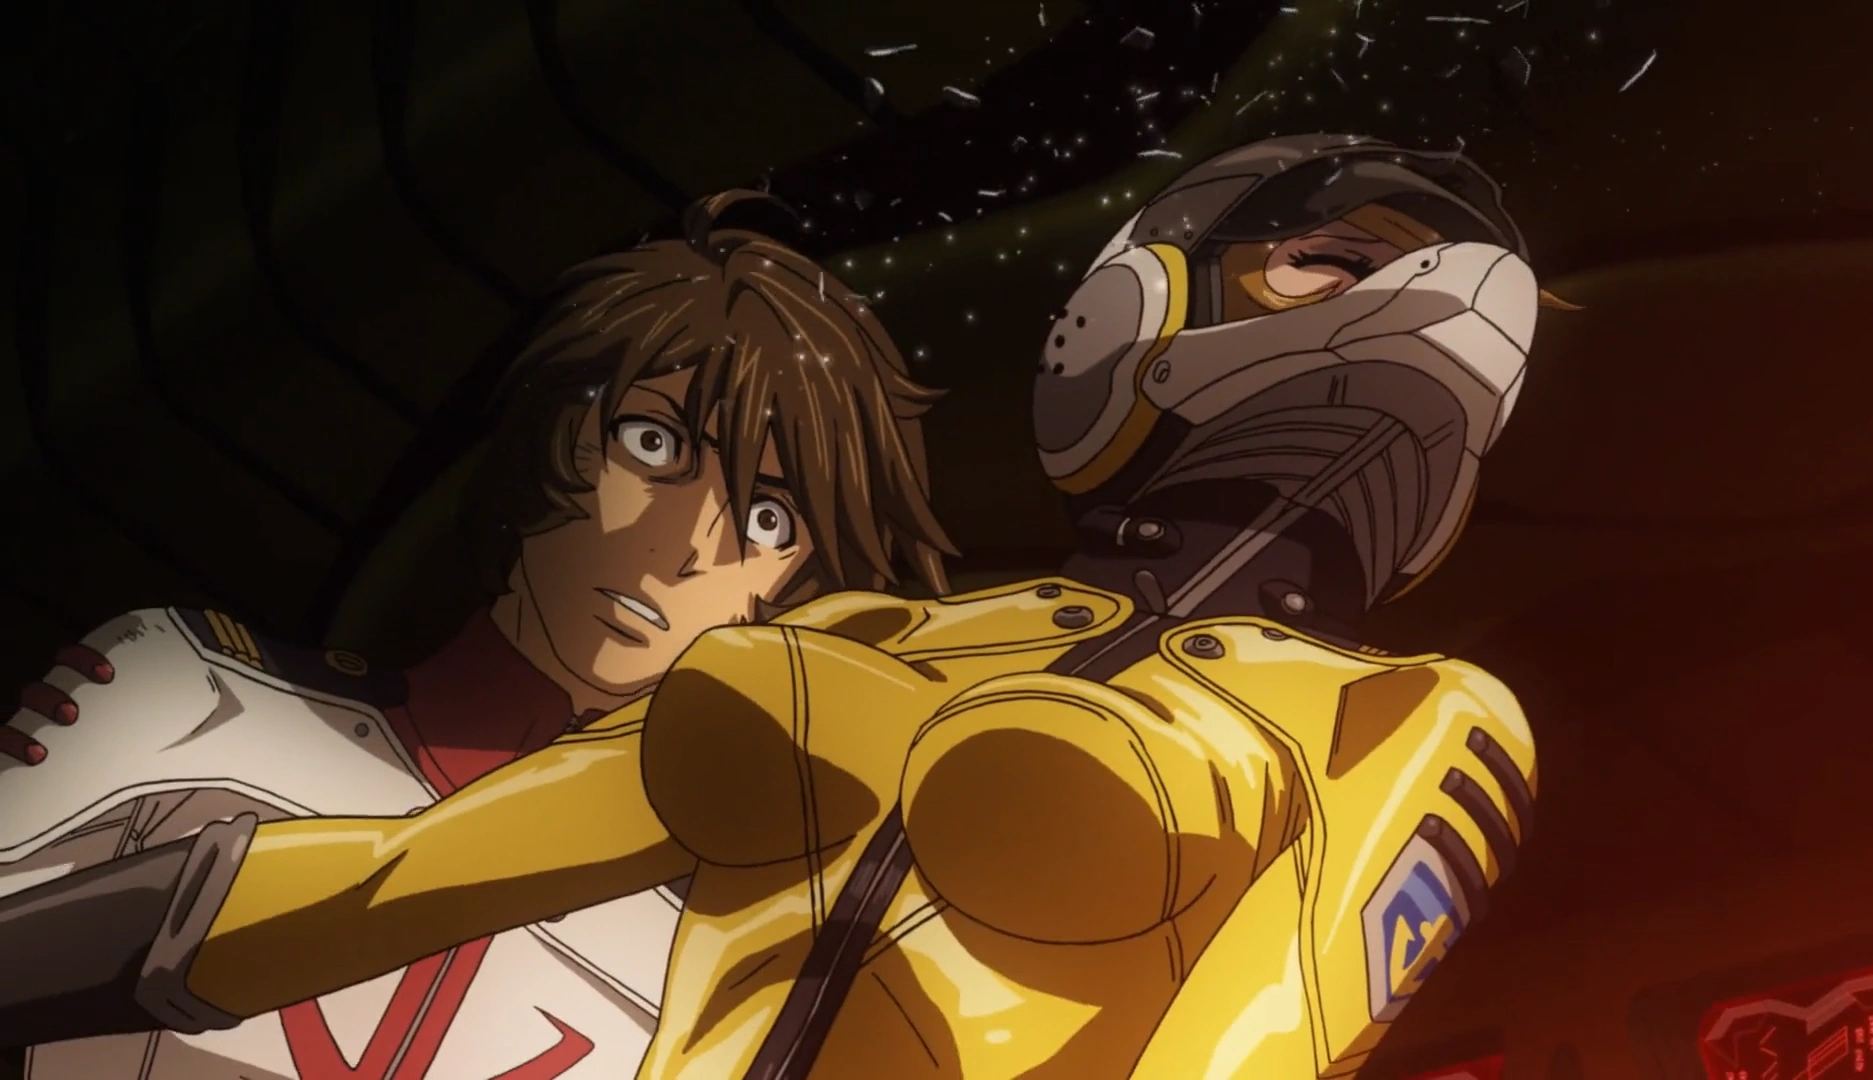
Mori takes the shot for Kodai
In the damaged corridors of the Garmillas flagship, Mori sat with a dying Garmillas soldier, trying to comfort him in his last moments of life. She then overheard an ongoing confrontation between the Gatlantean spokesperson Mil and Desler's nephew. Mil promised the young Garmillan that Gatlantis would cease their assault on the Earth and Garmillas, but only if he killed Desler first. Kodai, who had already been subject to a similar game by the Gatlantis Empire, begged Desler's nephew not to choose. His interruption angered Mil, who tried to shoot him down. After a brief stand-off, Mil pulled the trigger on Kodai, but Mori ran in between them and took the bullet instead of him. Kodai asked her why she would do something like that. She replied that she didn't know but that she was glad she had done it, before falling unconscious. Mori's sacrifice awakened something in the Gatlantean. The empire's philosophy deemed love and all emotions to be mere irrational impulses that only lead to chaos, yet Mori had just put herself in danger for someone she had no memory of, just as if she had been in love with him. This realization convinced Mil that Gatlantis' path of destruction would have to end, but before he could get the Great Emperor to stop the war, he was accidentally shot down by Desler's guards.[68]
The Golem Assault Battle[]
For this topic in more detail, see Golem Assault Battle

Mori awakes in the infirmary
After the confrontation, Mori was taken to the infirmary to rest. Kodai watched over her before leaving to prepare for the coming battle. She only woke up as the assault on the White Comet was underway, and was shocked by the amount of death and destruction around her. Many injured and dead crew members layed in the med bay as the Medical Department scrambled to save as many as possible. Distraught, Mori appealed to Teresa, saying that although she didn't remember her time on Terezart, she felt as if she did. She asked if there was any meaning to all the suffering and bloodshed going on and whether there was any reason for people to meet if everyone was destined to be born and die alone. She recalled how much she had already lost and begged Teresa to stop taking more away from her.[69]

Mori tells Kodai she wishes to follow him into his last attack
The battle worsened as Kodai's assault failed and Zworder activated the device himself. The Great Emperor fused with the White Comet and transformed it into a superweapon threatening Earth's very existence. With no way to oppose the enemy, and with Yamato's engine on the brink of collapse, Kodai ordered all hands to abandon the battleship. He stayed behind, intending to go down with the ship in a last-ditch attempt to slow Zworder down. Mori refused to evacuate and met him on the first bridge. Kodai protested, asking why she'd violate his order to leave the ship, but she ignored him, replying that she would help him pilot the Yamato as navigator. She observed that even with the engine going near-critical, they could never destroy such a mass, but they could at least buy some time for a general evacuation of the Earth. Mori closed the distance between her and Kodai, stating that even if she didn't remember him, she knew what was on his mind and reminded him that he was not alone.[70]

Mori and Kodai bask in Teresa's light
Sitting at her station, she reported that the engine was reaching its breaking point but would resist until they reached their objective. She then got up and sat on Kodai's lap. As the two got close and kissed, the engine went fully out of control and opened a hole toward a higher dimension. Teresa descended through the hole, using Yamato to manifest herself in regular space. With her came the spirits of the deceased crew members from the past two voyages and Kodai's brother, who appeared on the bridge. The couple watched in amazement and listened to Teresa as she proclaimed herself part of the "great harmony" of the bonds between the Yamato crew. With Yamato enveloped in Teresa's power, Kodai and Mori held hands and led the battleship straight into the enemy superweapon, annihilating it and bringing an end to the war with Gatlantis.[70]
In the higher dimension[]


Mori's two sets of memories merge into one
Yamato survived the attack on the White Comet and was transported into Teresa's higher dimension, despite appearing destroyed. Mori and Kodai also entered the other realm; however, they were offered a chance to leave aboard the battleship. Kodai refused to leave, as he had lost his will to move forward due to the weight of his actions during the war. Mori also stayed behind. As she ran across a small beach, she encountered a manifestation of Kodai and herself. Her missing memories merged back into her, completely healing her from her amnesia. She attempted to reach Kodai, but the voice of one of her deceased comrades revealed to her that she was only seeing an illusion. The voice pointed her in the direction of the real Kodai.[71]
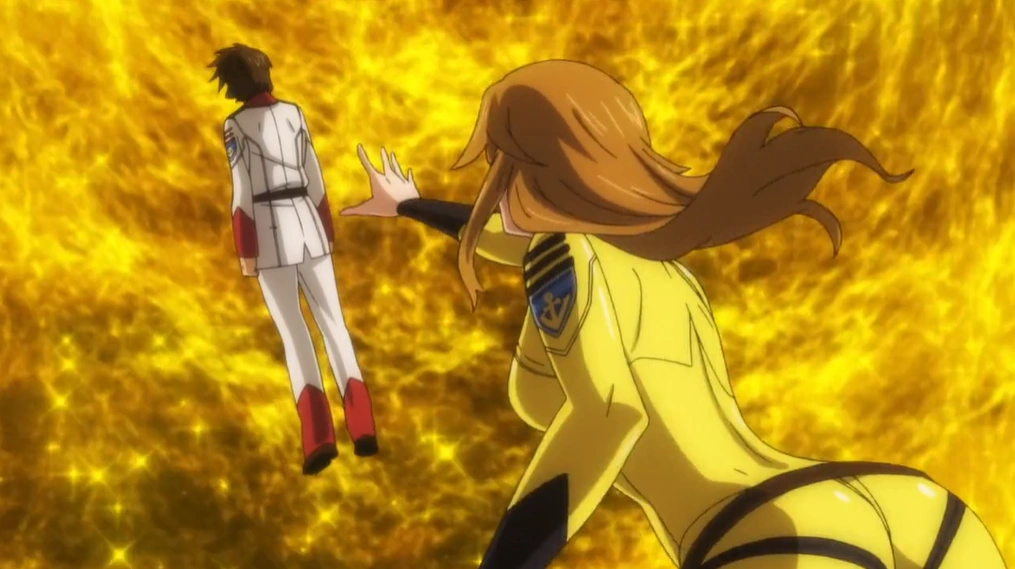

Mori reaches out for Kodai
He was standing at the center of a vast tree of light, which was a visual manifestation of the flow of time as seen from the higher plane of existence. Mori watched as the tree started to turn red and wither. Another set of voices commented that the tree was branching too much and that the flow toward the most optimal future could be severed. Mori asked how this could be, since the Gatlantis Empire had been defeated. However, Teresa's messengers reiterated that the human heart had enough power to change the future by itself. Mori jumped into the tree and begged Kodai to come with her, but he refused. Kodai revealed to her that he was unable to see a future where they could live in peace without perpetrating the eternal cycle of violence, no matter how hard he looked for it. He pushed Mori away, stating he didn't want to lose anything else. However, Mori continued to reach out, stating that the same was true for her too. She cried out the same thing she had told him one year ago, that he had saved the Earth, but this time she added that he would continue to save it numerous other times, because she would always be there to support him. Finally, she broke through to Kodai, but he was still hesitant to reach back to her. At that moment, Teresa intervened and showed them both a vision of their future child's small hand grasping Kodai's fingers. The goddess explained that throughout the infinite number of possible futures, that was the only one awaiting the couple if they chose to go back. The two finally held hands, restoring the flow of time.[71]
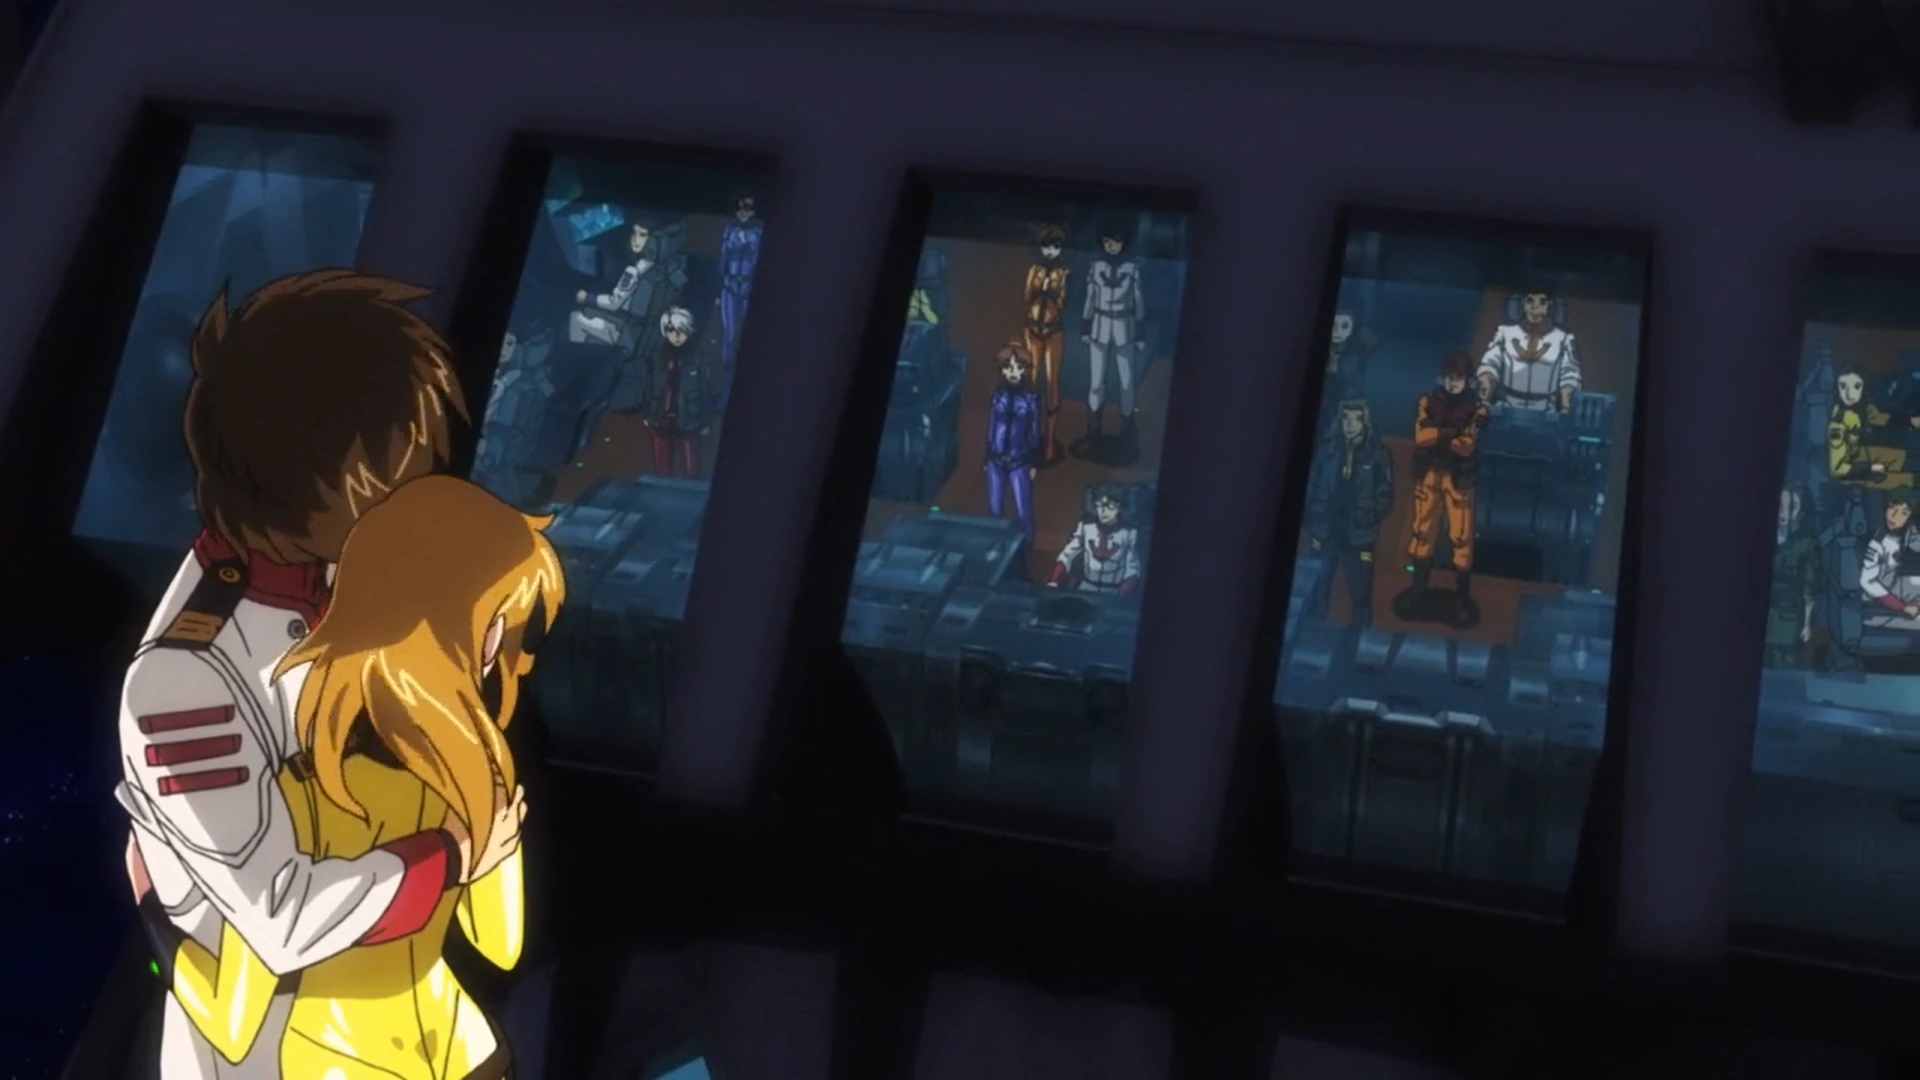

Mori and Kodai look at their friends as they arrive to rescue them
At that moment, a fully repaired Yamato ascended to the higher dimension. In order to have a chance at rescuing the two officers, the citizens of the Earth had voted to sacrifice the time fault to give Yamato enough energy to transcend the dimensional horizon and reach Teresa's domain. Overjoyed, the two were welcomed on board the battleship by their fellow crew members, and returned to the Earth on December 31, 2203.[21][71]
The new Earth[]

The Asuka, Mori's new vessel
After their return from the higher dimension, Kodai and Mori were facing a very different Earth. The sacrifice of the time fault had caused a shift in Earth's military policy and had major aftereffects on the planet's economy. Kodai felt guilty for leading Earth's citizens to such a decision, and Mori tried to support him through his troubles. Mori was appointed by General Commander-in-Chief Todo to be the captain of the next-generation supply carrier, Asuka. This appointment was rather unusual, given Mori had already received a two-rank promotion following her apparent death.[71] She accepted the new position, believing that the best way to support Kodai was to be on equal footing with him. Asuka formed the 65th Escort Corps along with Yamato, which was now under Kodai's command, and the battle carrier Hyuga, assigned to Sanada. The newly-formed flotilla was put under the command of Captain Osamu Yamanami, and was tasked with escorting a delegation on a diplomatic mission to Iscandar and Garmillas. The mission was set to take off on October 2, 2205,[72] after welcoming a newly graduated class of cadets.[73][74][75]
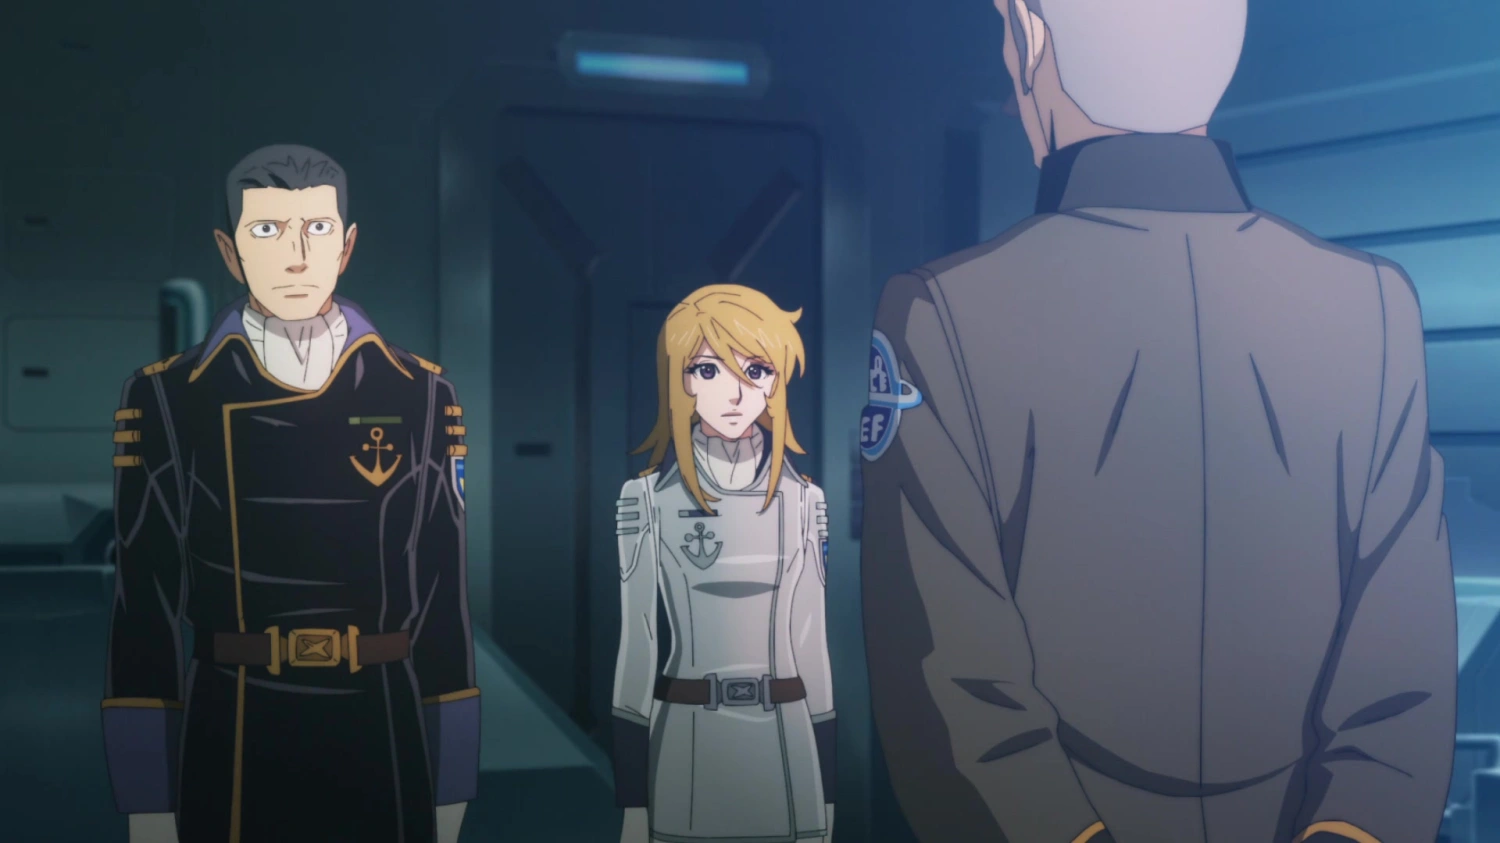

Todo talks to Sanada and Mori
On October 1,[73] Mori and Sanada met with Todo on Hyuga's bridge. Todo asked Mori if she was comfortable with her new position, to which she confidently responded by commending Asuka's specs and crew's skills. She explained that she was trying to learn as quickly as possible to not be an unknown factor on the field. Todo then asked Mori if she had had any chance to spend time with Kodai, but she replied in the negative, explaining that paparazzi were still following them even after more than a year had passed since their rescue. Todo commented on the rising tensions between the Great Garmillas Empire and the interstellar power known as the Bolar Federation, reiterating the importance of the 65th Escort Corps' mission. He told Mori and Sanada not to pay attention to the various opinionists who were mocking the fleet as a mere publicity stunt.[75]
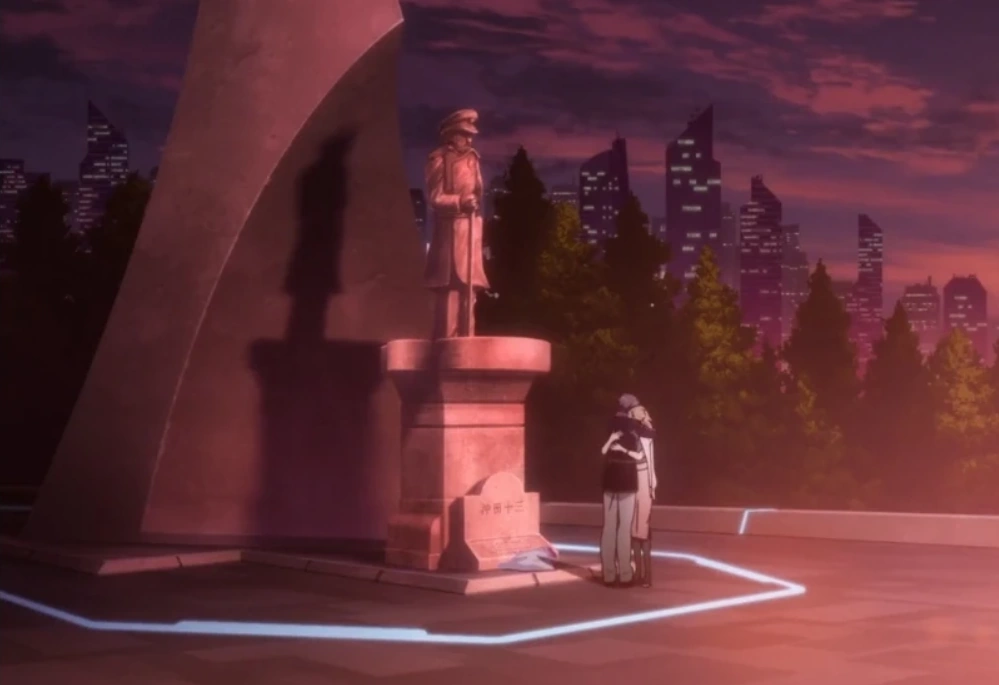

Mori hugs Kodai under Okita's statue
Later that day, Mori visited Hero's Hill and found Kodai there. He asked if she should be there, given they were on the eve of their departure, but Mori sarcastically asked if the same wasn't true for him too. She explained she had come to help him with his predicament and the two exchanged a loving embrace. Mori asked how many months it had been since they had been alone together, and Kodai reminded her they could be photographed at any moment. She jokingly replied that it they were the most expensive couple in the world. Kodai's mood turned somber as he explained how guilty he felt for having caused the Terran race to give up the time fault. He believed he would carry that weight for the rest of his life. At that moment, a bystander called him out, asking him if he could shoulder that responsibility. Kodai tried to run after him, but he was gone. Seeing Kodai break down, Mori silently hugged him.[75]
Mission to Salezar[]
Setting sail and training[]


Mori is shocked at Kodai's unexpected orders during the cerimony
On the day of the planned departure, Mori attended the presntation cerimony of Space Defense Academy's 38th class together with the rest of the 65th Escort Corps' officers. At the end of the cerimony, Kodai unexplectedly announced that the fleet would began preparations for launching immediately. As the fleet was departing, Yamato suddenly stopped without any warning. Nanbu asked Mori if he should halt the departure procedure, but she ordered him to keep going. Later, Nanbu expressed his frustration as the Asuka prepared to receive on board Sukeji Yabu, a technician from Garmillas who had been involved in the mutiny aboard Yamato years prior, but Mori berated him for his off-hand remark.[76]
On the first day of training for the new cadets, the Hyuga and Yamato's air squadrons fought a mock battle in the vicinities of the Moon. During the simulation, rookie pilot Shigeru Sakamoto performed a risky manover to show off, earning Mori's disgruntlement. She checked his personnel file, describing him as someone who rushes to death. On the fourteenth day of training, the fleet participated in a combat excercise near the 11th planet. Mori used the occasion to test her ship's new shield-deplying missiles.[76]
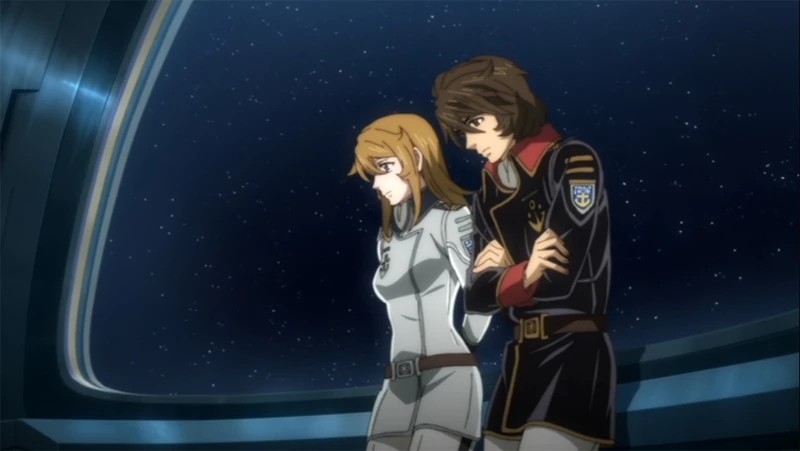

Mori and Kodai discuss Domon's situation
Sometime later, she attended a meeting aboard Yamato between the fleet's commanders. Yamanami briefed the group about the subspace gate they were approaching, which was a crucial piece of infrastructure supporting the Garmillas Empire's migration from Garmillas to planet Garmann. The Captain said they would complete a ceremony with the patrol fleet near the gate, and Mori finished his sentence by saying they would then head for the Large Magellanic Cloud, and that they had already almost reached Iscandar and Garmillas. Yamanami agreed but added that it was almost as if they were intruding into someone else's territory. Later, Mori and Kodai stood together in Yamato's rear observation deck. Kodai confided in Mori about one of the new crew members, Ryusuke Domon, who had sabotaged his record to board the battleship. He harbored resentment towards Kodai because the sacrifice of the time fault had caused his father to seemingly die. Kodai revealed to Mori that he had kept Domon on board because he reminded him of his young self, who was angry at Admiral Okita for causing the death of his elder brother. He felt that Domon's burden was even heavier than his own, and he had to somehow prove himself worthy of his subordinate's father's death. However, he did not know how, or if he could ever do it. With no way of resolving his doubts, Mori simply listened to him before putting her arm around him, silently showing her support.[77]
The destruction of planet Garmillas[]
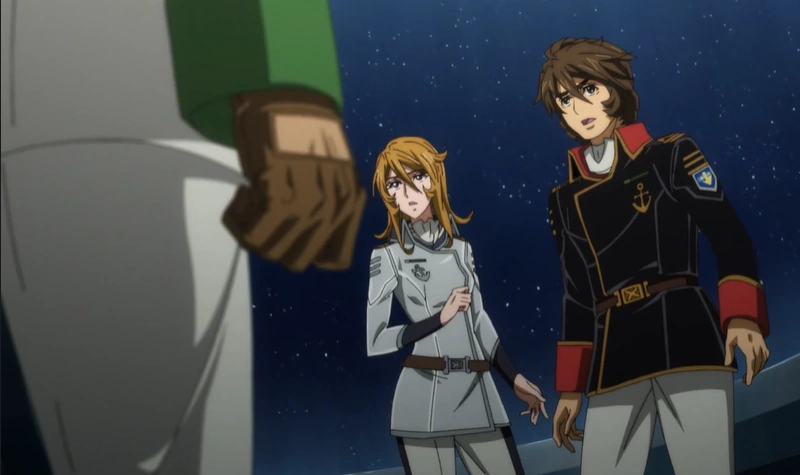

MorI and Kodai receive the news of Garmillas' destruction
Mori and Kodai's moment together was interrupted by Shima and Yamato's new Technical Officer, carrying the news that planet Garmillas had been destroyed in a sudden attack by an unidentified enemy. Nobody had any details on the attack or the attacker, only that a small group of survivors had managed to reach Iscandar to hide. However, Garmillas' double planet had already left its orbit, was accelerating at abnormal speeds, and was pursued by Leader Desler's fleet.[77] Mori soon returned to Asuka, where she overheard a conversation between two mechanics, who feared a currently ongoing technological exchange between the Earth and Garmillas could be interrupted if the attacker was Bolar.[78]


Mori, Kodai and Sanada meet with the members of the peace delegation
She later returned to the flagship to meet with the peace delegation's members and Yamanami. The 65th Escort Corps was the closest Terran formation to Iscandar. Still, out of fear of the Earth being dragged into another war, the federation's leadership refused to allow the fleet to intervene. Mori looked sorrowfully at Kodai as he tried to convince the delegation to send the 65th Escort Corps on a rescue mission to Iscandar. She, Sanada, Burrell, and Kodai later participated in a call to the commanders of the Garmillas patrol fleet, where she apologized for being unable to help the Garmillas forces. However, as the call was ongoing, a mutiny erupted on Yamato as the cadets tried to take control of the ship to continue the mission to Iscandar. The revolt was stopped, but Kodai decided to go along with the young crew's plan. Both Asuka and Hyuga followed the flagship to the battlefield.[78]
Rescuing Iscandar[]
For this topic in more detail, see Rescue of Iscandar, Battle in the Vorzon System, and Immigrant Fleet Rescue Operation
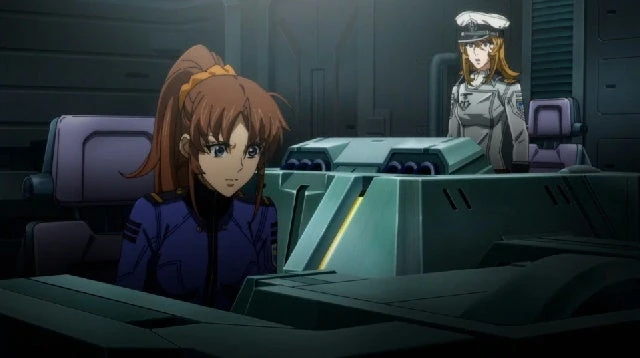

Mori leading Asuka during the Battle in the Vorzon System
The 65th Escort Corps arrived at Iscandar and engaged the enemy forces to protect the refugees stuck on the planet's forces. During the battle, Asuka deployed its space cavalry and projected a Wave-motion Shield to cover the civilian convoy. Mori received a report that the shield would only last for only 150 seconds, and immediately ordered to fire another next one. Nanbu warned that staying in Wave-motion Resonance much longer they may damage their ship, but the captain confidentaly stated Yamato and Hyuga would protect them. After the enemy forces, now identified as Dezarium, retreated, Mori and the rest of the 65th Escort Corps' officers met with the commanders of the Garmillas fleet in Yamato's strategy room. Sanada informed them that the energy derived from Garmillas' destruction had been diverted somewhere by the enemy and that they were presumably going to do the same to the nearby planet Garmario. To stop them, Kodai decided to fire the Wave-motion Gun at the planet and destroy it before Dezarium could. Mori objected, asking him if he was going to use the weapon in front of Queen Starsha, but he stayed adamant, saying he would shoulder the responsibility for this action. However, as the plan was underway, the Dezarium forces began moving Iscandar in front of Yamato's line of fire, using it to shield Garmario. At that moment, Princess Yurisha contacted the Earth fleet, telling them to use one of their warheads on a specific point on the Iscandar surface. The resulting reaction would push the world out of Yamato's way. Mori ordered Asuka to close in on Iscandar's surface to fire a shield over the planet's capital, protecting it from the warhead's blast. The plan was successful, and Garmario was destroyed in time, but the firing of the Wave-motion Gun left Yamato motionless and at the mercy of the shockwave left behind by the planet.[79]
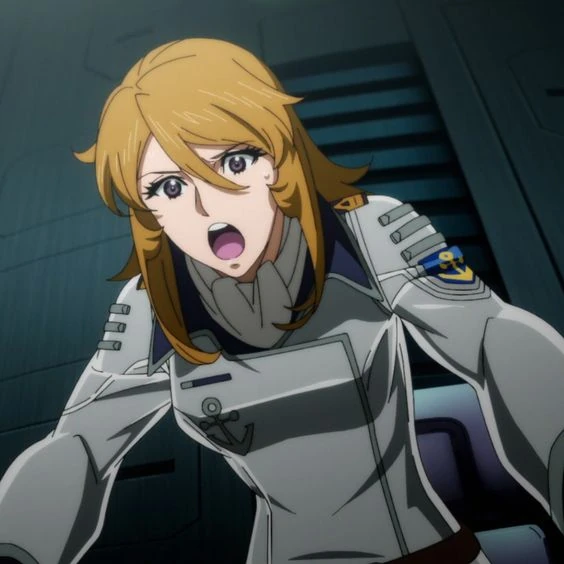

Mori scolds Kodai for his recklessness
Fortunately, Asuka arrived in the nick of time to deploy a shield and rescue the flagship. From her bridge, Mori stood up and berated Kodai, telling him he should stop facing the burden of his actions alone and that he should rely on his comrades. She refused to pull back her ship despite the danger, reminding her fiancé that despite being on different vessels, the former Yamato crew were all on the same boat, just as they had chosen to be years prior over Terezart when Kodai had been forced to fire the Wave-motion Gun at Gatlantis.[79]
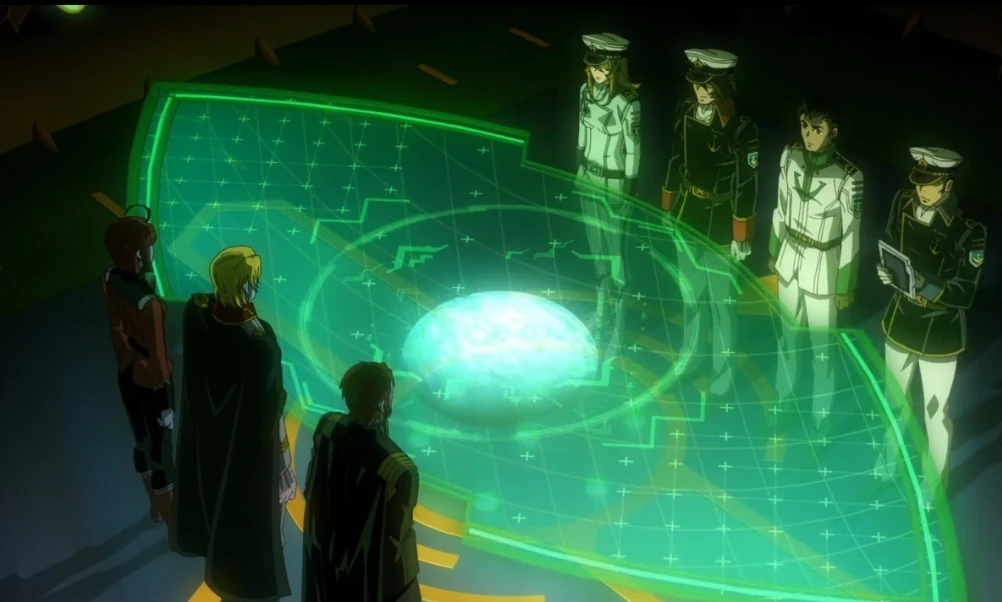

The 65th Escort Corps' officers meet the Garmillas commanders
After the battle, the remaining Dezarian forces began pulling Iscandar away, moving close to the star Vorzon. Mori and the other commanders of the Garmillas-Earth joint fleet convened a meeting to plan their next move. Mori suggested that their focus should be on rescuing the refugees and the Iscandarian royal family. Dietz, who had served as Starsha and Yurisha's attendant for the previous years, personally asked Kodai to convince the Queen to leave the planet, but he refused. Kodai stated that he had forced her to abandon her principles against the usage of WMGs, earning him Mori's concern. During the operation, Asuka was tasked to escort the civilian vessels rescued by a fleet of dimensional submarines. When one of the fleet's ships was destroyed by a Dezarian weapon, Mori ordered the migration ships to spread out.[80]
The war's end and Sasha's birth[]
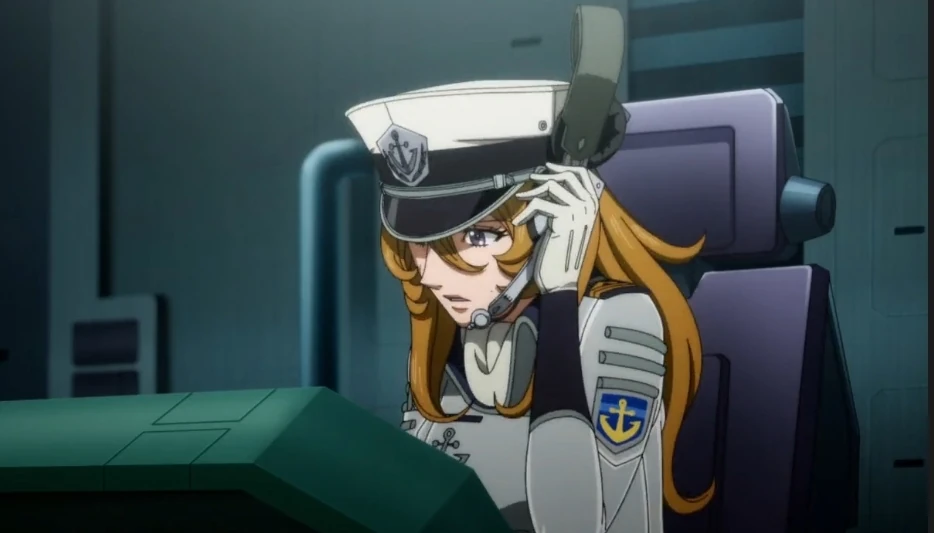

Mori answers to Kodai's call
With the failure of the rescue operation and Dezarium threatening to whipe out the civilian ships still on the surface, Starsha brokered a ceasefire between the two factions. She then called Desler and Kodai to her palace, intending to reveal to the the truth behind the origins of the Garmillas race. Later, Asuka received a private transmission from Kodai to Mori, and the captain anxiously ordered to be patched through. Kodai was distraught by what he had found out, saying he didn't know what to do anymore. Mori tried to ask what had happened, but he only started sobbing without giving any answers.[80][81]
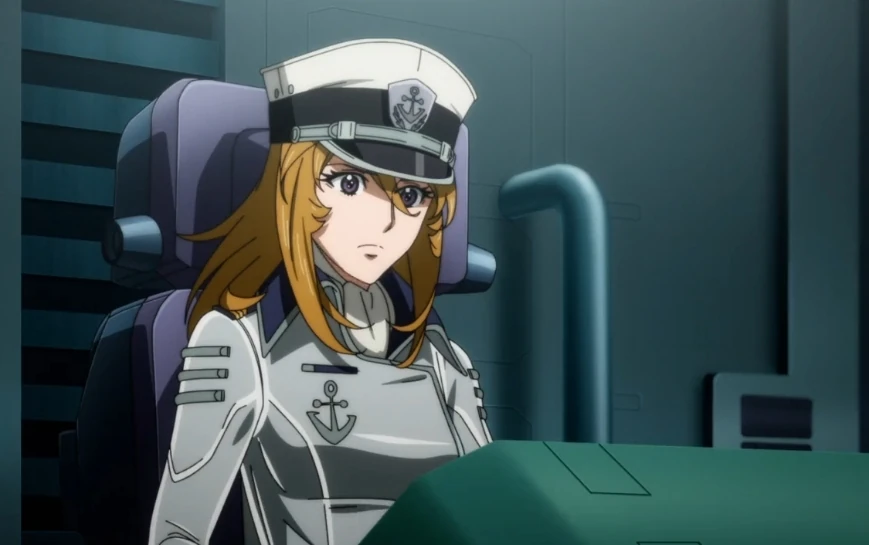

Mori agrees to Kodai's plan
As part of the accord with Dezarium, Starsha had agreed to give up her planet in exchange for free passage for the Garmillas-Earth fleet and the refugee fleet. However, Starsha's true intention was to self-destructive the planet before the enemy could lay their hands on it. Knowing this, as the joint fleet left the battlefield, Desler turned around its flagship and launched a last suicidal assault on the Dezarian forces.[80][81] Domon and Kodai soon came up with a plan to rescue both Desler and the two Iscandarian royals, and departed from Yamato. Shima relayed their plan to Sanada and Mori, and she immediately accepted, saying she would move ahead to fulfil her part. The operation was successful, but planet Iscandar had to be destroyed so that Dezarium wouldn't get access to its memory database, and it's destruction made both Starsha and Yurisha disappear after only a few minutes.[82]
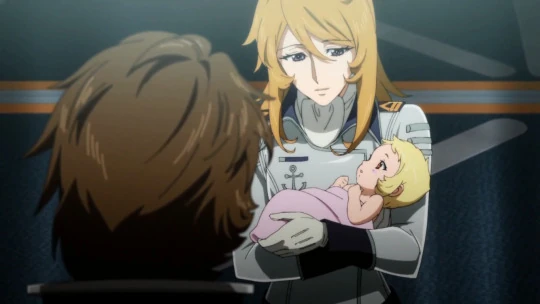
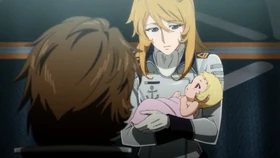
Mori holds Sasha
Kodai and his team returned to the Asuka to meet Mori. They brought with them a capsule containing the daughter Starsha had conceived with Kodai's brother years ago, kept in a Wave-motion Energy state. Kodai passed it to Mori, wondering if they should send it to quarantine. But at that moment, the light inside the capsule began to take form, giving birth to Sasha. As Mori repeated the baby's name under her breath, the sudden weight of the capsule almost caused her to drop it. She took Sasha out of the capsule and held her, looking at her with a loving smile. The tearful Kodai held out his hand, and the baby grasped his finger, just as Mori and him had seen in Teresa's vision. The two exchanged knowing looks, and Mori welcomed the new life into the world.[82]
With the conflict over, the 65th Escort Corps separated from the Garmillas fleet and headed back to Earth.[82]
Facing the consequences[]
Following the 65th Escort Corps's return from what became known as the Iscandar Incident, the fleet was immediately reorganized. All captains, including Kodai, were held responsible for their violation of the Earth Federation's policy and were dismissed. All members of Yamato, Hyuga and Asuka's crews were also relocated. Despite this, the brilliant skills she displayed during the Incident, which were hard to believe for a newly appointed captain, earned her praise from both inside and outside the Earth Federation.[83] As of 2207, her current assignment is unkown, but it has become public knowledge that her engagement Kodai has not progressed.[84]
Personality[]
Yuki Mori is a tenacious individual able to deal with difficult and seemingly hopeless circumstances, including the personal challenges of losing her entire life history and enduring the ongoing struggles of a long war.[20] She also has a strong sense of justice, as she demonstrates in defending Admiral Okita from Susumu Kodai's anger over the death of his elder brother under Okita's command.[39] She is equally willing to stand up for aliens as for Terrans.[39][41][12]
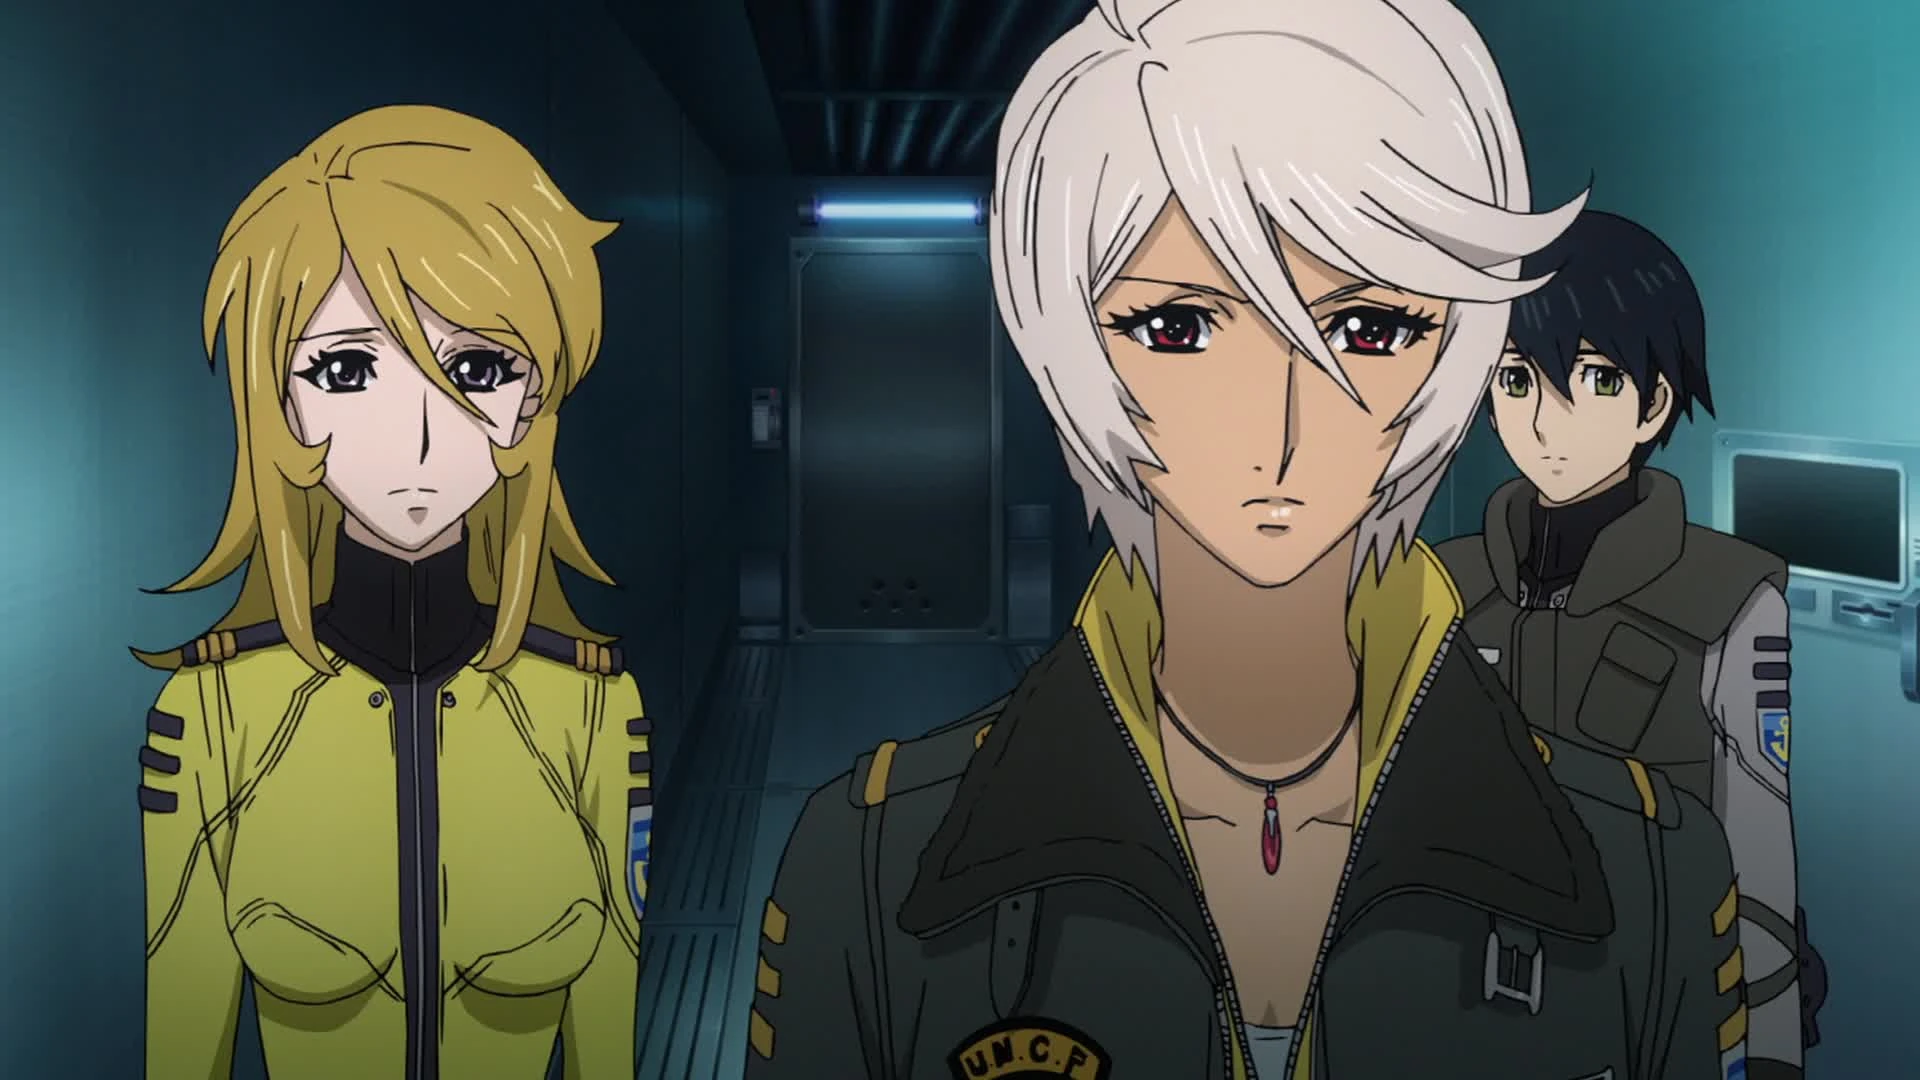

Mori was quick to emphasise with others
Mori is sensitive to the emotional states of those around her and is able to easily bond with a wide range of people. She often tries to help others through their predicaments.[14][19][39][41] Despite her great empathy however, she was initially closed off or even rude to those she considered to be hotheaded,[24] bad-mannered,[5] or too invasive,[3] but she matured out of this more childish behaviour during the journey to Iscandar.[24]

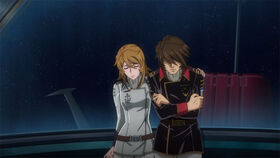
Mori is Kodai's main source of comfort and support
Her initial antagonism toward Kodai slowly evolved into a respectful relationship between colleagues and then friendship,[13][24] and became a romance only after sharing many trials together during the mission to Iscandar.[41][2] Until late 2202, she and Kodai were engaged to be married,[49] but she temporarily broke off their relationship when he tried to leave her behind on Earth during the Yamato Revolt to protect her.[47][48] Wanting to prove to Kodai she would always be there to support him, she boarded Yamato illegally.[53] The two soon rekindled their relationship,[54] and she would go on to become Kodai's primary support during the Gatlantis War[55][70] and as he faced the guilt of his actions after their return from the higher dimension and during Yamato's third journey.[75][78] Their love for each other is strong enough that even at a time when Mori had lost her memories of Kodai, she was still ready to give her life to protect him.[68] When with him, she tends to act in a more carefree and playful way,[43][48] but she also often chastises him when he falls back into his tendency of shouldering all of his responsibilities and baggage by himself.[79]
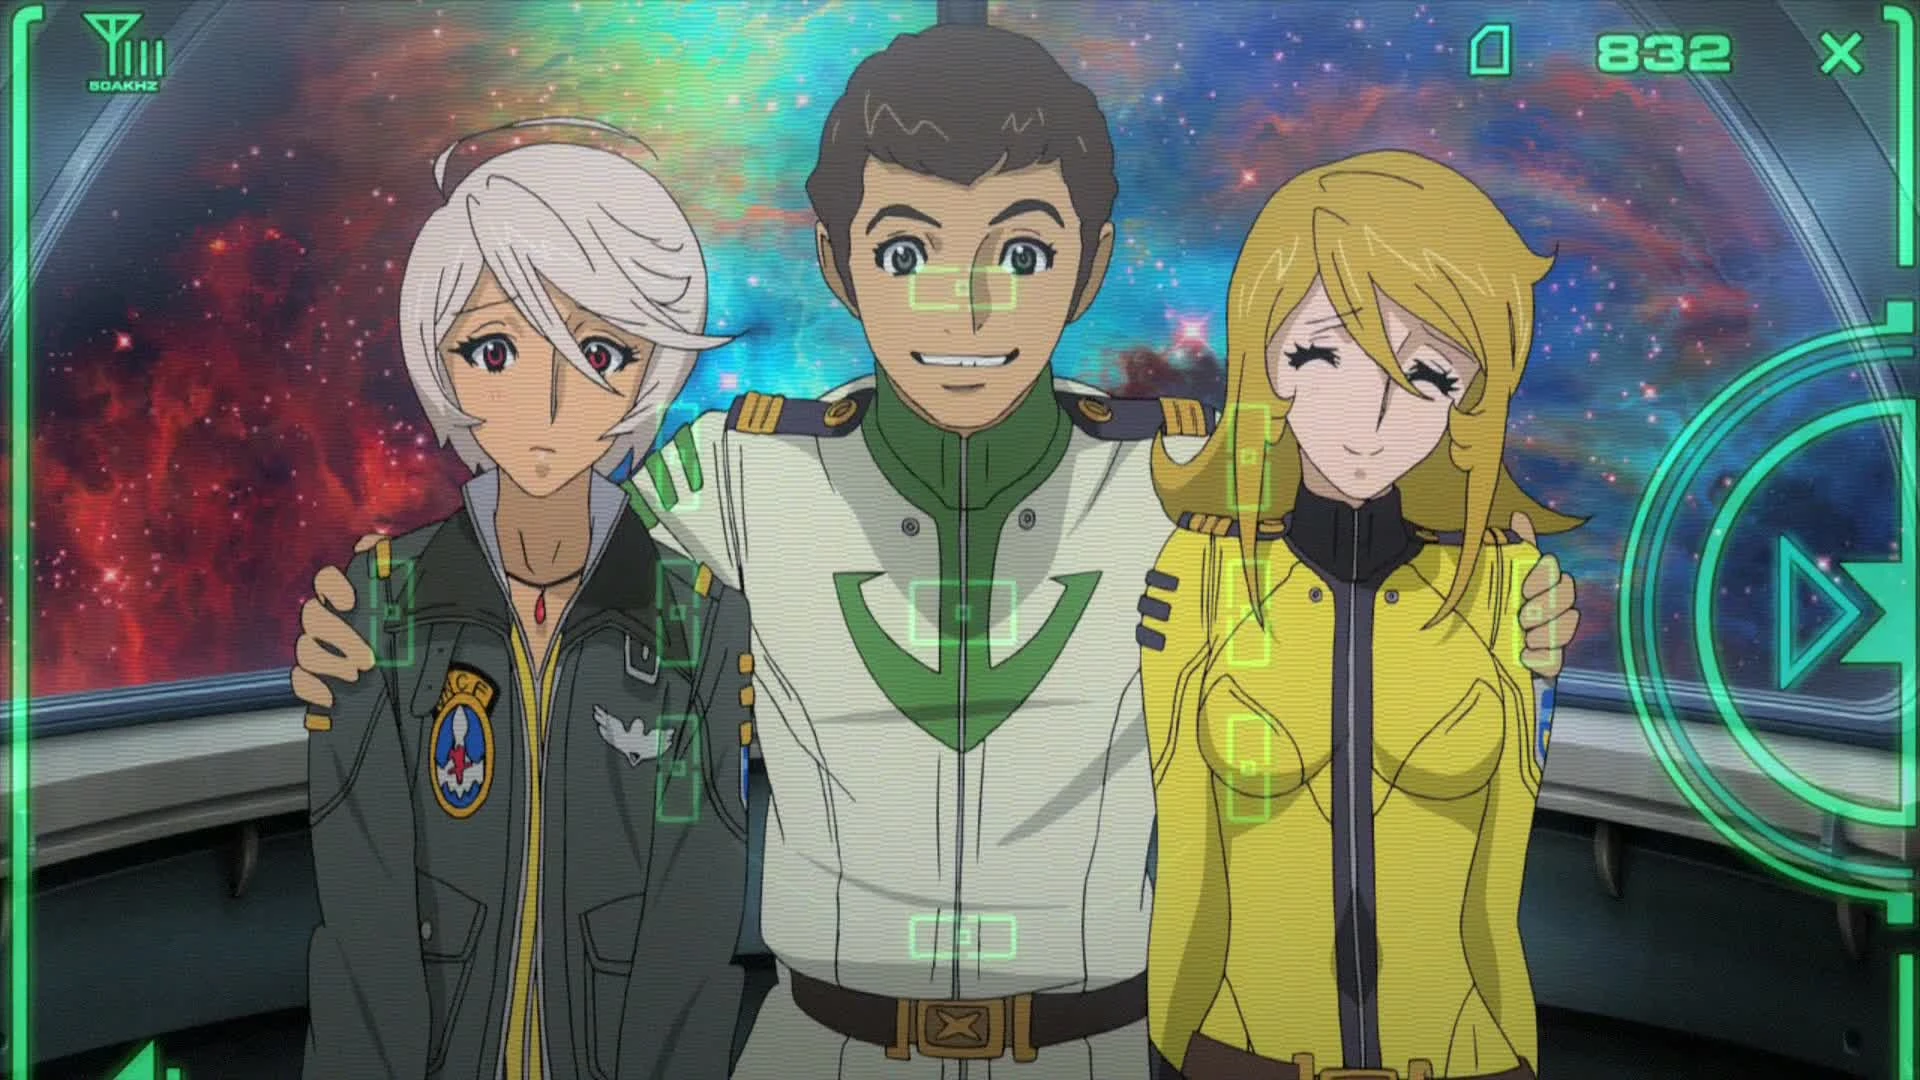

Mori became friends with almost all her comrades
Mori developed friendly relations with most of her fellow crewmembers, most notably Akira Yamamoto,[2][53][67] despite the two initially being love rivals,[26][43] and the young Yuria Misaki, who greatly looks up to Mori as her superior.[24] She also grew close to Princess Yurisha Iscandar, who connected with her on a psychic level following the incident in which both of them were severely injured.[19][42] In the year after her incident, she had a father-daughter bond with Admiral Hijikata, her legal guardian, and often looked for him when in need of advice.[26][55] She also sometimes looks up to Doctor Sado as a source of wisdom.[48]
Manga[]
In the Space Battleship Yamato 2199 manga adaptation, Mori maintains most of her anime counterpart's personality. Additionally, she states that she is unable to understand the attentions men have for her, which leads her to be ridiculed by her male coworkers at HQ. She also laments not remembering her first love.[11]
Battles[]
Great Garmillas War[]
- First Battle of Pluto (Operation M)
- Operation M2
- Garmillas Encirclement of the Gliese 581 System
- Skirmish out of the Dimensional Fault
- Engagement with the Garmillas Dimensional Submarine
- Psychic Attack on Yamato
- Battle of Carell 163
- Battle of Balun
- Battle of the Rainbow Star Cluster
- Uprising on Prison Camp 17 (bystander only) (also part of the Garmillas Civil War)
- Battle of the Imperial Capital
- Battle of the Galactic Theater Gate (also part of the Garmillas Civil War)
Hunt for the World of Tranquillity[]
Gatlantis War[]
- Battle of the eleventh planet
- Battle on Planet Stravase (also part of the Garmillas Civil War)
- Battle in Subspace
- Terezart Landing Operation
- Blockade of Terezart
- Battle of Saturn
- Battle against Neu Deusura
- Golem Assault Battle
Iscandar Incident[]
- Rescue of Iscandar
- Battle in the Vorzon System
- Immigrant Fleet Rescue Operation
- Rescue Operation for Leader Desler
Other[]
Manga[]

Mori and Yurisha talk as the Battle of the Rainbow Star Cluster rages on
In the Space battleship Yamato 2199 manga adaption by Michio Murakawa, Mori's origins are completely different from her anime counterpart. She was produced as a somatic cell clone of Yurisha under the production number YU-K1, in order to serve as a backup for the princess in case she didn't awake from her coma. She was born in 2198, and was grown to the body equivalent to that of a 19-year-old. She's made believe to be suffering from amnesia like in the anime, but she never actually had any memories due to being a clone. Sanada was responsible for her learning program, and she knows of Chuya Nakahara's poetry because he integrated it with the program. She was also the one who proposed using the First Fleet as a diversion during Operation M.[10] During her time at UNCF HQ, male workers took on to call her "Snow White".[11] Outside of her background, her story follows the anime without major differences. After Yurisha revealed herself while controlling Misaki's body, Mori was assigned as her assistant, causing her absence during the Battle of the Rainbow Star Cluster. While they were talking in her cabin as the battle raged on, Yurisha asked Mori to bring her her holographic message capsule.[10][85]
Gallery[]
")
")
")
")
")
")
")
")
Notes[]
- Mori's photo in her personnel file depicts her with the rank insignia of Lt. Junior Grade, despite her never obtaining the rank. At the time the photo would have been taken, she would have been an Ensign, as seen in "Messenger of Iscandar".[8][3]
- Curiously, Kodai's file is depicted with the same mistake.[3]
References[]
- ↑ 1.0 1.1 1.2 Starblazers-Yamato.net Yamato 2205 CHARACTERS entry for Yuki Mori
- ↑ 2.0 2.1 2.2 2.3 2.4 2.5 2.6 "Memories of the Blue Planet"
- ↑ 3.00 3.01 3.02 3.03 3.04 3.05 3.06 3.07 3.08 3.09 3.10 3.11 "Messenger of Iscandar"
- ↑ 4.0 4.1 4.2 4.3 4.4 4.5 "AD 2202 - Revive, Space Battleship Yamato"
- ↑ 5.0 5.1 5.2 5.3 5.4 "Toward a Sea of Stars"
- ↑ 6.0 6.1 6.2 Yamato 2199 official website 2199 Series character introduction for Yuki Mori
- ↑ [[1]]
- ↑ 8.0 8.1 8.2 8.3 8.4 8.5 Crew database file on Yuki Mori featured in "Point of No Return"
- ↑ "Tension – Reach the Embassy on the Moon"
- ↑ 10.0 10.1 10.2 Space Battleship Yamato 2199 Manga Vol.9
- ↑ 11.0 11.1 11.2 Space Battleship Yamato 2199 Manga chapter 33
- ↑ 12.0 12.1 12.2 12.3 12.4 12.5 "The Forever War"
- ↑ 13.0 13.1 13.2 13.3 13.4 "Point of No Return"
- ↑ 14.0 14.1 "A World I Once Saw"
- ↑ Trajectory of YAMATO official 2024 calendar dates Mori's incident with Yurisha in May of 2198 and the Space Battleship Yamato 2199 Model Sheet Design Collection GARMILLAS confirms she was a member of the 9th Section by the time she met the princess
- ↑ Space Battleship Yamato 2199 Model Sheet Design Collection EARTH p.196
- ↑ Space Battleship Yamato 2199 Model Sheet Design Collection GARMILLAS p.196
- ↑ Trajectory of YAMATO official 2024 calendar
- ↑ 19.0 19.1 19.2 19.3 19.4 19.5 19.6 19.7 19.8 "The Whisper of the Witch"
- ↑ 20.0 20.1 20.2 20.3 20.4 20.5 "Out of the Forest of Memory"
- ↑ 21.00 21.01 21.02 21.03 21.04 21.05 21.06 21.07 21.08 21.09 21.10 "The Era of Space Battleship Yamato: Choice of 2202"
- ↑ 22.0 22.1 "Escape from the Jupiter Sphere"
- ↑ Day count at the end of "Escape from the Jupiter Sphere"
- ↑ 24.0 24.1 24.2 24.3 24.4 24.5 24.6 "Gravestone on a Frozen Field"
- ↑ 25.0 25.1 "The Trap on All Sides"
- ↑ 26.0 26.1 26.2 26.3 26.4 "Farewell to the Solar System"
- ↑ "The Sun Sets on Pluto"
- ↑ Trajectory of YAMATO official 2024 calendar
- ↑ "Wish Upon a Star"
- ↑ "Clockwork Prisoner"
- ↑ "Graveyard of the Universe"
- ↑ 32.0 32.1 "A World I Once Saw"
- ↑ "The Wolf from Another Dimension"
- ↑ "A Choice for the Future"
- ↑ "Over the Black Light"
- ↑ Space Battleship Yamato 2199 Secret File: 01: The top secret information that backed the covert operation during Domel’s last battle
- ↑ 37.0 37.1 37.2 "They're Coming!"
- ↑ 38.0 38.1 38.2 "Under a Rainbow Sun"
- ↑ 39.0 39.1 39.2 39.3 39.4 39.5 "Prison Planet 17"
- ↑ 40.0 40.1 40.2 40.3 "The Planet That We Head For"
- ↑ 41.0 41.1 41.2 41.3 41.4 41.5 "One Man's War"
- ↑ 42.0 42.1 42.2 42.3 "The Distant Promised Land"
- ↑ 43.0 43.1 43.2 43.3 43.4 43.5 43.6 "Space Battleship Yamato 2199: Odyssey of the Celestial Ark"
- ↑ Space Battleship Yamato 2202 Complete Works Vol.1 p.3
- ↑ The Era of Space Battleship Yamato: Choice of 2202 Theater Pamphlet p.18
- ↑ First character file for Shiro Sanada on the Yamato 2202 website
- ↑ 47.0 47.1 "Shock – Legacy of the Cosmo Reverse"
- ↑ 48.0 48.1 48.2 48.3 48.4 48.5 "Tension – Reach the Embassy on the Moon"
- ↑ 49.0 49.1 Space Battleship Yamato 2202 official website CHARACTER entry for Yuki Mori
- ↑ Space Battleship Yamato 2202 Complete Works Vol.1 p.28
- ↑ 51.0 51.1 51.2 "Shock – Legacy of the Cosmo Reverse"
- ↑ "The Beam of Light Flashes! / Radiance of the Wave Motion Gun"
- ↑ 53.0 53.1 53.2 53.3 53.4 53.5 "The Trap at Planet Stravase!"
- ↑ 54.0 54.1 54.2 54.3 "Zworder, the Devil's Alternative"
- ↑ 55.0 55.1 55.2 55.3 "Bewitching - The Space Fireflies Beckon a Crisis"
- ↑ "Dessler's Challenge!"
- ↑ "The Shocking White Comet Empire - The Yamato Rams Through!"
- ↑ 58.0 58.1 "The Terezart Landing Operation – Crush the Enemy Missile Fleet!"
- ↑ "Zurvival's Fierce Assault - Find Teresa"
- ↑ 60.0 60.1 "O Teresa, Cry for Dessler!"
- ↑ "Battle off the Coast of Saturn - Gather the Wave Motion Gun Fleet!"
- ↑ "Yamato in Crisis - The Devil's Alternative Once More"
- ↑ 63.0 63.1 "Heir to the Yamato, Her Name is Ginga"
- ↑ "Heir to the Yamato, Her Name is Ginga"
- ↑ "Gatlantis, the Cursed Children"
- ↑ "Escape from the Nightmare!"
- ↑ 67.0 67.1 67.2 "The Fated Showdown!"
- ↑ 68.0 68.1 "Warriors of Love"
- ↑ "Yamato, Attack the Comet Empire!
- ↑ 70.0 70.1 70.2 "Farewell, Space Battleship Yamato"
- ↑ 71.0 71.1 71.2 71.3 "Earth, Yamato is..."
- ↑ Space Battleship Yamato 2205 Complete Works p.162
- ↑ 73.0 73.1 Starblazers-Yamato.net Yamato 2205 CHARACTERS
- ↑ [2]Starblazers-Yamato.net Yamato 2205 MECHANIC
- ↑ 75.0 75.1 75.2 75.3 "A Galactic War is About to Break Out! Assemble the Yamato Fleet!!"
- ↑ 76.0 76.1 "Yamato, a New Departure!!"
- ↑ 77.0 77.1 "The Last Day of Garmillas"
- ↑ 78.0 78.1 78.2 "Save Iscandar! Rebellion of the Young Heroes!!"
- ↑ 79.0 79.1 79.2 "Emergency Order! Yamato, Shoot Iscandar!!"
- ↑ 80.0 80.1 80.2 "Immigrant Fleet Rescue Operation. Go Beyond the Dimensional Wall!"
- ↑ 81.0 81.1 "Iscandar, the Dying Planet of Sorrow"
- ↑ 82.0 82.1 82.2 "Hello Sasha"
- ↑ starblazers-yamato.net CHARACTERS Be Forever Yamato: REBEL 3199 entry for Susumu Kodai
- ↑ starblazers-yamato.net CHARACTERS Be Forever Yamato: REBEL 3199 entry for Yuki Mori
- ↑ Space Battleship Yamato 2199 Manga chapter 55
- ↑ Mori's crew database states she was born in 2180, this doesn't match up with her supposed age of 19 throughout the series. The date was later changed to 2179 for the recap movie "Space Battleship Yamato 2199: Voyage of Remembrance"