Template:Infobox battles yamato 2199
- For the comparable battle in the original series, see Battle of the Rainbow Star Group.
The Battle of the Rainbow Star Cluster was an ambush of the Earth battleship Yamato by forces of the Great Garmillas Empire late in the Garmillas-Earth War. Occurring nearly a month after a crushing defeat at Balun, the battle became one of the empire's few remaining chances to prevent Yamato from completing its journey to the planet Iscandar. It also became an opportunity for the legendary Garmillas general Erich Domel to restore his own and his family's damaged reputations, and for the empire's ruler, Abelt Dessler, to make a decisive political maneuver against Iscandar.
Preparations
Following the destruction of thousands of Garmillas ships at Balun and thousands more stranded far from home ("Over the Black Light"), Dessler concluded that Yamato had become the most serious threat facing his empire. However, the one commander he most trusted to defeat the Earth ship had been arrested on the false charge of scheming to assassinate Dessler. He released Lieutenant General Domel from prison, dismissed his conviction, and granted the general his request to resume the campaign against Yamato that he had almost completed once before--but asked him to first recover a special passenger from Yamato, the princess Yurisha Iscandar. In exchange for victory, Dessler offered to reduce the sentence handed down to Domel's wife, Elisa Domel, for collaborating with opponents of the regime.
In preparation for the battle, the Imperial Guard returned to Domel the trusted commanders of his 6th Armored Space Division and his super dreadnought flagship Domelaze III, and placed the subspace submarine UX-01 at his disposal. The empire's military resources were constrained, and the Imperial Guard provided him with only four older carriers from the Homeland Defense Fleet crewed by "children and old men," as Colonel Wemm Heidern described them. Despite the limitations imposed upon him, the general was able to call upon Minister of Defense Welte Talan for added support and secured a prototype instant matter transporter and an asteroid mining missile, and ultimately devised a strategy that he was confident would succeed. The final step was anticipating his opponent's next move, and he predicted that Yamato would take a dangerous shortcut through the Rainbow Star Cluster. Once Domel's task force arrived at the cluster, the carrier Bulgrey moved ahead and launched its fighters toward Yamato's likely location.
Meanwhile, the Yamato had entered the Large Magellanic Cloud and was poised near the Tarantula Nebula as the crew considered how to proceed. Admiral Juzo Okita was convinced that navigating around the massive nebula would rob them of precious time, and would allow the Garmillas military to organize more effective attacks. He decided to take the shortest approach, directly through the Rainbow Star Cluster at the heart of the nebula. Immediately upon warping into the cluster, Yamato was buffeted by intense ion turbulence and lost the ability to use radar. Chief navigator Daisuke Shima stabilized the ship and set course for a relatively calmer region of the Rainbow Cluster ("They're Coming!").
Opening Phase
Yamato's optical sensors soon detect the Garmillas advance fighter wing approaching, and Okita orders the ship's Cosmo Falcon fighter squadron to intercept ("They're Coming!"). Led by Major Lyle Getto, the Garmillas Debake fighters engage the Falcons, drawing them away from the battleship as a diversionary tactic. With the humans now distracted, a squadron of Snuka dive bombers launches from Lanbea under the command of Major Fommt Berger and is instantly teleported by the prototype matter transporter to Yamato's position. Surprised by their sudden appearance, Yamato suffers damage to its shock cannons, anti-aircraft guns, wave motion shield, and sensors until Ensign Akira Yamamoto takes off in a Cosmo Zero fighter and beats back the Snukas. By the time Berger calls for the squadron to retreat, they have already succeeded in rendering Yamato blind and vulnerable to the next wave.
The UX-01 surfaces from subspace to release a "suckerfish" craft that attaches itself to the aft section of the battleship without being detected. A four-member Zaltzi strike team accesses an airlock and quietly boards Yamato.
Attacking from Within
Driving deeper into Yamato.
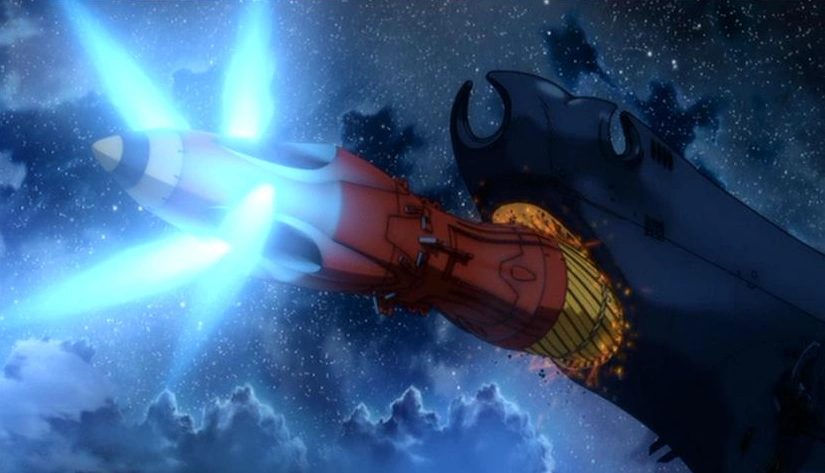
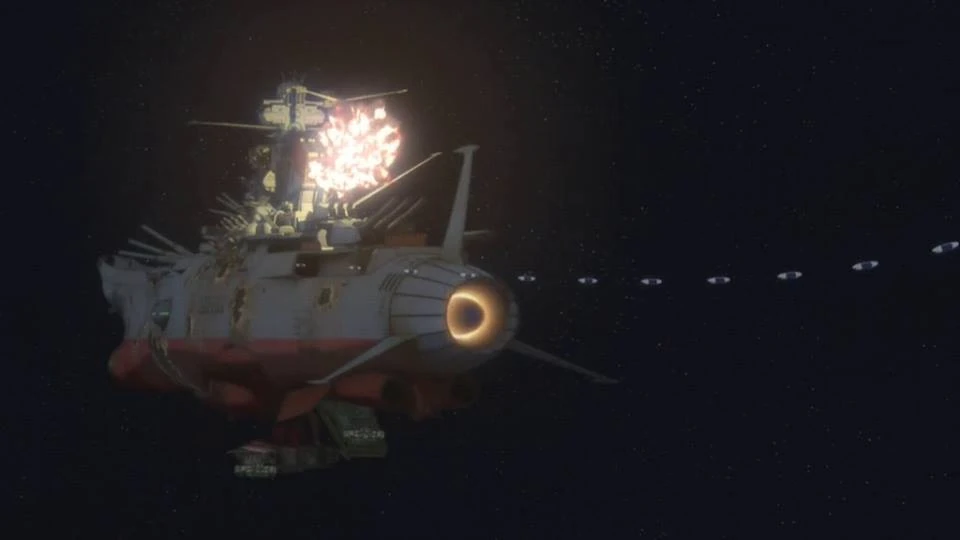
As the Yamato crew waits and surmises that the Garmillas task force is using a form of warp-based technology to deploy the dive bombers so rapidly, a single heavy bomber takes off from the carrier Darold and is teleported to a point directly ahead of the Earth ship. They are again caught unprepared when the heavy bomber fires its single payload, the massive asteroid drill missile. Yamamoto chases after the bomber and damages it, sending it hurtling out of control into a nearby ion storm, but the drill missile firmly lodges itself inside the muzzle of the battleship's wave motion gun. It begins to turn and force its way deeper into Yamato, penetrating the wave motion gun control room and sending crew members fleeing.
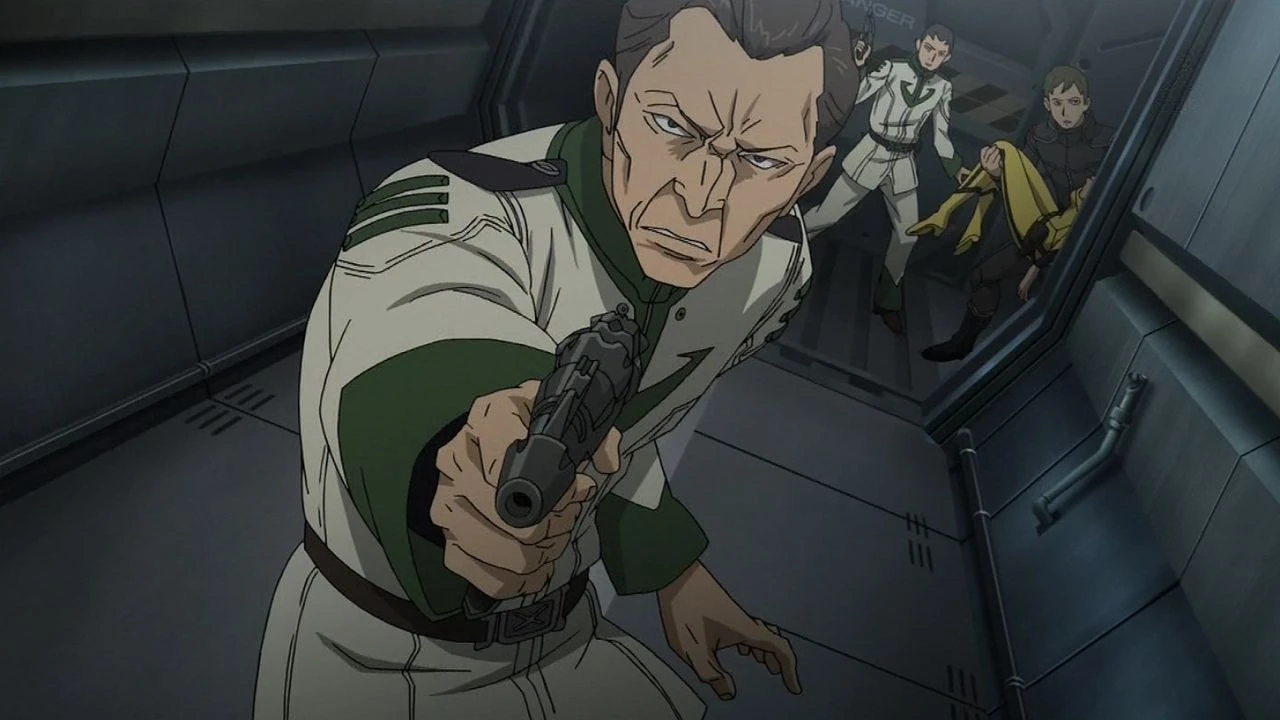
Having changed into human uniforms, three of the Zaltzi team make their way through the ship as they commence the search for Princess Yurisha, leaving Corporal Norren Oshetto to guard the airlock. They remain unnoticed until security officer Toru Hoshina encounters them while escorting another officer, Yuria Misaki--who is, ironically, under the psychic control of the very person they are hunting. Hoshina realizes that the three are strangers and requests that they identify themselves. One of the Zaltz draws a gun and shoots him. Misaki faints at the sight of her injured friend, but internal sensors detect the weapons fire and Okita dispatches Lieutenant Susumu Kodai and a security squad to stop the intruders. Before the squad can arrive, Lieutenant Yuki Mori comes upon the unconscious bodies of Misaki and Hoshina. The strike team mistakes Mori for Yurisha and drugs her before she can use her own weapon.
The Zaltzi strike team aboard Yamato
A heavy firefight erupts near the airlock and pins the team down, and two of the Zaltz are killed. After their commanding officer is wounded, he seals the airlock between him and Oshetto, who is carrying Mori, and then activates a grenade clutched to his body. The explosion rips through the entire section, activating an emergency bulkhead that blocks the security squad and allow Oshetto to escape with Mori. Kodai flies off in the ship's second Cosmo Zero to try to stop the suckerfish, but the UX-01 retrieves it safely and disappears beneath the dimensional line.
Working to make repairs on the third bridge, chief science officer Shiro Sanada hypothesizes that the unexploded drill missile is operating on a delayed timer, and recommends sending Lieutenant Kaoru Niimi and the robot Analyzer to disarm it. The two enter the decompressed control room, access the missile's computer controls from inside the drilling component, and stop its countdown with seconds left before detonation.
The Battle Turns
Despite Yamato's recall order, the Cosmo Falcon squadron remains locked in combat with Getto's fighter wing. As they eventually make their way back, Ensigns Takuya Kobashi and Sho Sawamura find one of the Garmillas carriers, the Bulgrey. Kobashi is killed in a reckless run on the carrier but his missiles hit their target and inflict significant damage. Sawamura follows with his own missile and gun salvo, and the lightly defended Bulgrey is obliterated. Getto comes close to taking out Sawamura, but squadron leader Saburo Kato intercepts and shoots him down.
Gamilias torpedoes hitting the Yamato.
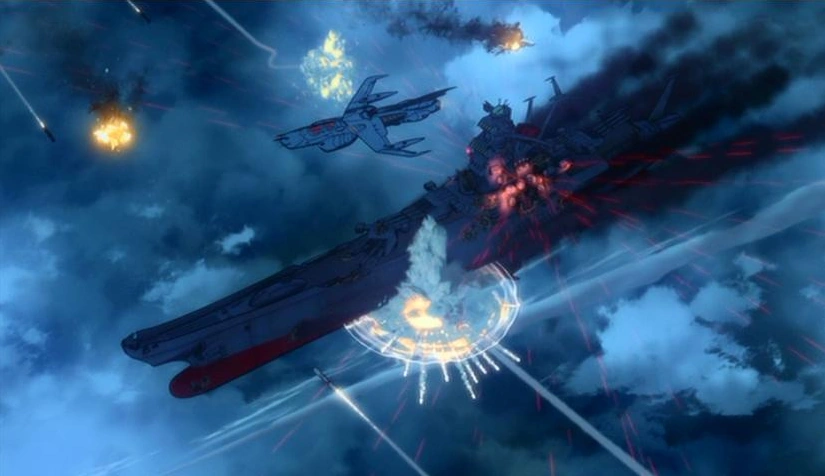
Aboard Domelaze III, General Domel waits for the drill missile to detonate, but to avoid any uncertainty, he grants Major Charis Kreize permission to lead his torpedo bombers in a full assault. The bombers are teleported to Yamato and deploy their torpedoes, tearing into the battleship but meeting heavy resistance from anti-aircraft fire, the returning Cosmo Falcons, and the two Cosmo Zeroes now patrolling the sky. Kreize's panicked plea for reinforcements is unanswered before he and all of his bomber wing are wiped out. Domel overcomes a growing sense of concern and takes the entire task force ahead to confront Yamato directly.
Okita formulates a plan as he awaits the inevitable appearance of the Garmillas main force. As Darold enters the edge of weapons range and begins firing, Niimi and Analyzer reprogram the drill missile to operate in reverse, extract itself from Yamato and fly on a direct course toward the enemy ships. Darold's captain yells out for evasive action, but a single shock cannon shot strikes the missile as it nears the carrier. The explosion consumes Darold and Shuderg with it as swerves to avoid the blast. Yamato takes advantage of the disarray among the Garmillas and opens fires, sending the wounded Lanbea plunging into a nearby ion storm, leaving only Domel's flagship. Domelaze III and Yamato exchange salvos until the super dreadnought suddenly loses control. The general realizes too late that he has been lured by Okita into an ion turbulence. Yamato continues to attack, firing away at its now helpless opponent.
The Fall of Domel

Domel's flagship self-destructs.
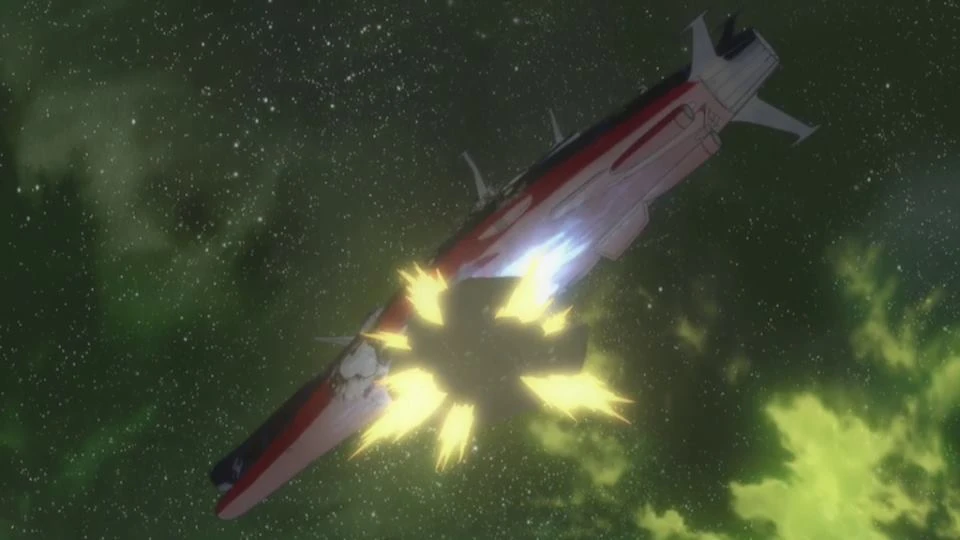
Stunned and blaming no one but himself, Domel acknowledges his defeat. He readies Domelaze III's self-destruct mechanism, and with Colonel Heidern and the loyal bridge crew staying at his side, detaches the ship's autonomous bridge section from the main hull before it blows. The bridge module catches up to Yamato and secures itself to the battleship's third bridge. Domel hails Yamato and offers his genuine congratulations to Admiral Okita and praise for his tactical brilliance. He turns down Okita's proposal to allow Yamato to peacefully pass. Communications are cut, and Domel activates the self-destruct, unaware that Sanada and a maintenance team had repaired the ship's wave motion shield a moment earlier. The explosion vaporizes Domelaze III, but inflicts only minor damage on its target ("Under a Rainbow Sun").
Aftermath

The memorial service for those killed in battle.
As the badly damaged Yamato departs the Rainbow Star Cluster, Kodai is greeted by a stranger with a familiar face: Princess Yurisha Iscandar, awakened from a coma by Misaki's trauma and walking the halls of the ship for the very first time. Until she introduces herself, he almost believes that she is Mori ("Under a Rainbow Sun").
The crew holds a service for those whose lives were lost in the battle, launching into space the bodies of those who could be recovered, including two members of the Zaltzi boarding party. During the ceremony, two detained mutineers who were able to escape the ship's brig following the torpedo assault find food and weapons, and look for an opportunity to leave Yamato. Their chance arrives when Kodai and Yurisha take off on a scouting mission for resources that can be used to repair the ship. Unknown to Kodai and Yurisha, the planet they investigate is a Garmillas prison world. The mutineers set in motion a chain of events that brings Yamato into contact with the still imprisoned Elisa Domel and other members of the Garmillas Rebellion ("Prison Planet 17").
Under the command of Major Berger, Lanbea survives the battle, locates and retrieves the downed heavy bomber and its crew, and limps away from the cluster into open space. More than two months later, Lanbea is rescued by a task force led by another carrier, Mirangal (Space Battleship Yamato 2199: Odyssey of the Celestial Ark).
When Lt. Mori returns to consciousness, she finds herself in a holding cell aboard the UX-01, bound for the Garmillas prison planet and ultimately Garmillas itself. Believing that he now has control over the third princess of Iscandar, Leader Dessler uses her in a ploy to convince his own subjects and the ruler of Iscandar, Queen Starsha Iscandar, that the leadership of Iscandar has given final approval to a plan to merge their empires ("Prison Planet 17", "The Planet That We Head For").